Connect your LMS with LTI
Give your LMS the CoVince tool details, register the LMS, choose how people sign in, map your products to journeys and hand the details over. Grades can go back to the LMS, and CoVince can open outside tools too.
Set it up - your learning system - 8 min. You need: to be an admin, and a person who looks after your LMS
Nothing changes for learners until your LMS team adds the link on their side. The test in step 8 is only explained here.
What you will be able to do
- Connect your LMS Moodle, Canvas and others.
- Open the right journey One product, one journey.
- Hand it to the LMS team One file with everything.
- Get grades back Scores go to the gradebook.
Get these ready first
- Be an admin Only admins of the organisation see this page.
- Know who runs the LMS You need them twice: to add CoVince, and to give you their details.
Do it together, one step at a time
Ten steps. You and the LMS admin each do half.
What LTI does
A learner clicks a link in the LMS. CoVince opens, in the right journey.
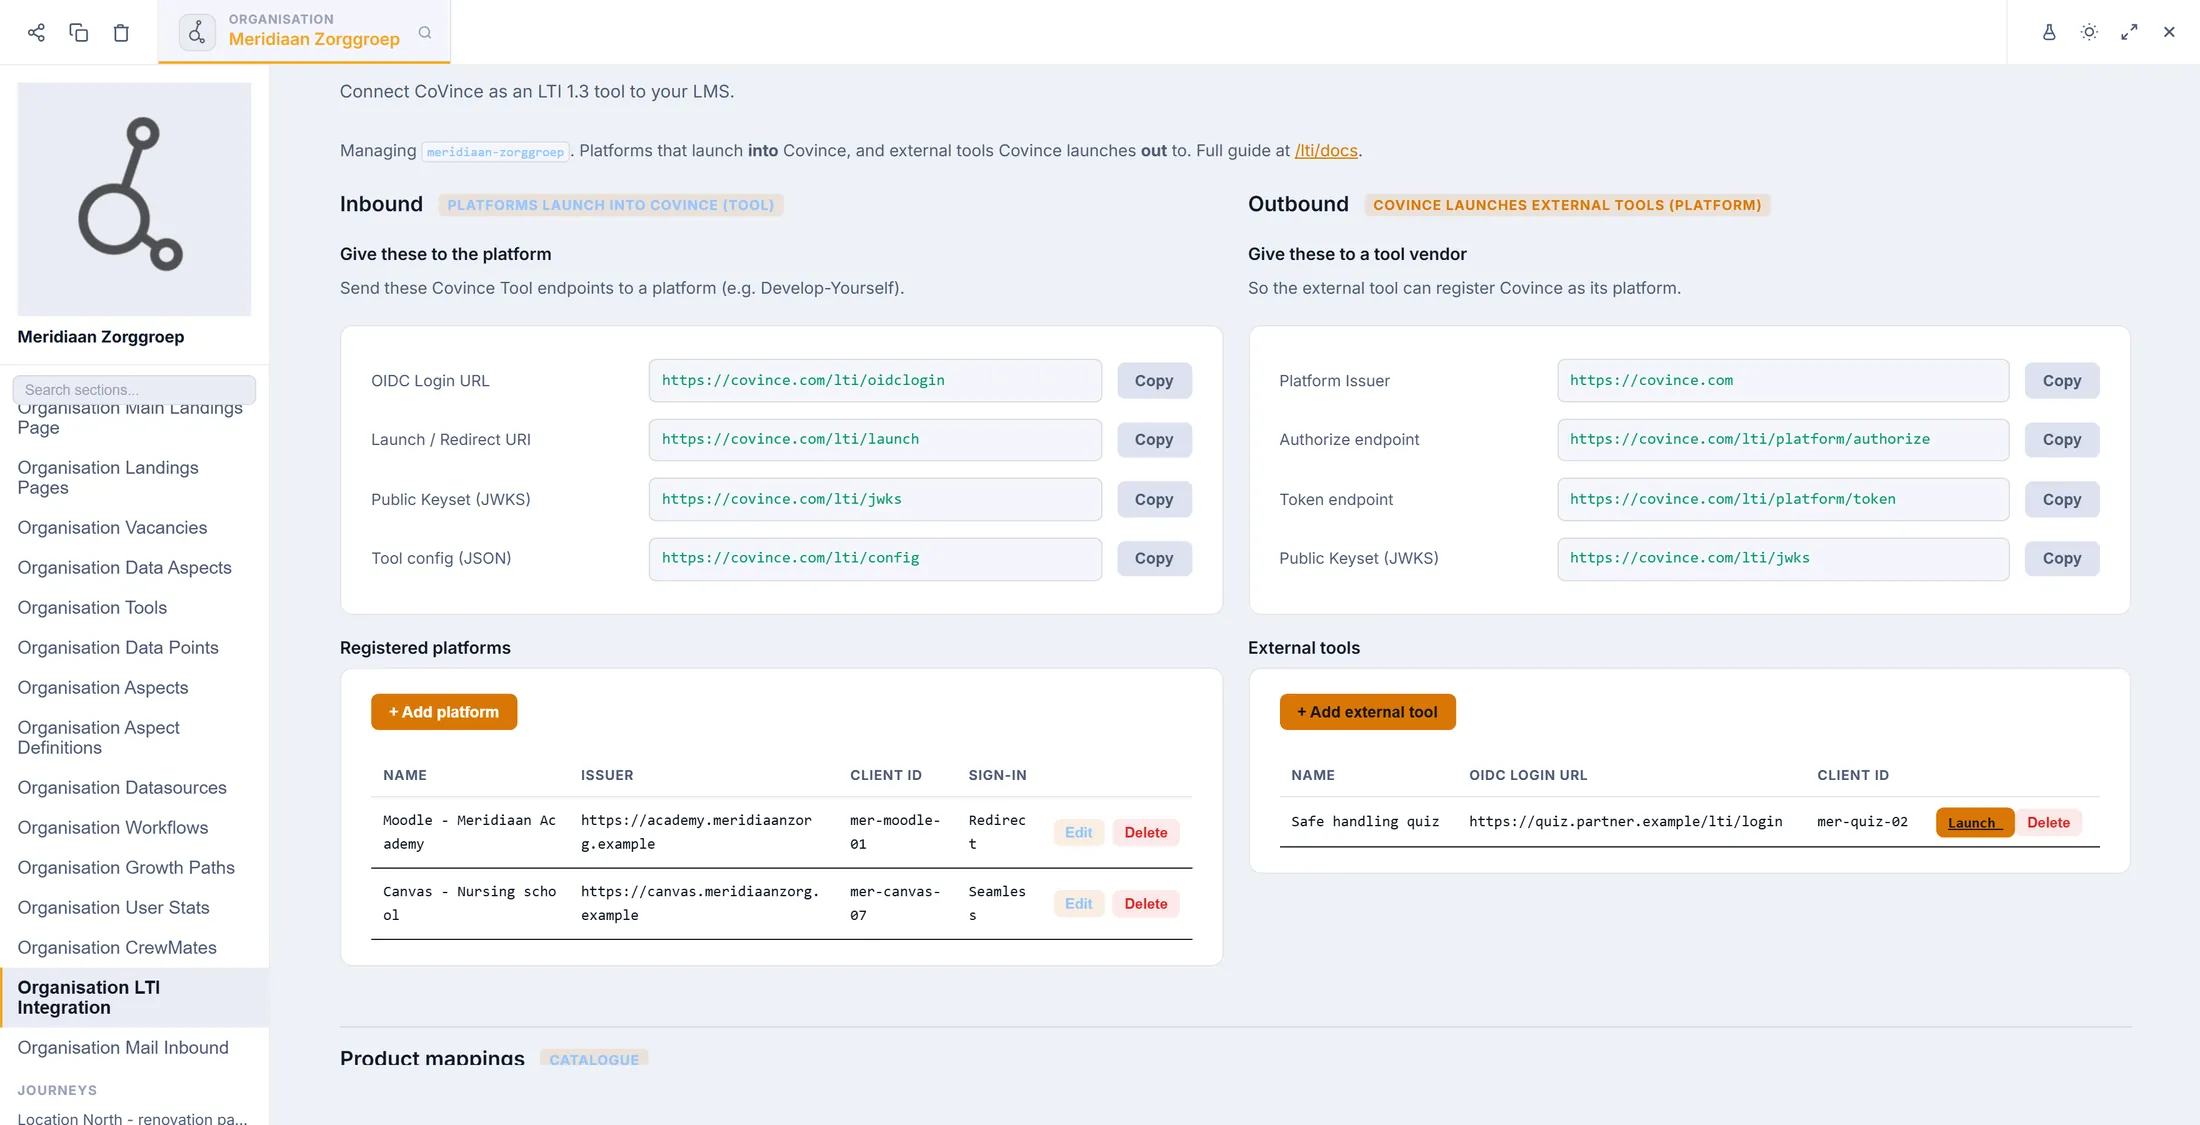
- Open the Editor and choose your organisation.
- In the list on the left, click Organisation LTI Integration .
- The page has two sides. Inbound : your LMS opens CoVince. Outbound : CoVince opens an outside tool.
- Below them you find Product mappings , Handout for the platform and Self-test the full loop .
Inbound is the one you need first. Give the LMS your details
The LMS needs four web addresses from CoVince.
- Under Give these to the platform you see four rows, each with a Copy button.
- OIDC Login URL is where the LMS starts a launch.
- Launch / Redirect URI is where the learner lands.
- Public Keyset (JWKS) lets the LMS check that messages come from CoVince.
- Tool config (JSON) holds all of this in one file. Some LMSs can read it from its web address.
- Press Copy next to a row and paste it in a message to your LMS admin.
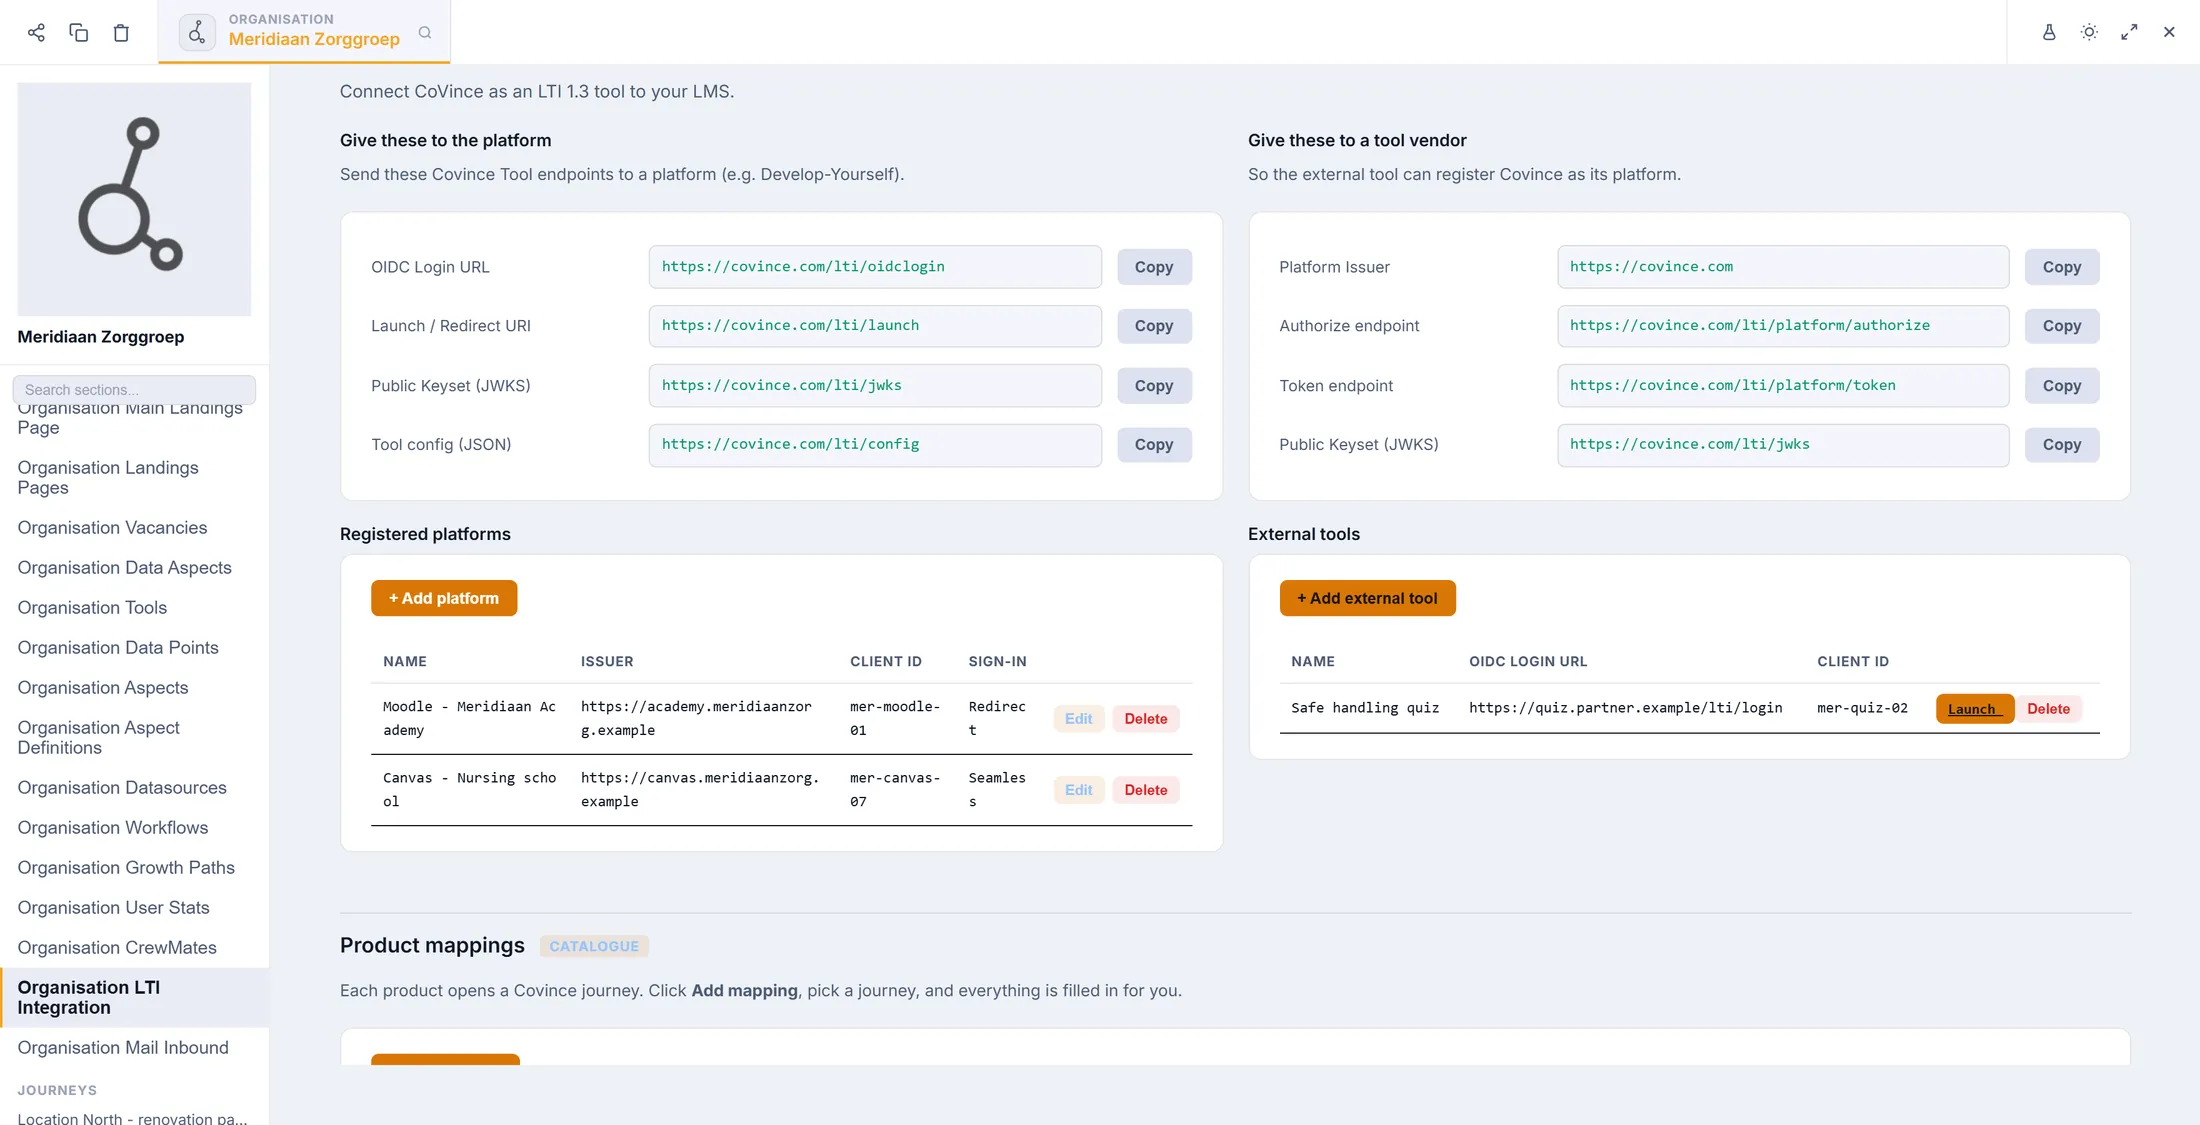
Four addresses, four Copy buttons. Register your LMS
CoVince only opens for an LMS it knows. Tell it which one.
- Press + Add platform. The window Register a platform opens.
- Give it a Name you will recognise, for example Moodle - Meridiaan Academy .
- Fill in what the LMS admin sent: Client ID , Platform Issuer , Deployment ID , Token URL , Authorize URL and JWKS URL . The fields with a red star are required.
- Using Develop-Yourself? Press Fill Develop-Yourself defaults first: the addresses are filled in for you.
- Press Save registration. The LMS appears in the list Registered platforms .
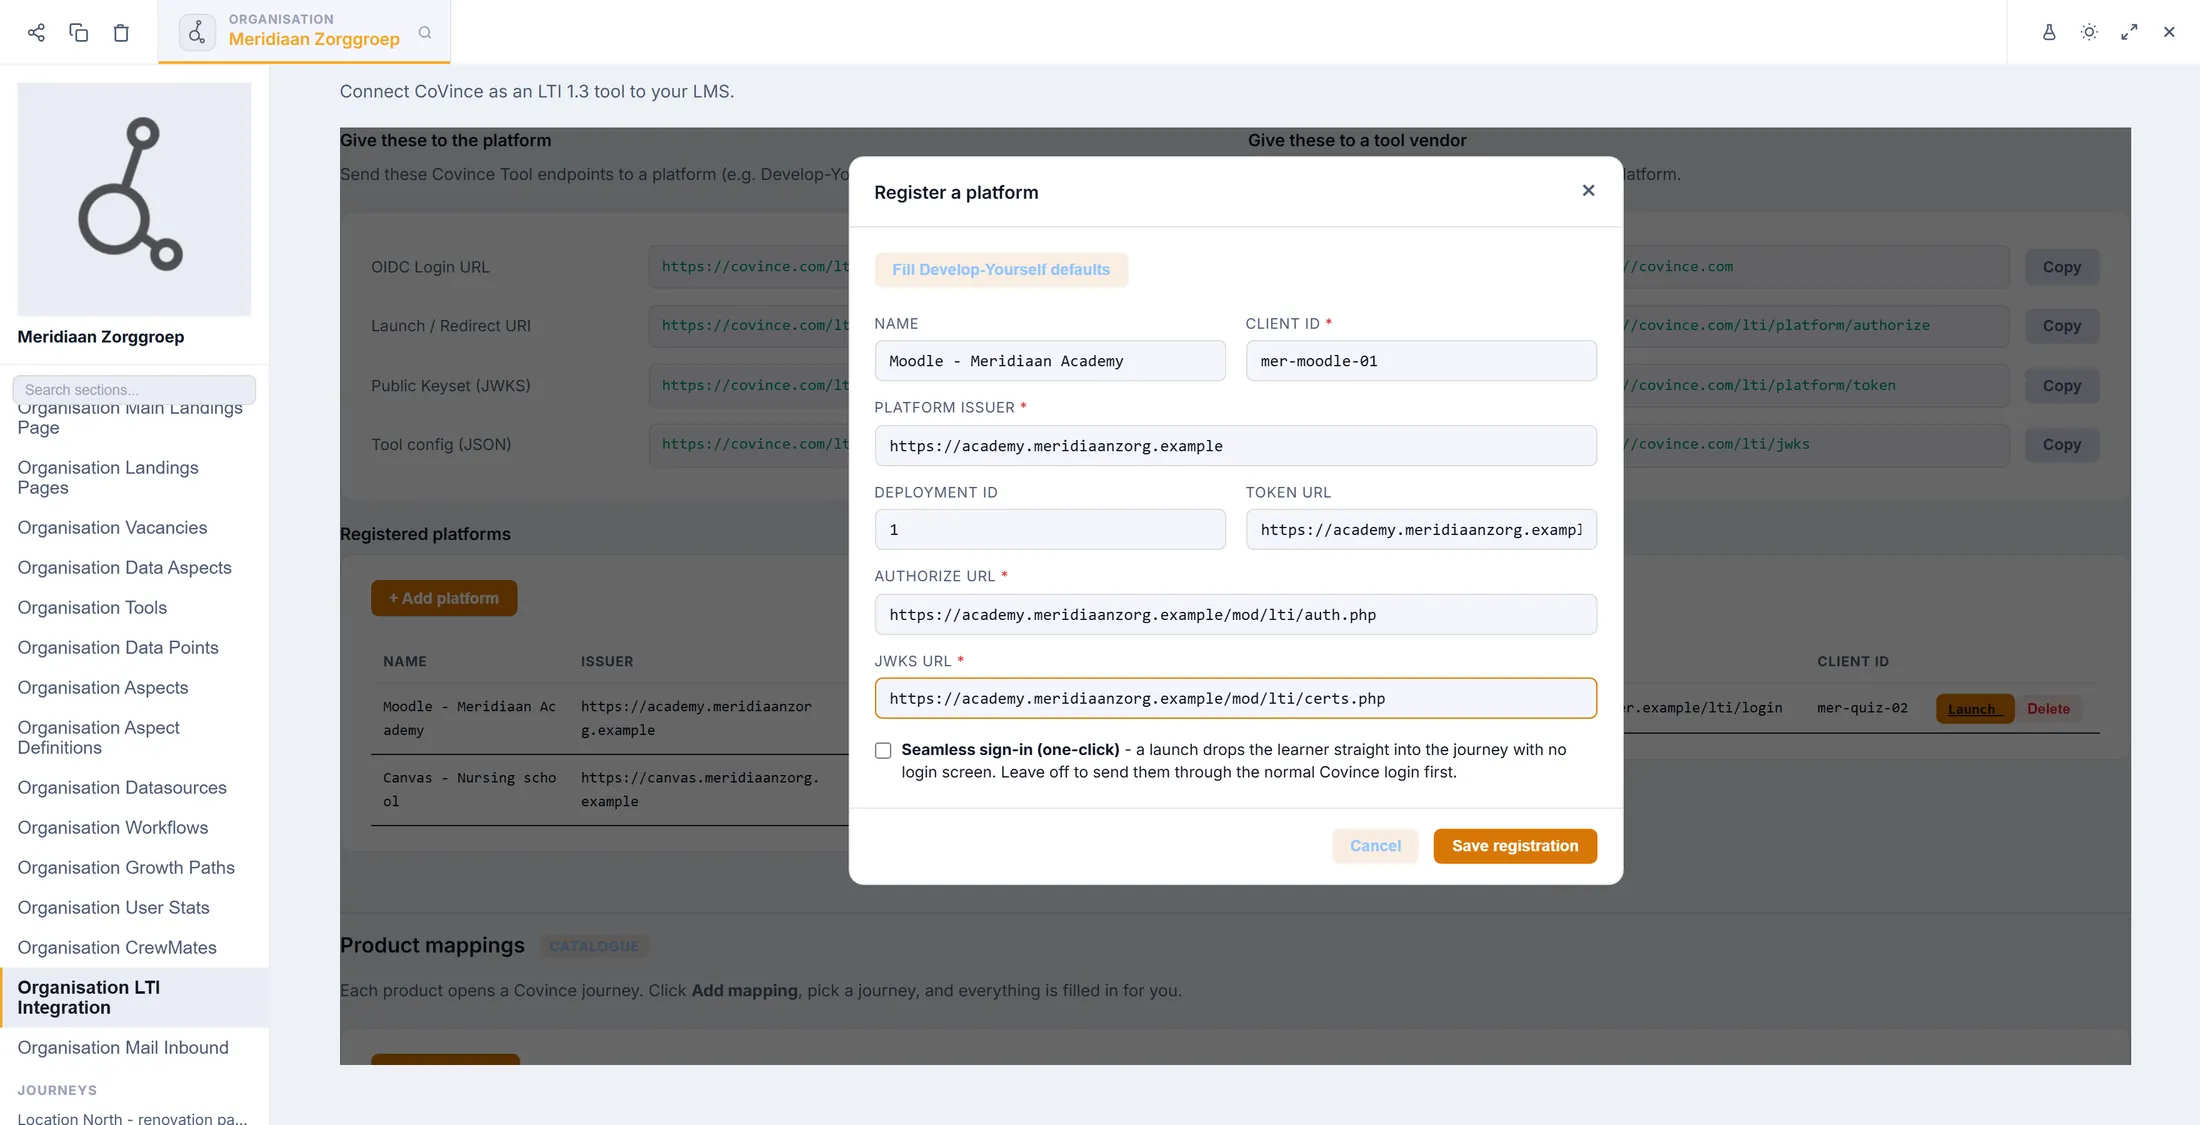
Copy the values exactly as the LMS admin sent them. Choose how people sign in
Decide if learners get a login screen or go straight in.
- Leave Seamless sign-in (one-click) unticked to send learners through the normal CoVince login first. The list shows Redirect .
- Tick it and a launch drops the learner straight into the journey, with no login screen. The list shows Seamless .
- Press Save registration.
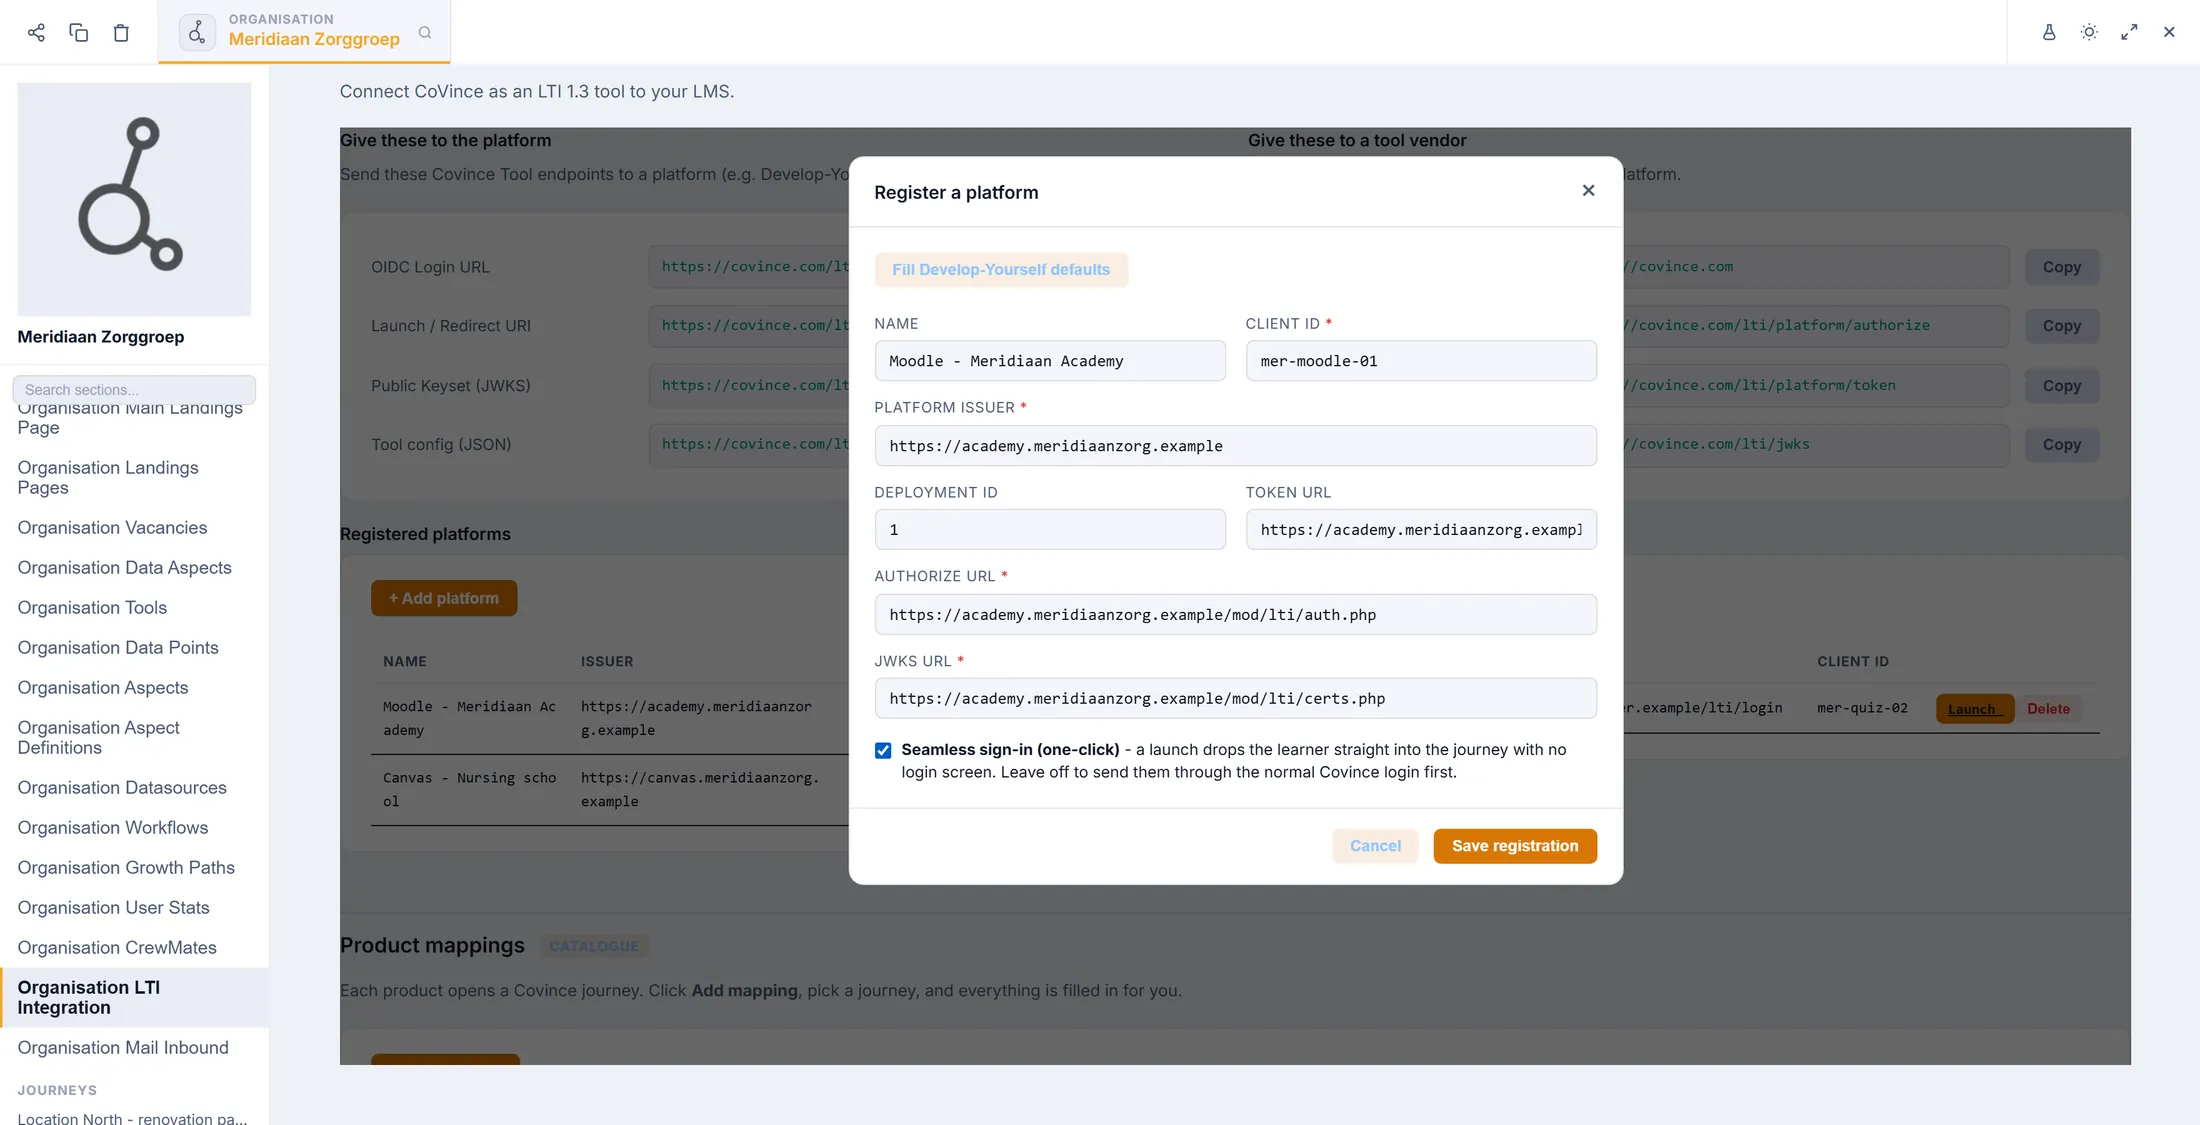
One tick box decides. Choose a journey for a product
A product in the LMS should open one CoVince journey. Pick that journey.
- Scroll to Product mappings and press + Add mapping.
- The window New product mapping shows Step 1 - choose a journey .
- Type in Search journeys... to find it. The list shows the journeys of your organisation.
- Click the journey.
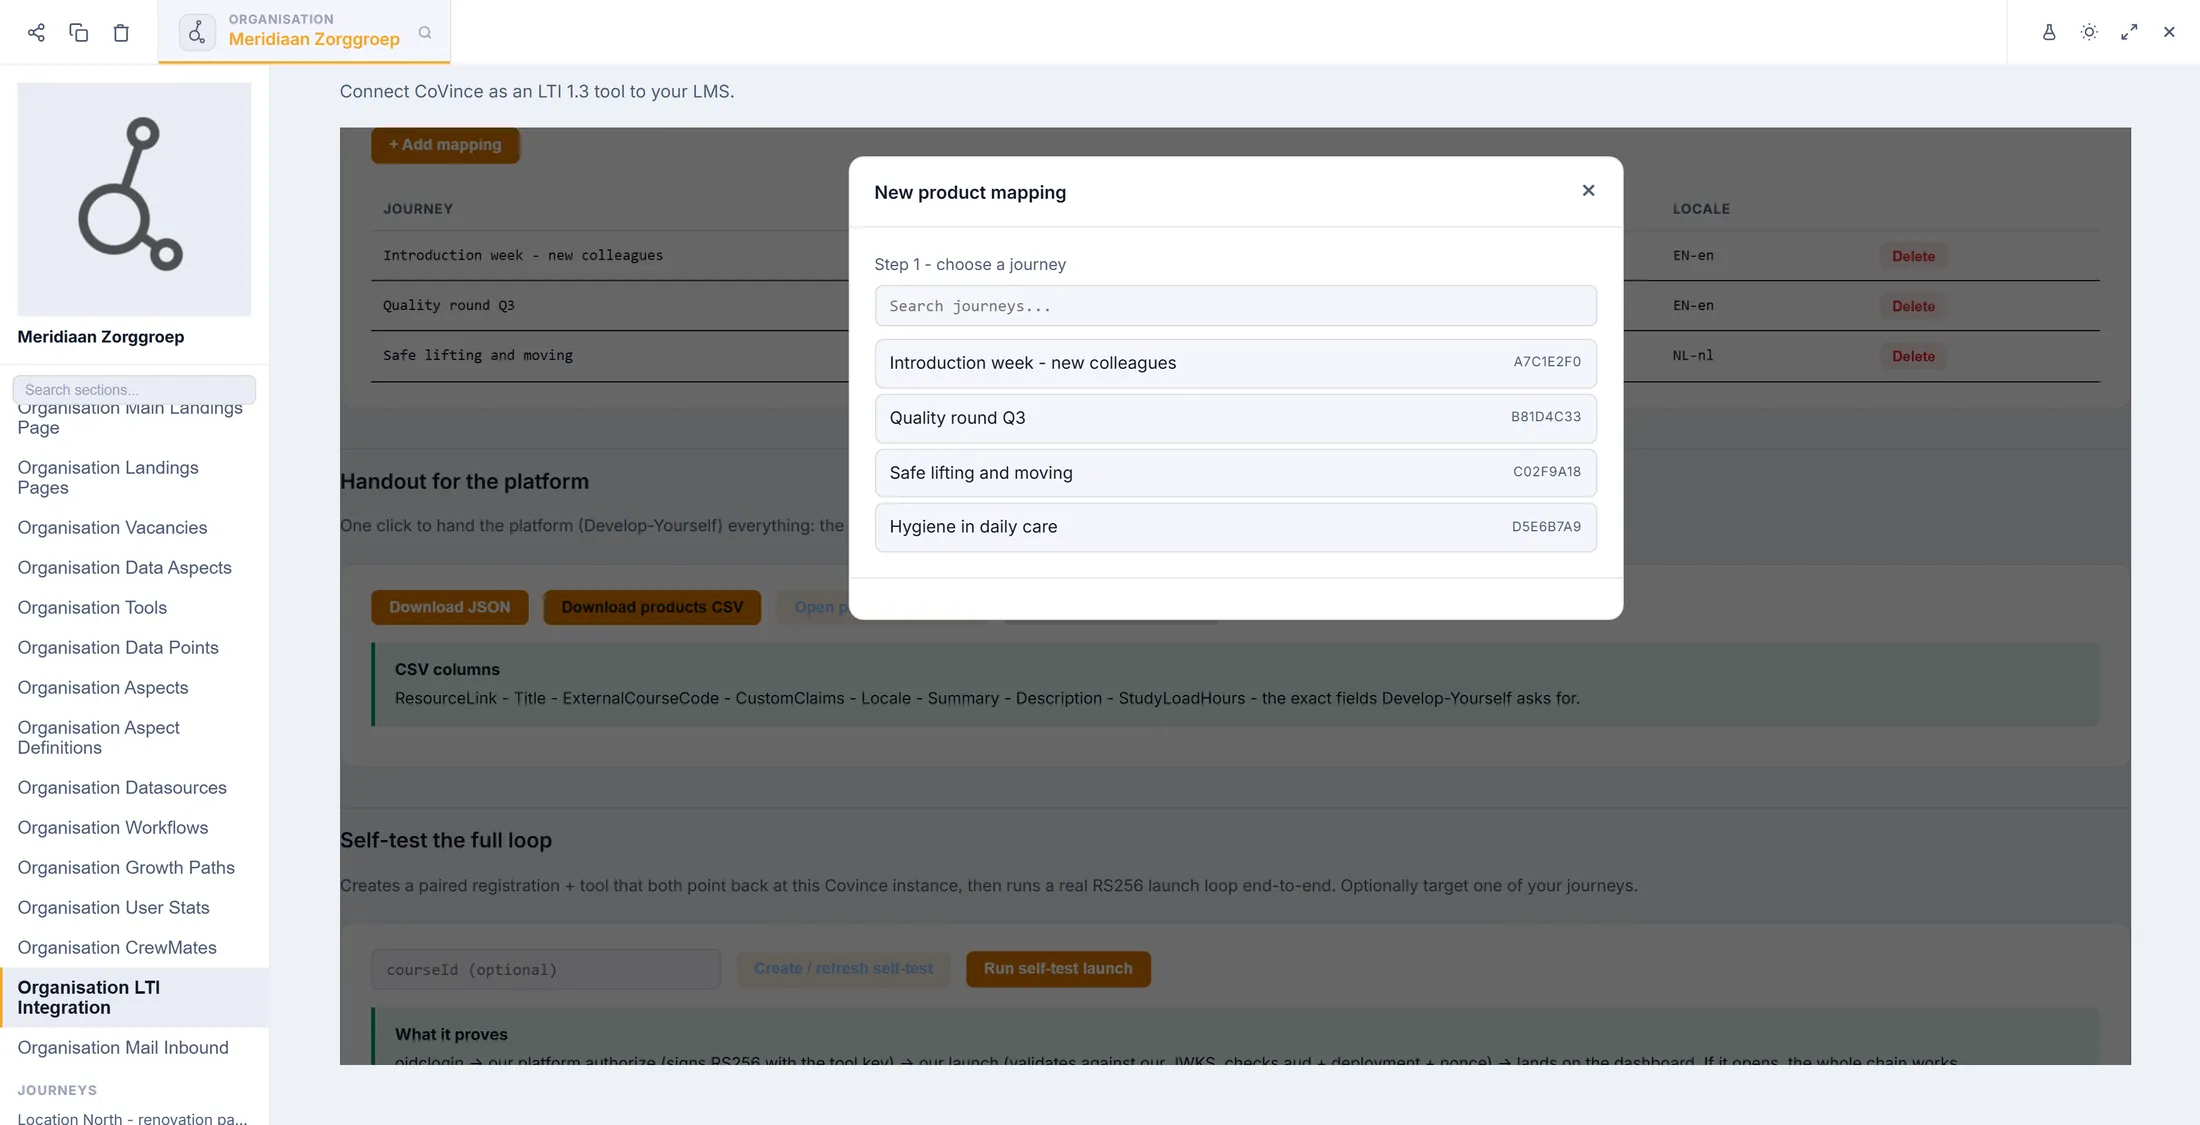
Click the journey you want. Check what is filled in
Everything is filled in for you. Check it and save.
- ExternalCourseCode is the product code. The journey ID is filled in; use the code your LMS uses if it has its own.
- Resource link (deeplink) is the link that opens this journey. Give it to the LMS team.
- Add Title , Locale , Summary , Description and Study load (hours) if the LMS catalogue shows them.
- Custom claims carry course_id : the part that opens the journey. Leave it.
- Press Save mapping. The row appears under Product mappings . Back returns to the list of journeys.
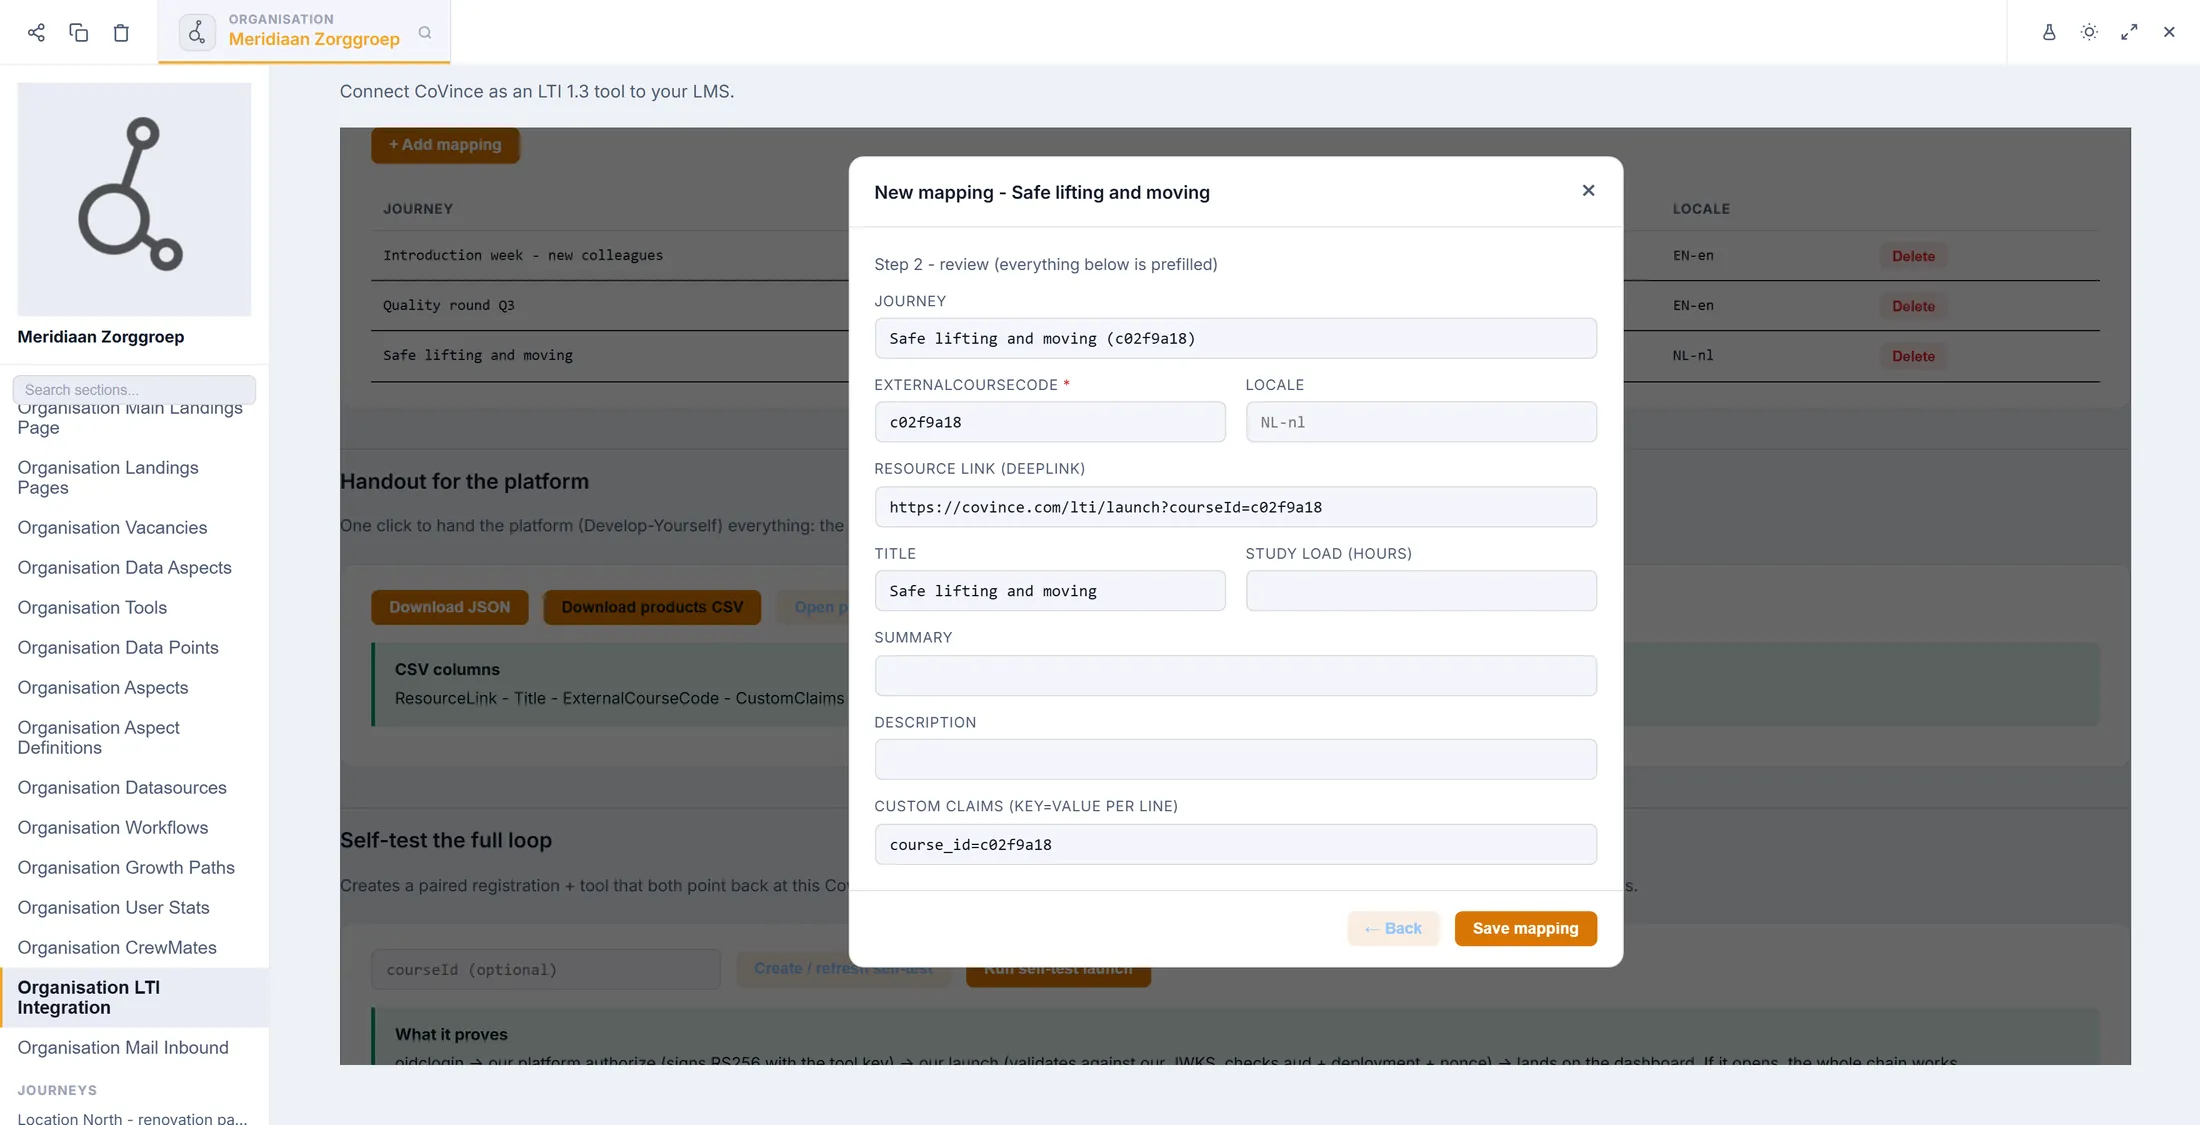
Nothing to type, only to check. Hand the details to the LMS team
One click gives the LMS team everything they need.
- Scroll to Handout for the platform .
- Download JSON saves the addresses and all products in one file.
- Download products CSV saves the products as a table. The columns are ResourceLink, Title, ExternalCourseCode, CustomClaims, Locale, Summary, Description and StudyLoadHours.
- Open printable handout opens a page you can print or save as a PDF.
- Copy connection details copies only the addresses, to paste in a message.
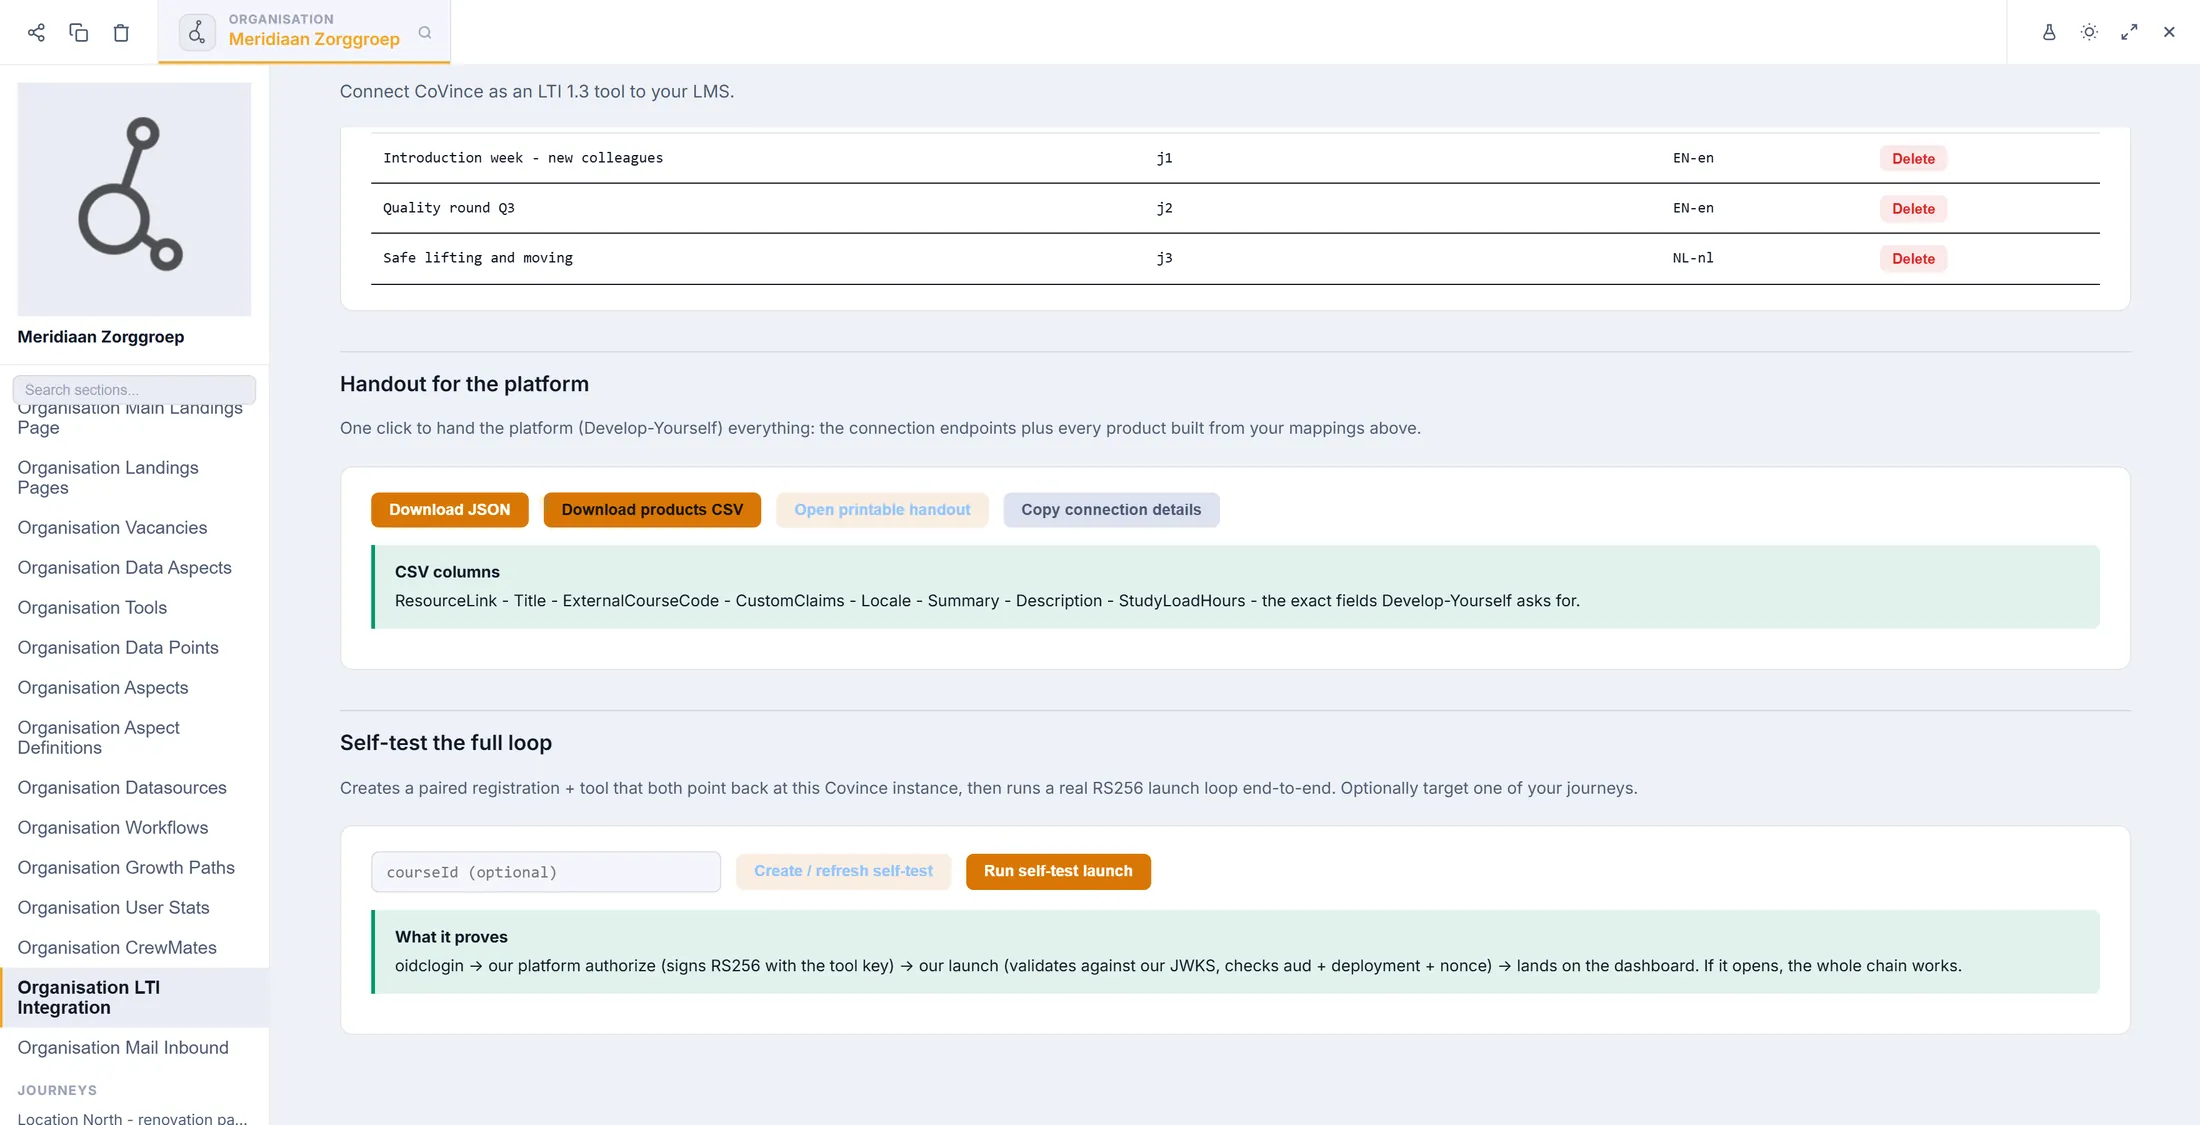
Four buttons, four ways to send it. Test it without an LMS
CoVince can test the whole route against itself.
- This is for when you want to try before the LMS team is ready. Nothing in this explainer asks you to press these buttons now.
- Type a journey ID in courseId (optional) to make the test open that journey.
- Create / refresh self-test sets up the pretend LMS and the matching tool. They show up in your lists.
- Run self-test launch opens a new window and runs the launch. You should arrive on your dashboard.
Two buttons, in this order. Get grades back in the LMS
A score in CoVince can appear in the LMS gradebook.
- Ask the LMS admin to check that your LMS supports grade passback (AGS). Canvas, Moodle 3.9 and newer, Brightspace and Blackboard Learn Ultra do.
- The link in the LMS must be made as an assignment , not only as a navigation link.
- The LMS must allow the lineitem scope for CoVince.
- In step 3, fill in the Token URL of the LMS. Without it no grades can be sent.
- CoVince then sends the score, the maximum score, the progress and the time, when the learner finishes the graded work.
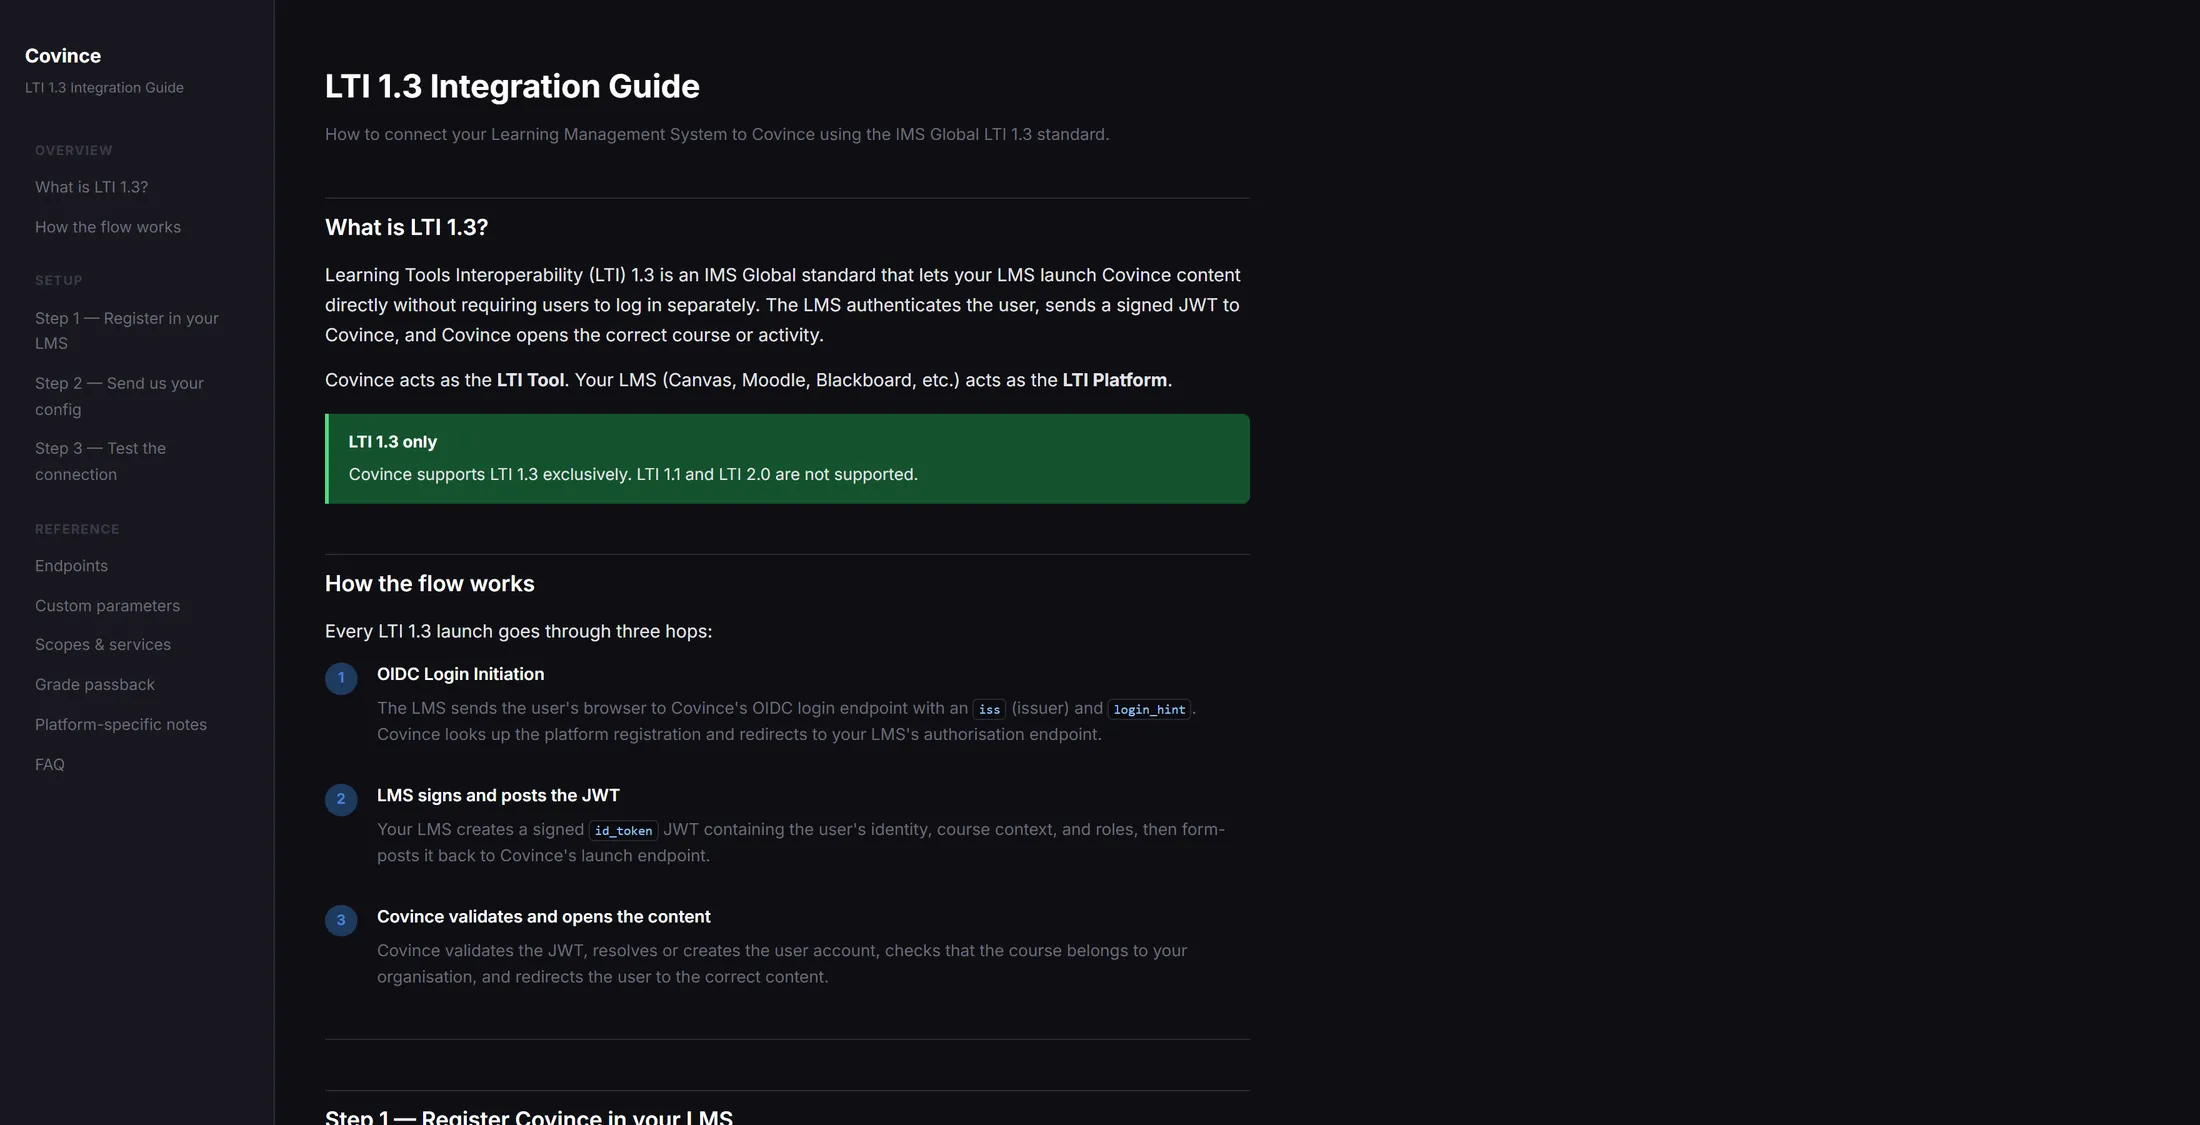
The guide has the details for your LMS team. The other way: open an outside tool
CoVince can also open another tool, and be its LMS.
- Give the tool vendor the four addresses under Give these to a tool vendor : Platform Issuer , Authorize endpoint , Token endpoint and Public Keyset (JWKS) .
- The vendor sends you a Client ID and two web addresses.
- Press + Add external tool. The window Add an external tool opens.
- Fill in Name , Client ID , Tool OIDC Login URL and Tool Launch / Target Link URI . Deployment ID and Issuer override are optional.
- Press Save external tool. A Launch button appears in the list to open the tool.
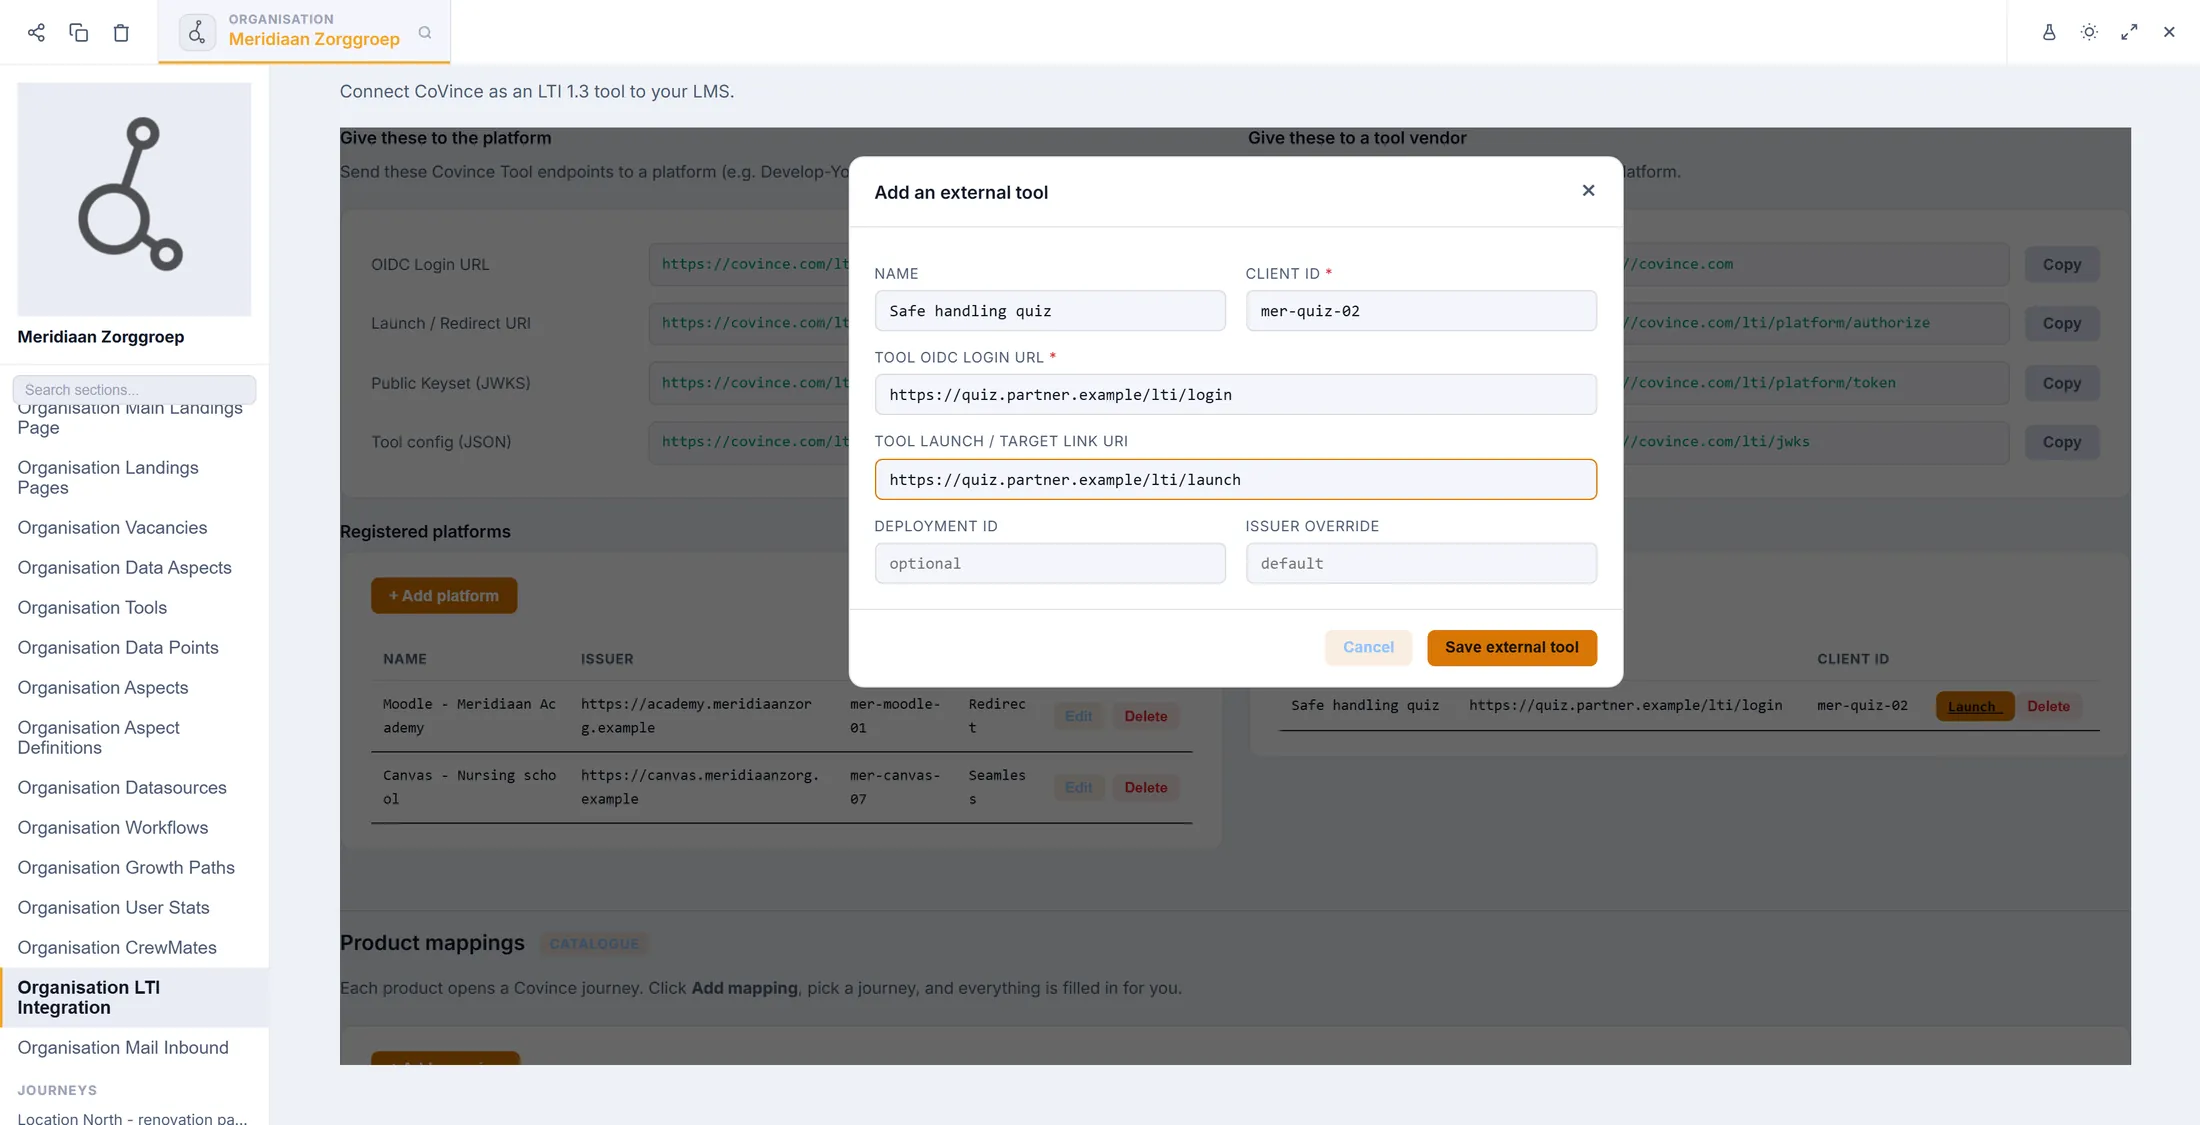
The same idea, the other way round.
If something is not right
The launch says "Platform not registered".
The Platform Issuer or the Client ID is different from what the LMS sends. Open the row with Edit and paste them again.
The learner sees a login screen.
That is the normal login. Tick "Seamless sign-in (one-click)" to skip it.
The launch says "Access denied: course not available".
The journey must belong to your organisation, and the product must be mapped to it.
Grades do not appear in the LMS.
Make the link an assignment, and fill in the Token URL.
The words, in plain language
- LTI
- A standard way for a learning system to open another tool, with the learner already identified. CoVince uses version 1.3.
- LMS
- Learning management system: the place where people take courses, such as Moodle, Canvas or Brightspace.
- platform
- The system that opens things. In Inbound this is your LMS. In Outbound it is CoVince.
- tool
- The system that gets opened. In Inbound this is CoVince. In Outbound it is the outside tool.
- deep link
- A link that goes straight to one journey instead of the start page.
- client ID
- A code the LMS gives to CoVince so it can recognise CoVince. Copy it exactly.
Where to go next
- Add people Invite the people who will learn in your organisation.
- All explainers The other things you can learn here.