Run a training: from the agenda to the sign-up
Make a training as an event, price it in the shop, build the detail page once, link it, and let visitors register, pay or join the waitlist. Every step in the order you do it.
OASIS Academy - run your trainings - 30 min. You need: a login as an admin of your organisation
Nothing is sent to anybody until you press a button that says so. Use a price of 0 and your own addresses to try it.
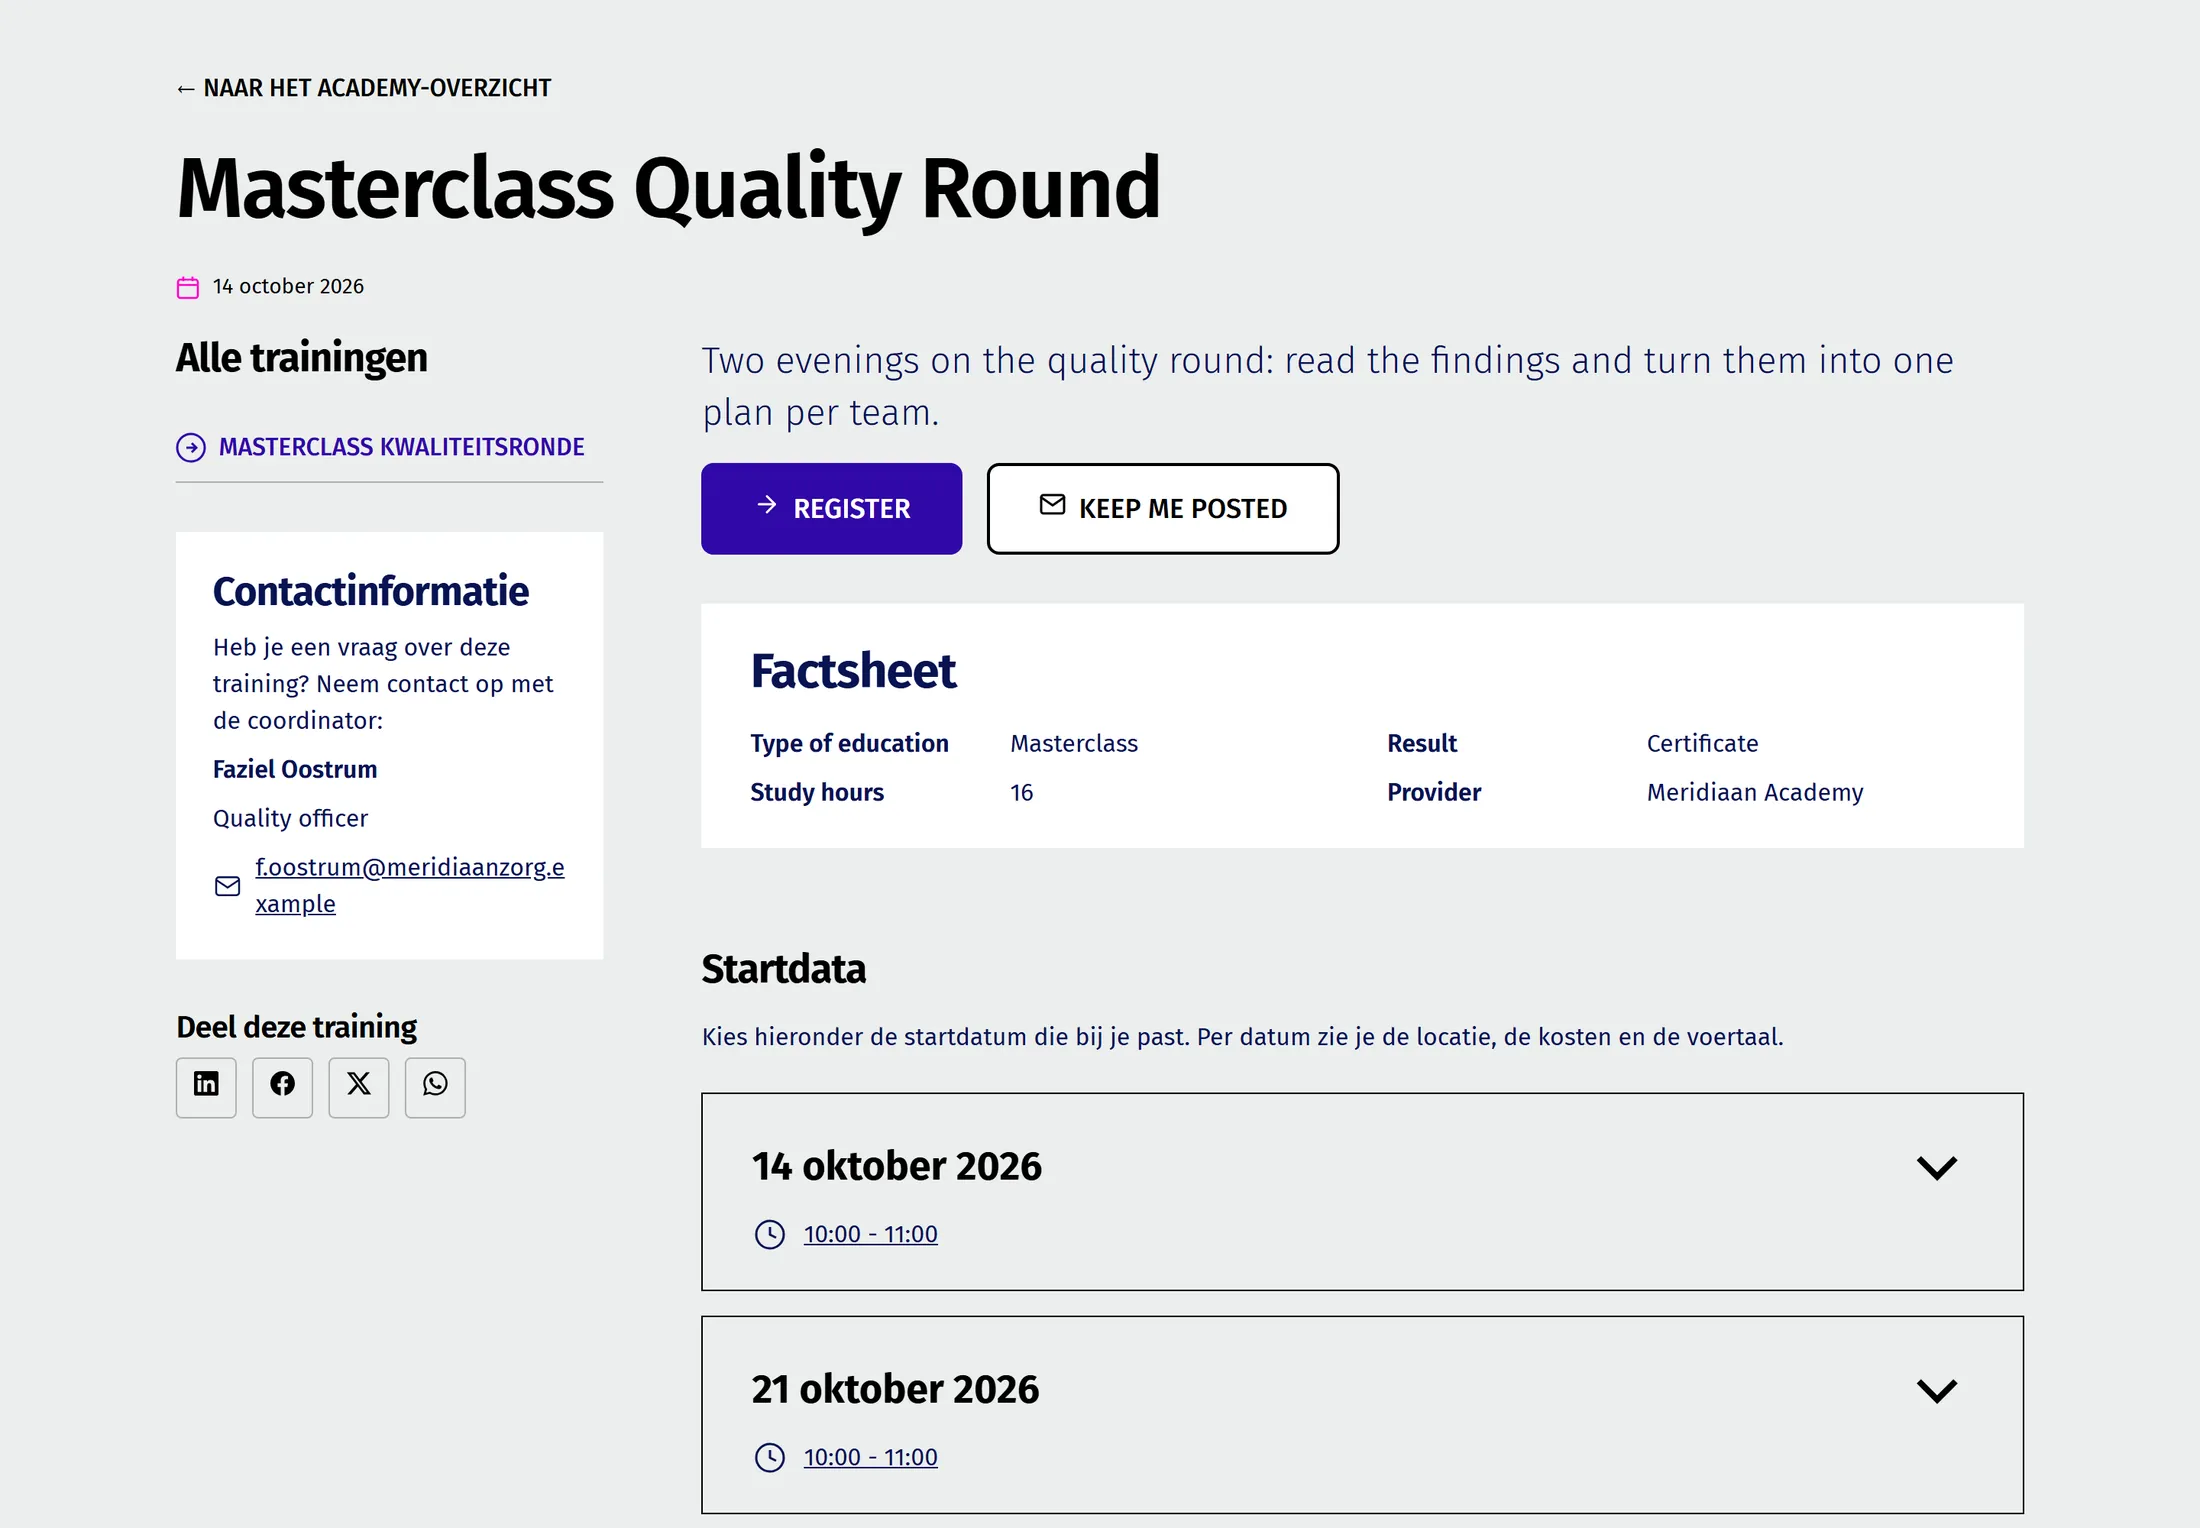
What you will be able to do
- Make a training From the agenda, with its facts and a series of dates.
- Give it a price Price, invoice orders, a tier discount and discount codes.
- Build the page once One template that every training uses.
- Let people register With a waitlist when it is full.
Get these ready first
- Be logged in as admin You make pages and prices in the Editor, so you need admin rights.
- A journey The training and its dates live in a journey.
- A second window A private window shows what a visitor sees.
Do it together, one step at a time
Parts 0 to 7. Do one step, tick it off, go on.
0 - Get ready
Log in, check one heading, and open a second window.
- Log in to CoVince. You land on the first screen with your organisation.
- Later, when you open an event as a Training (step 1.2), look in the Training section for the heading Waitlist and registrations .
- The heading is there: registration is on and you can do every part. It is not there: parts 1 to 5 still work, and parts 6 and 7 appear once registration is switched on for you.
- Keep a second browser ready in a private (incognito) window. That is how a visitor sees your page.
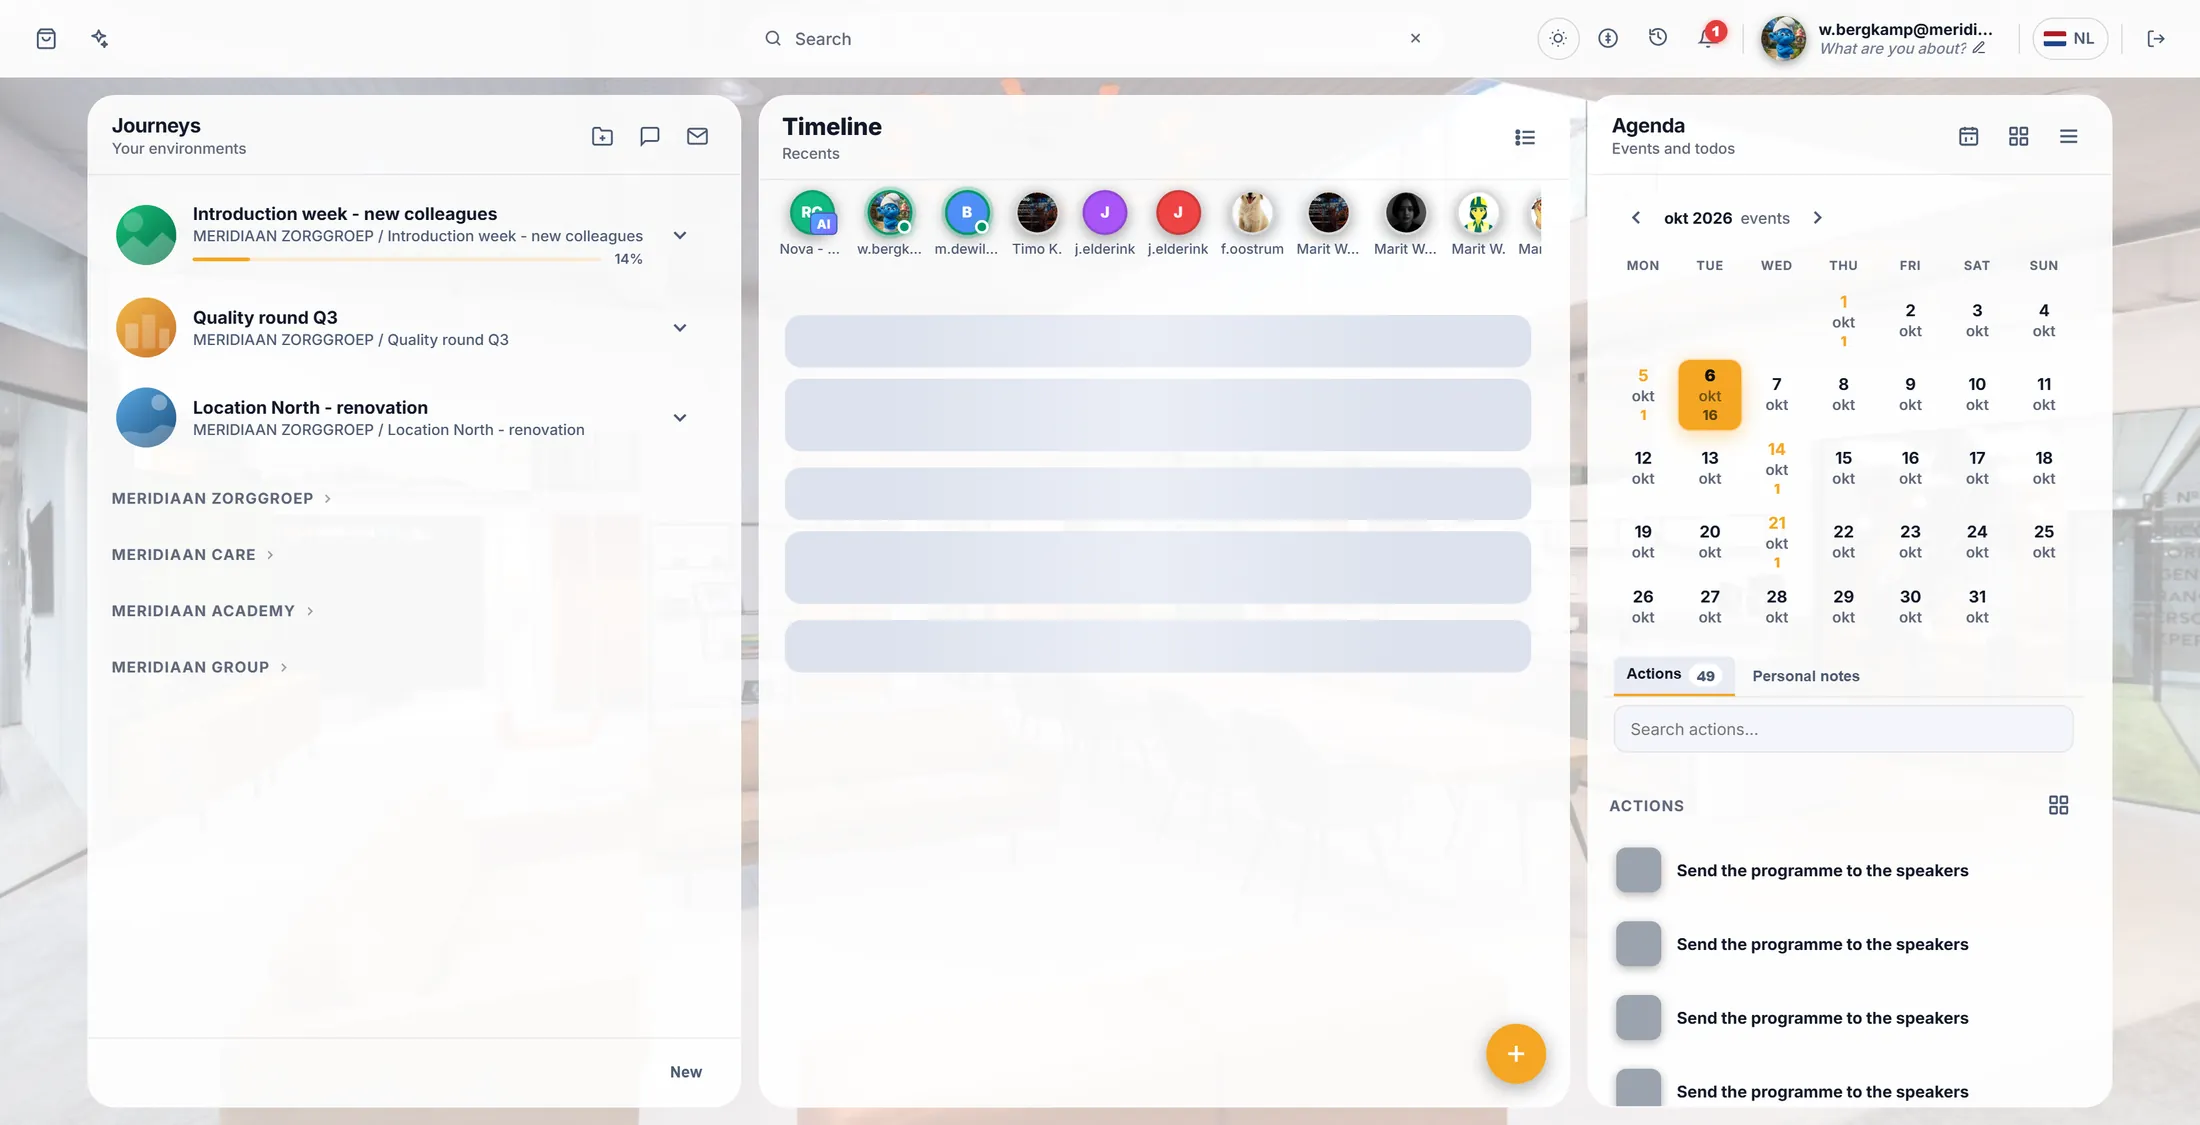
You start on the first screen. 1.1 - Start a new training in the agenda
Click a day and start the event wizard.
- On the first screen, click a day in the agenda, about three weeks ahead.
- Press Create event (Schedule an event for this day). The wizard opens.
- No journey selected yet? The wizard first asks Select a journey. Pick your journey.
- Fill in the name, then the description (required) and the picture (required, press Pick image).
- At Type, choose the card Training (Training or educational event).
- The Next button only lights up once the required steps are filled in.
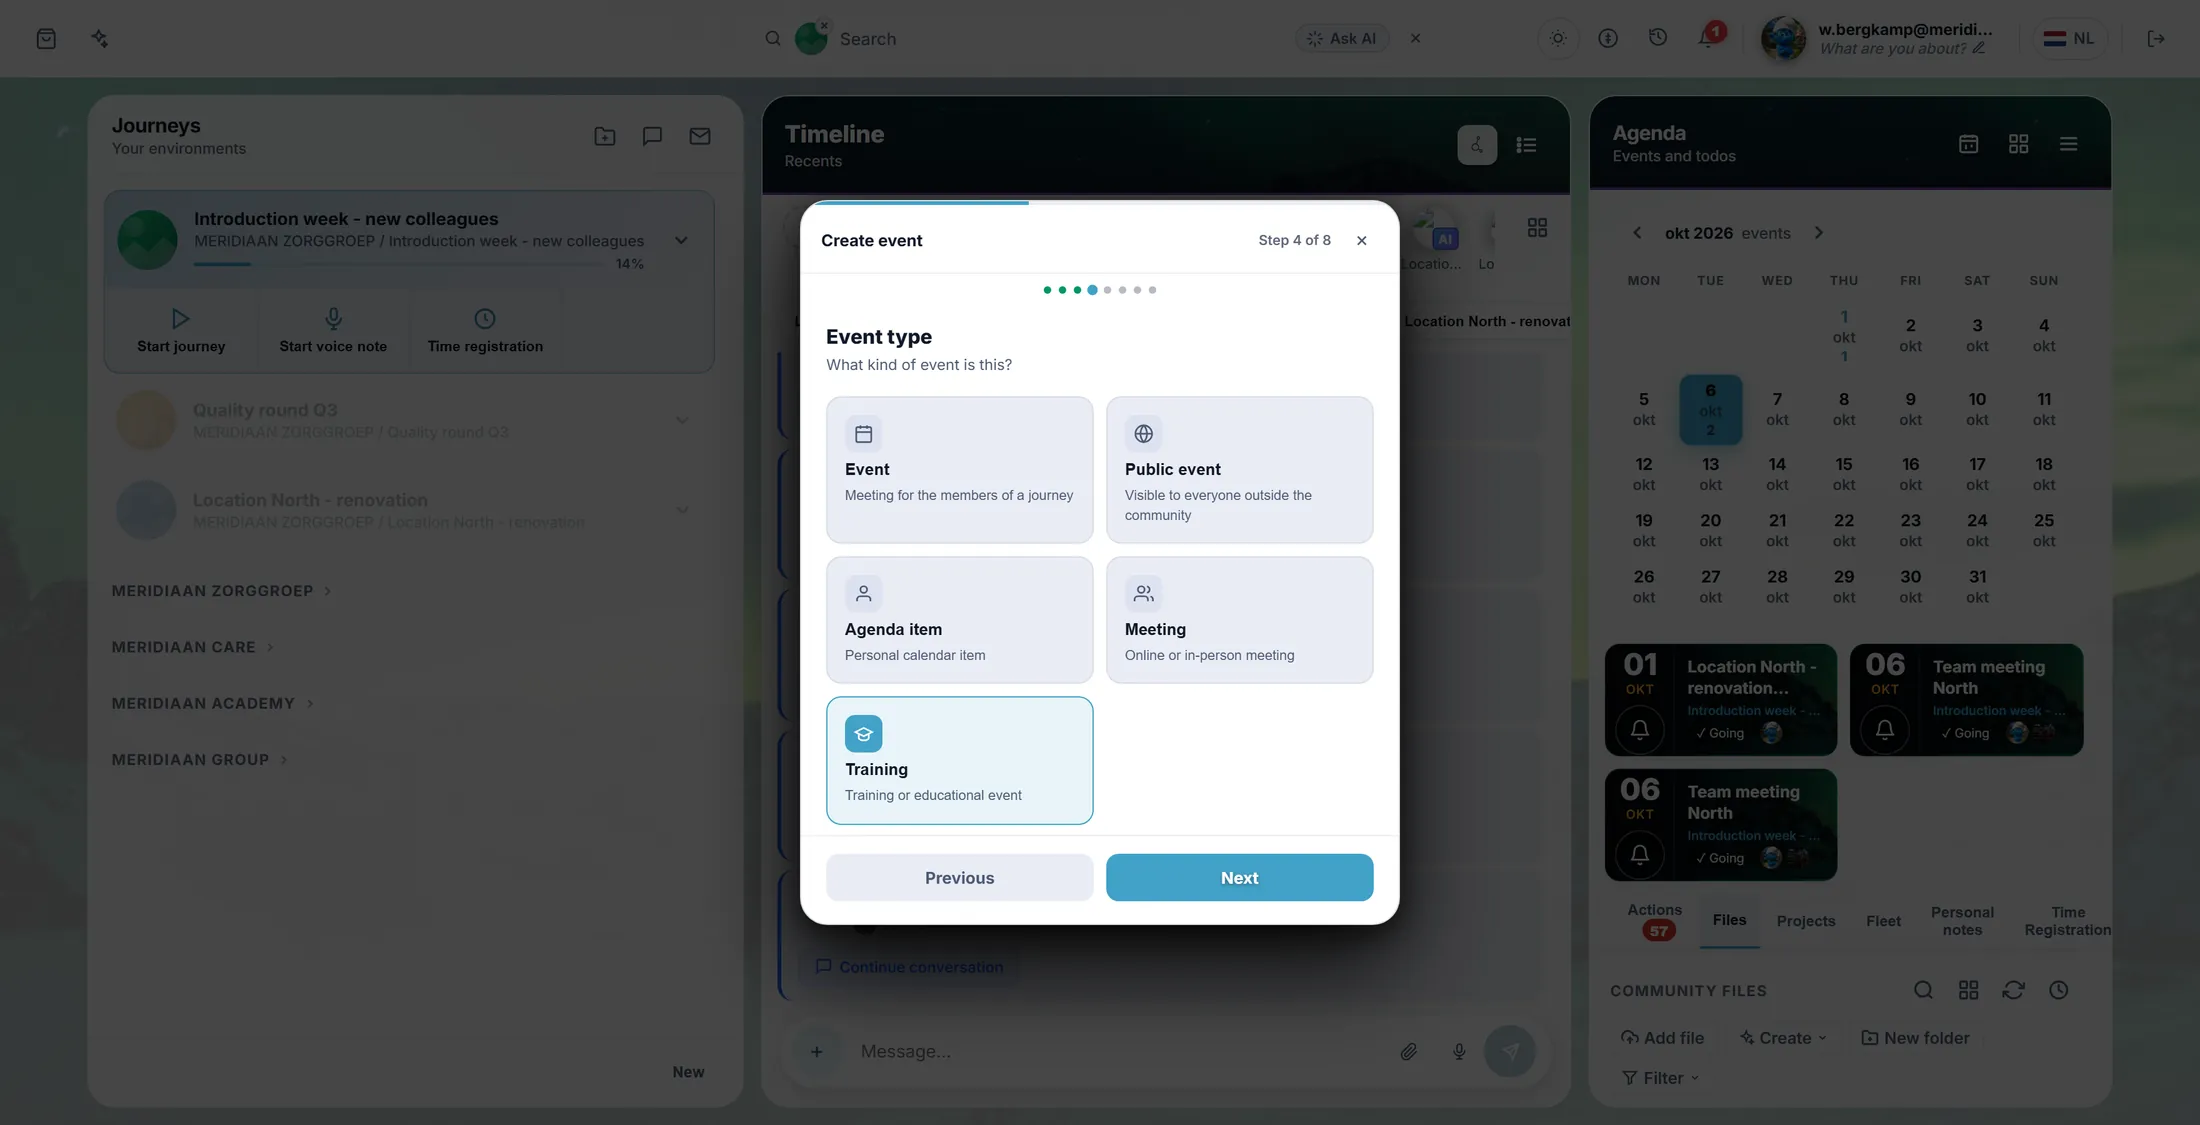
Choose the Training card. 1.1 - Time, public, place, finish
Set when, who may see it, and where. Then finish.
- Set the start time.
- At Public, choose Yes. Without it a visitor without an account cannot see the page.
- Set the duration, for example 3:00.
- At Location, choose On location and type the address.
- Press Finish. You see Saving... , then the event is made and stands in the agenda.
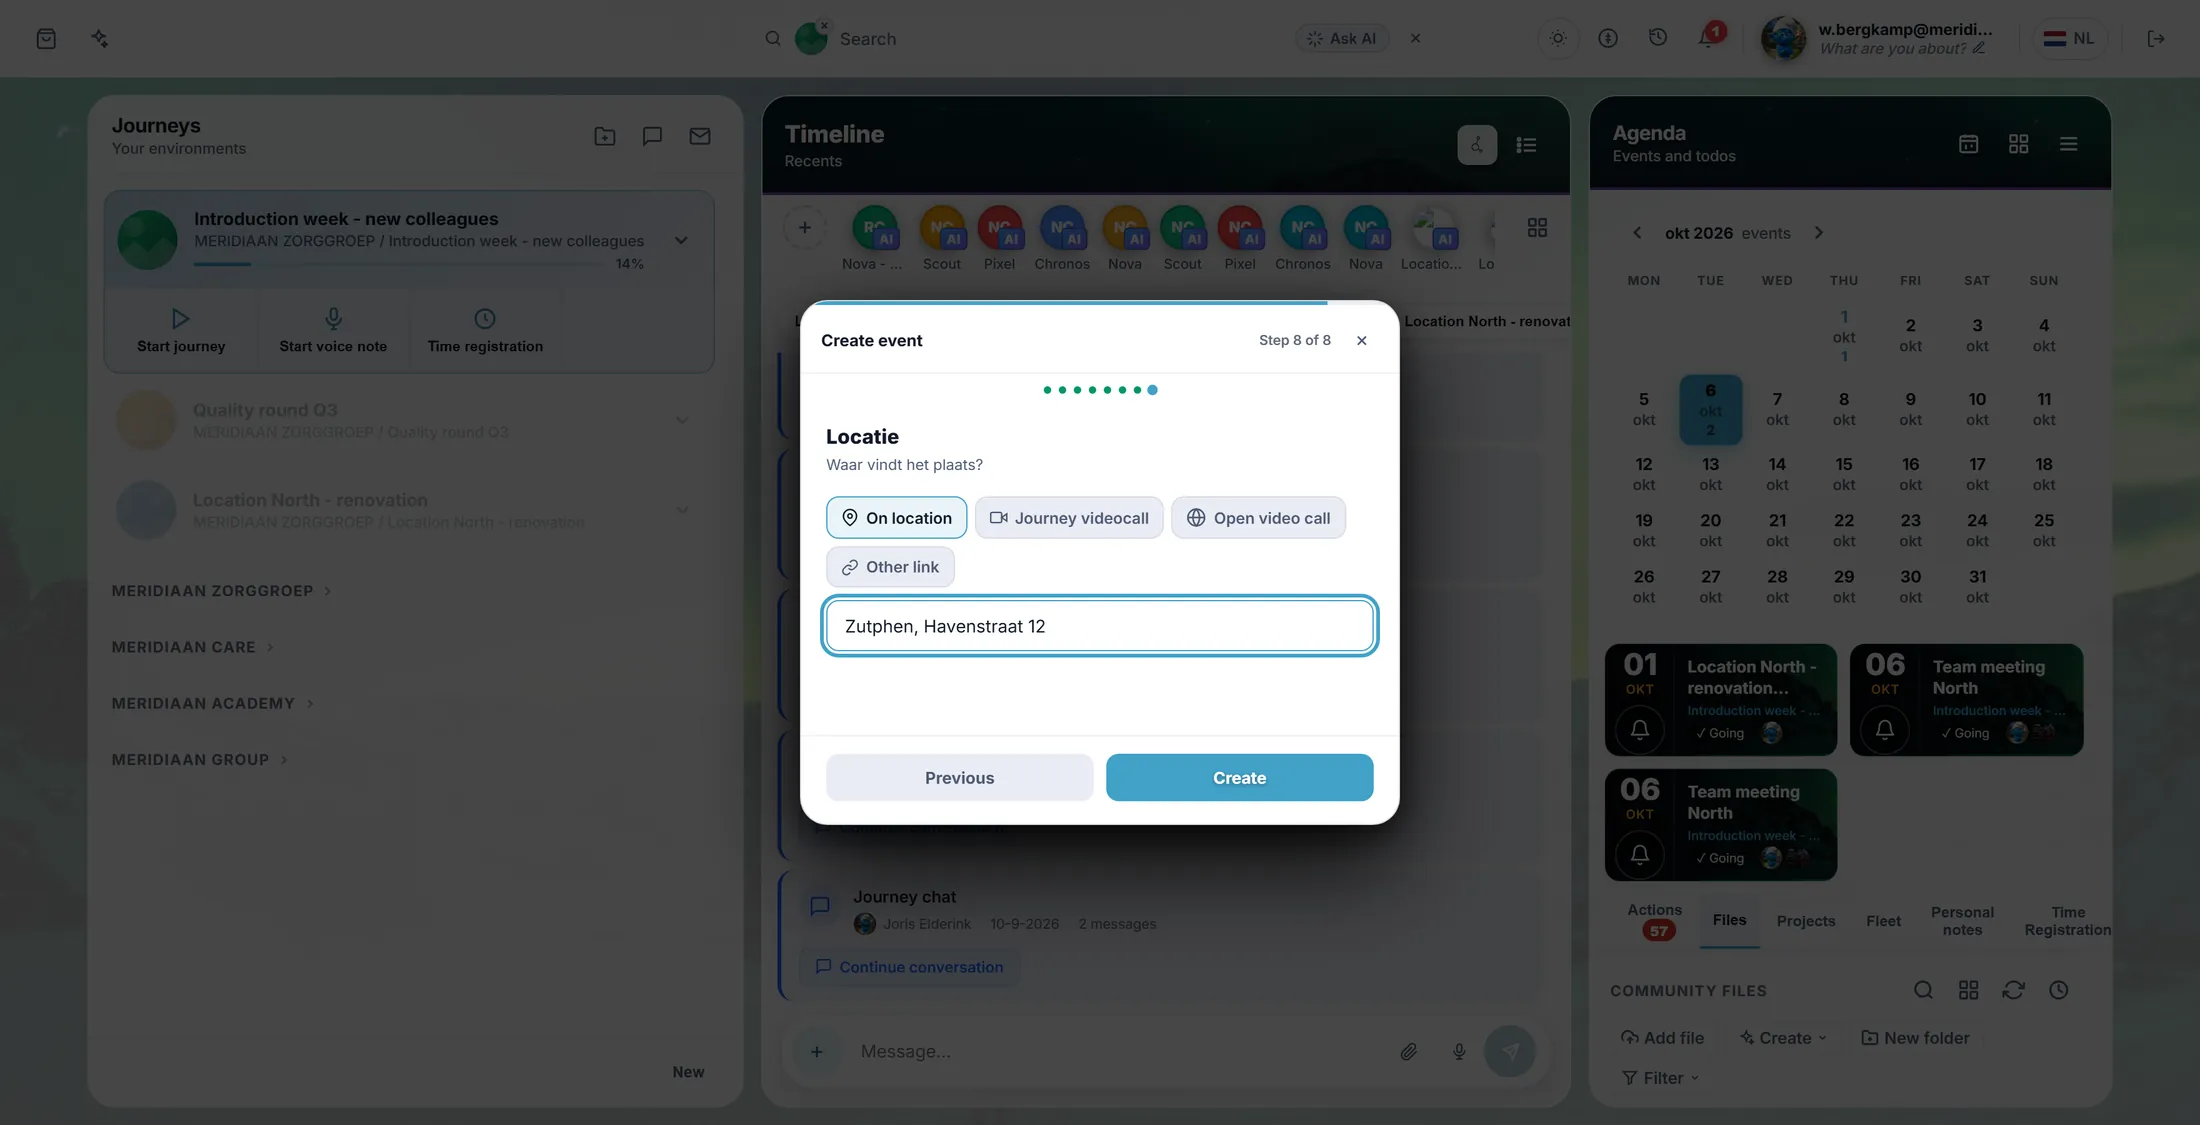
Public: Yes. Then Finish. 1.2 - Open the event and make it a Training
Open the event and switch on the Training section.
- Click the event in the agenda and open it.
- Press the pencil (Edit).
- Set Event type to Training. The section Training appears.
- Tick Publicly viewable. This is a separate setting from the type.
- Watch the status line: Saving... and then Saved . Everything saves itself.
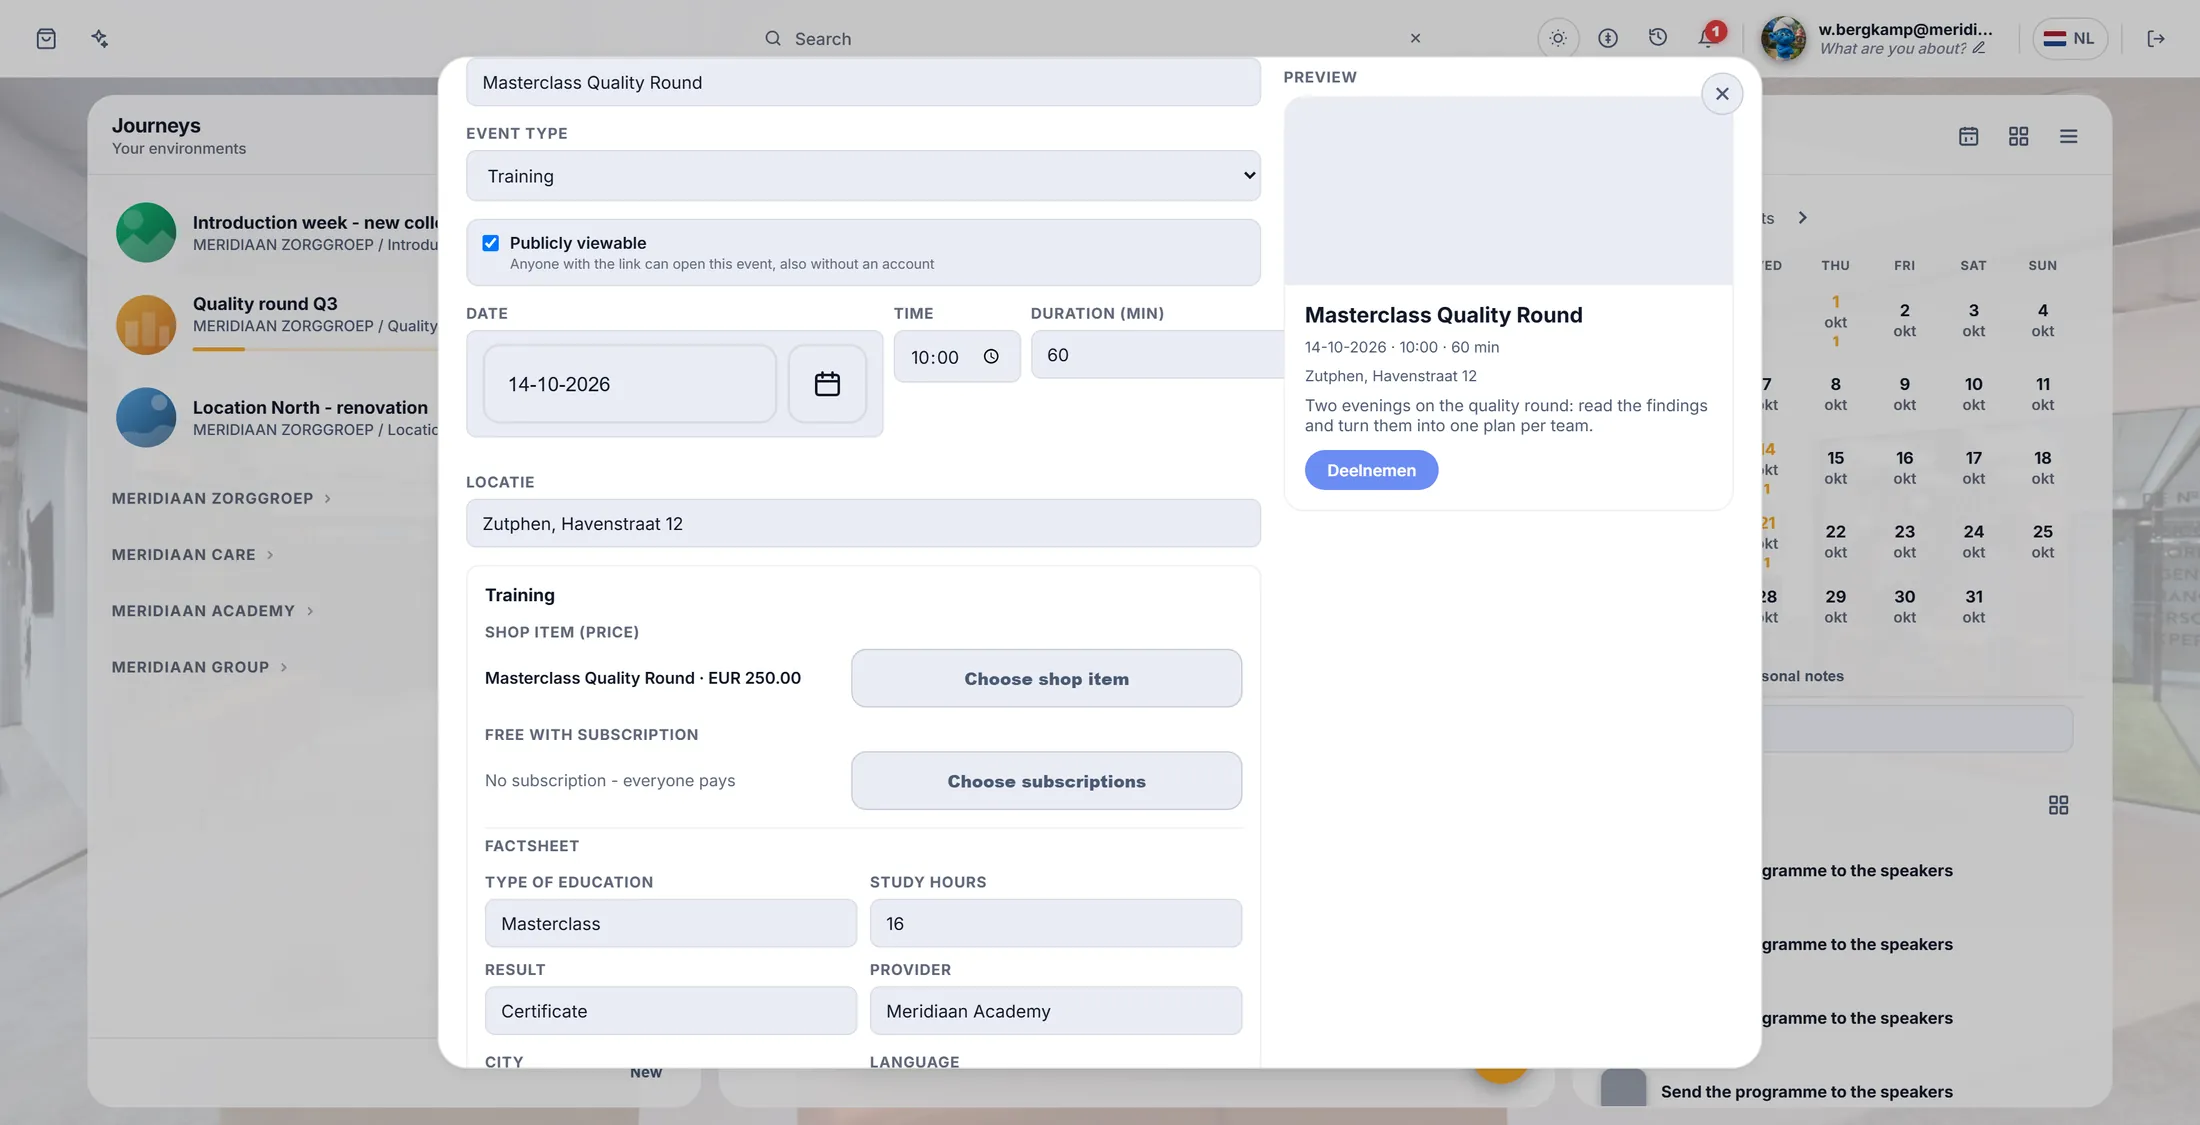
Event type Training opens the Training section. 1.2 - Link a shop item (the price)
Make the shop item that carries the price.
- At Shop item (price) press Choose shop item, then Create from this training.
- A shop item with a price of 0 is made and linked.
- You see Sign the sales agreement in the shop first ? Do part 2.6 first, then come back here.
- Leave Free with subscription empty ("No subscription - everyone pays"), unless you want that on purpose.
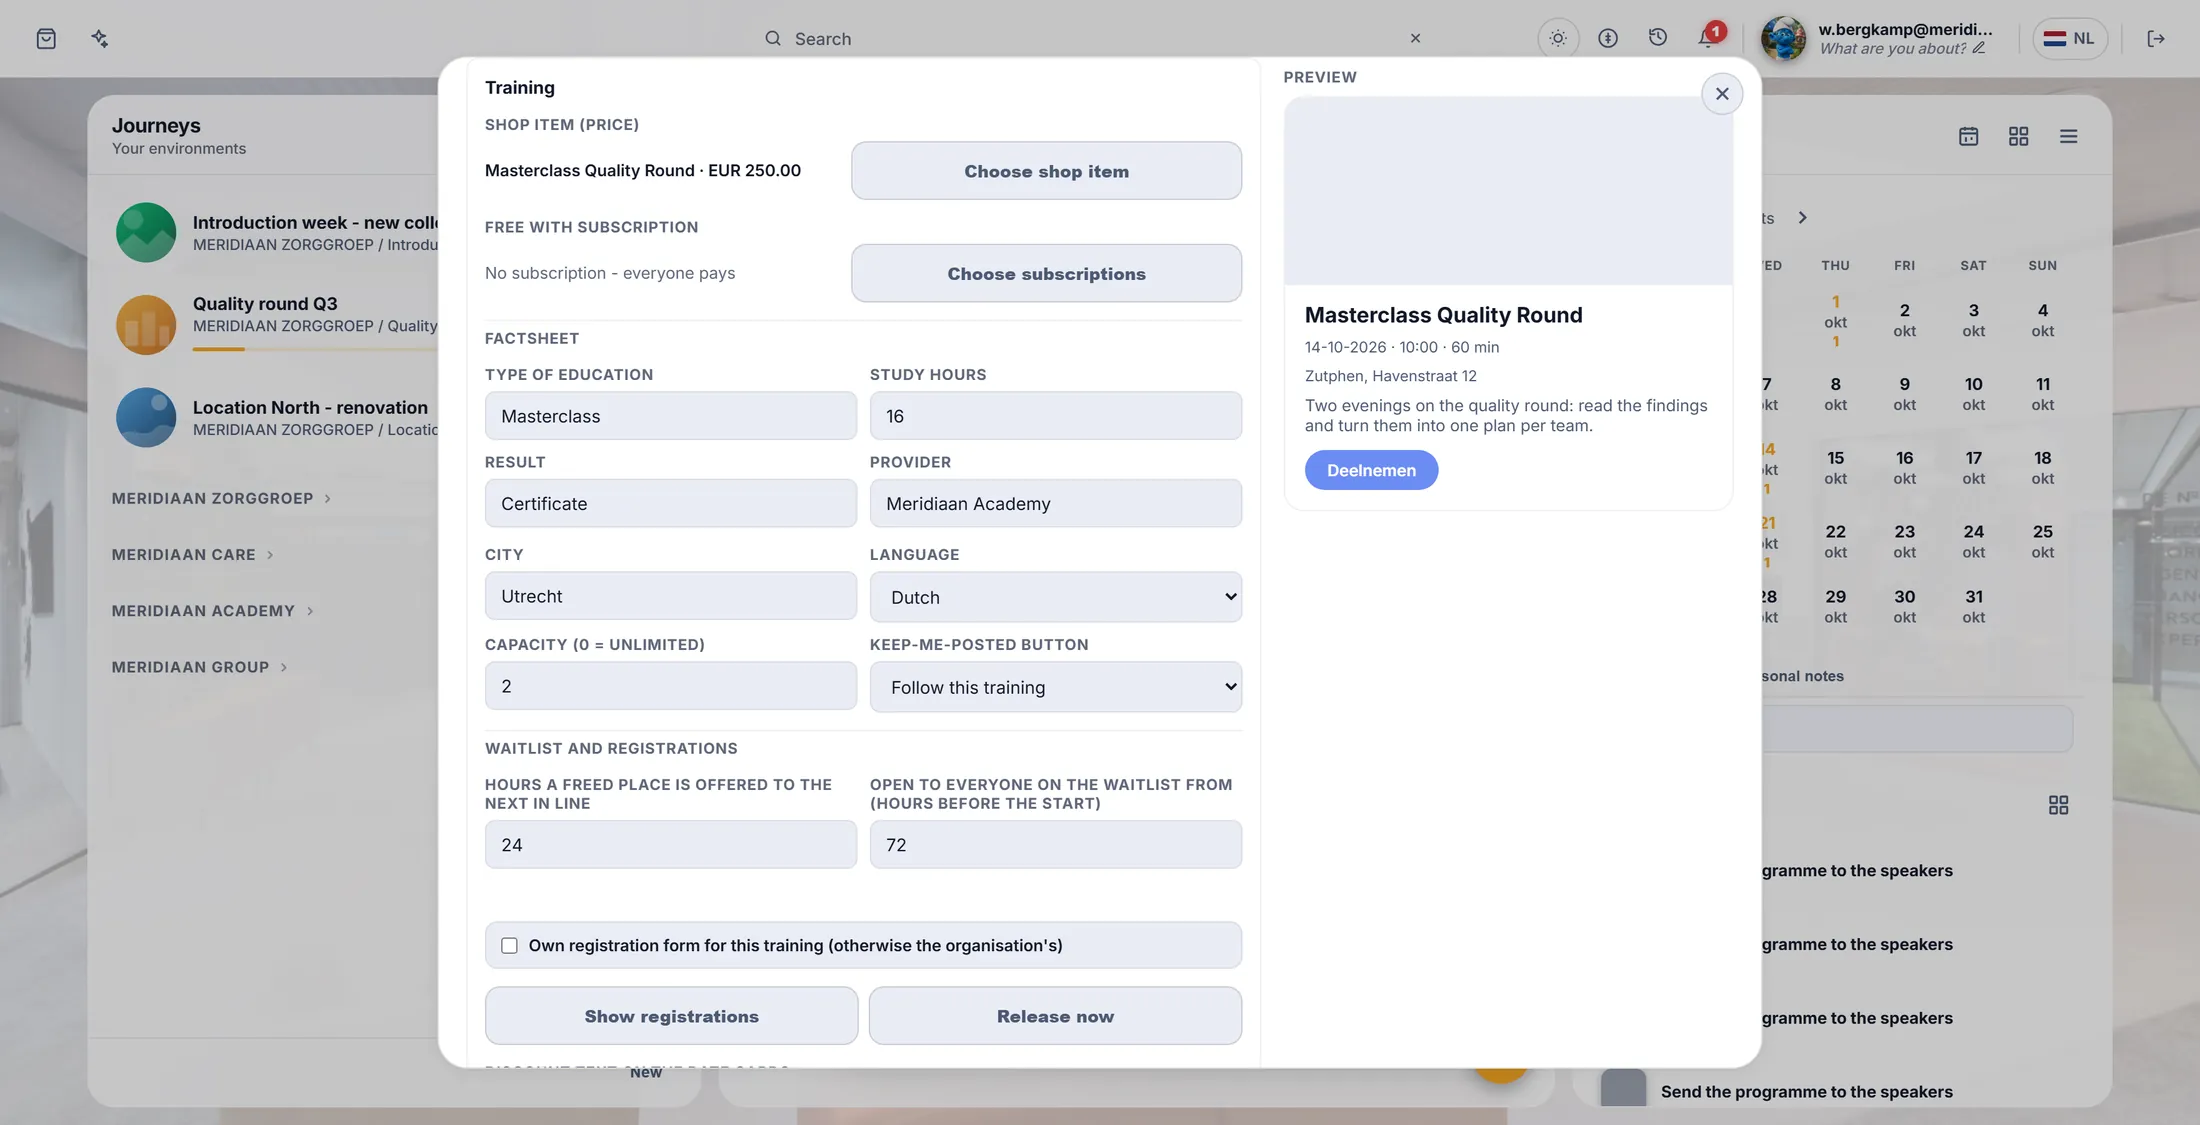
Create the shop item from the training itself. 1.2 - Factsheet, place, language, capacity
Fill in the facts a visitor wants to know.
- Factsheet: Type of education, Study hours, End result, Provider. For example Masterclass - 16 - Certificate - Meridiaan Academy.
- Place and Language of instruction. For example Utrecht and Dutch.
- Capacity (0 = unlimited): type 2 . Small on purpose, so you can try the waitlist later.
- Button Keep me informed: type "Follow this training".
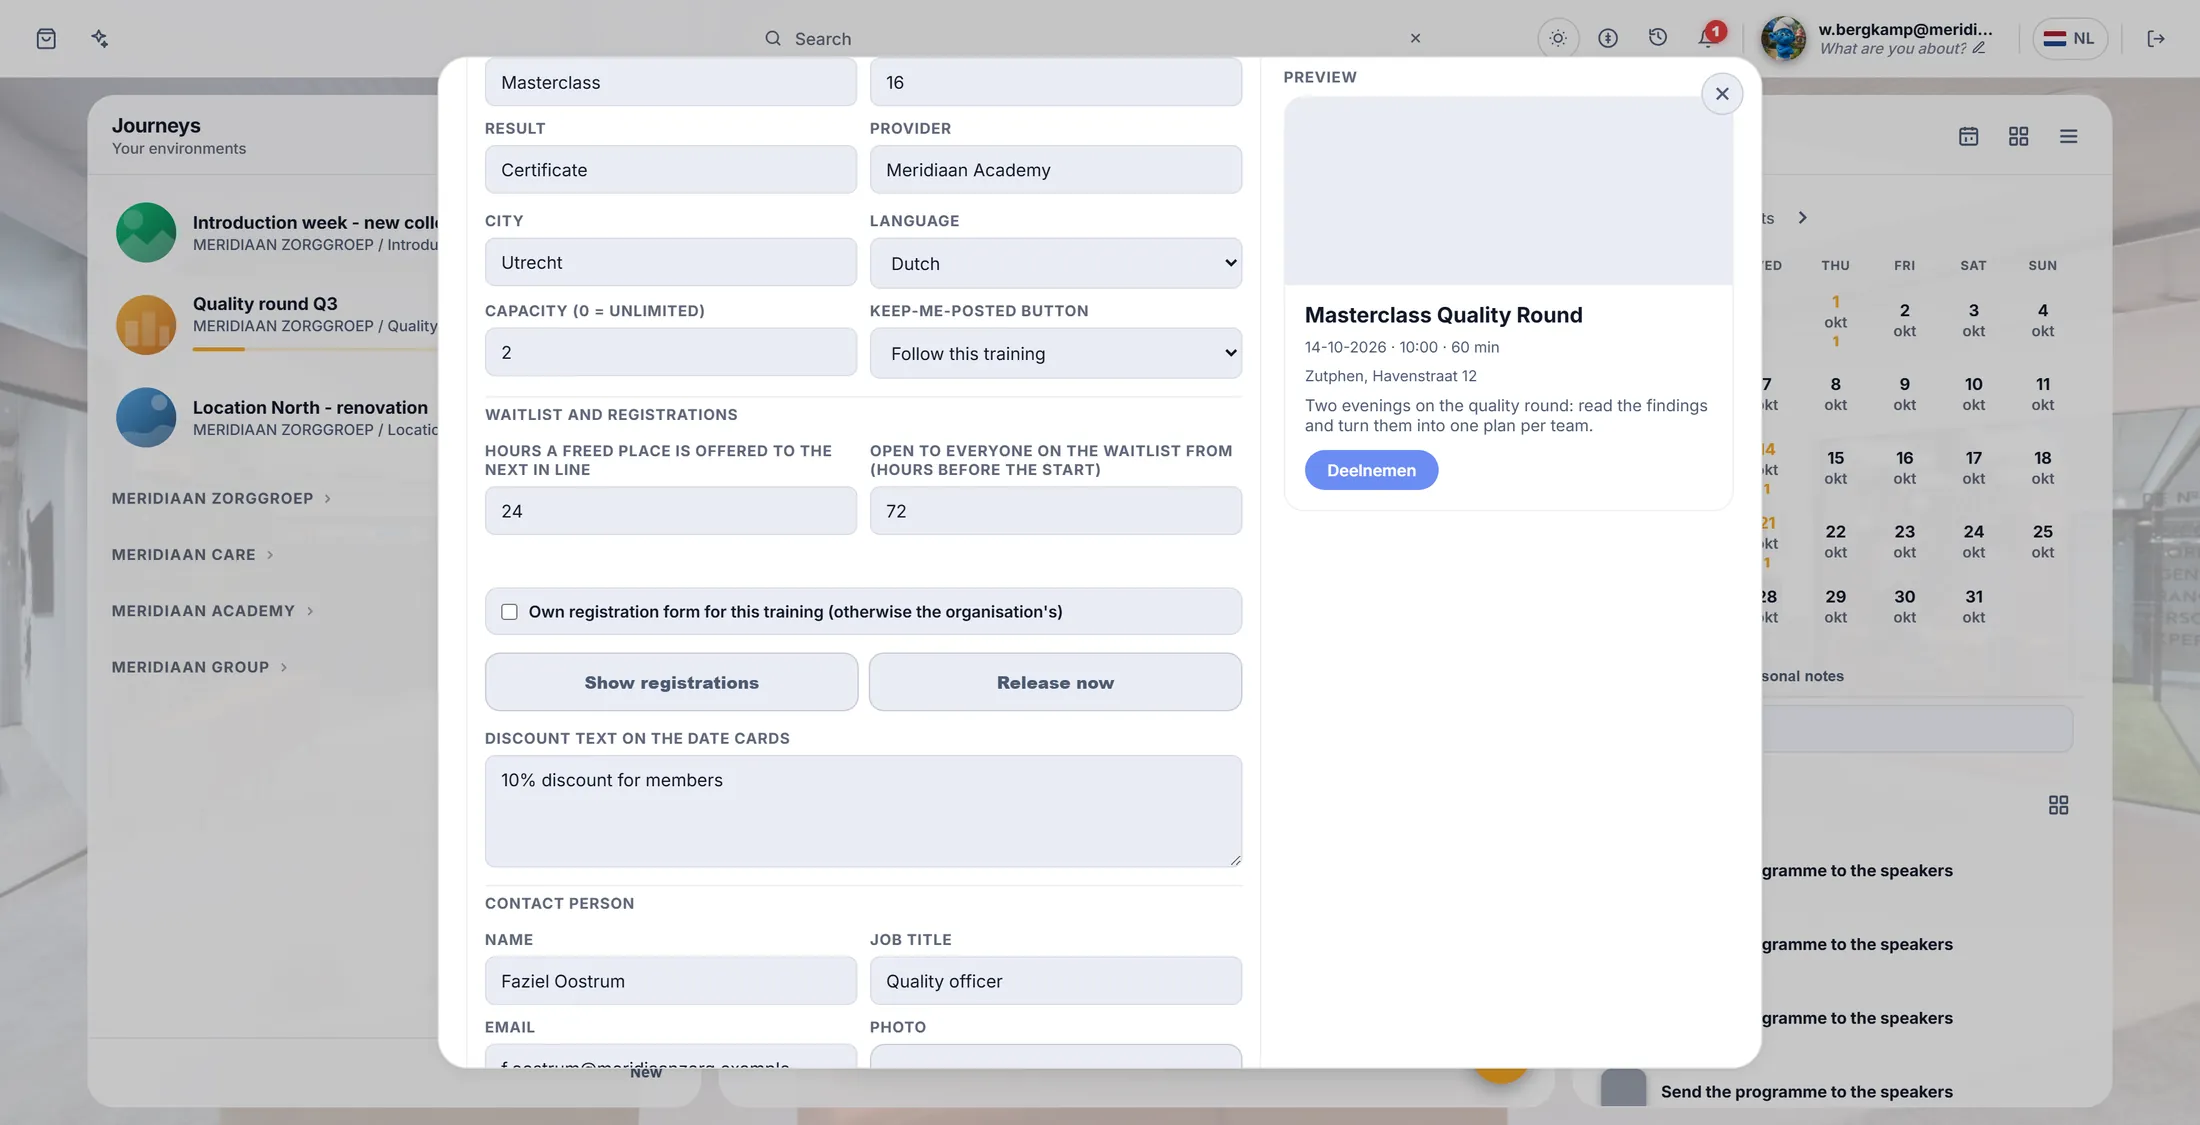
Factsheet and capacity. 1.2 - Waitlist, own form, discount text, contact
Set the waitlist, an optional own form, and the contact person.
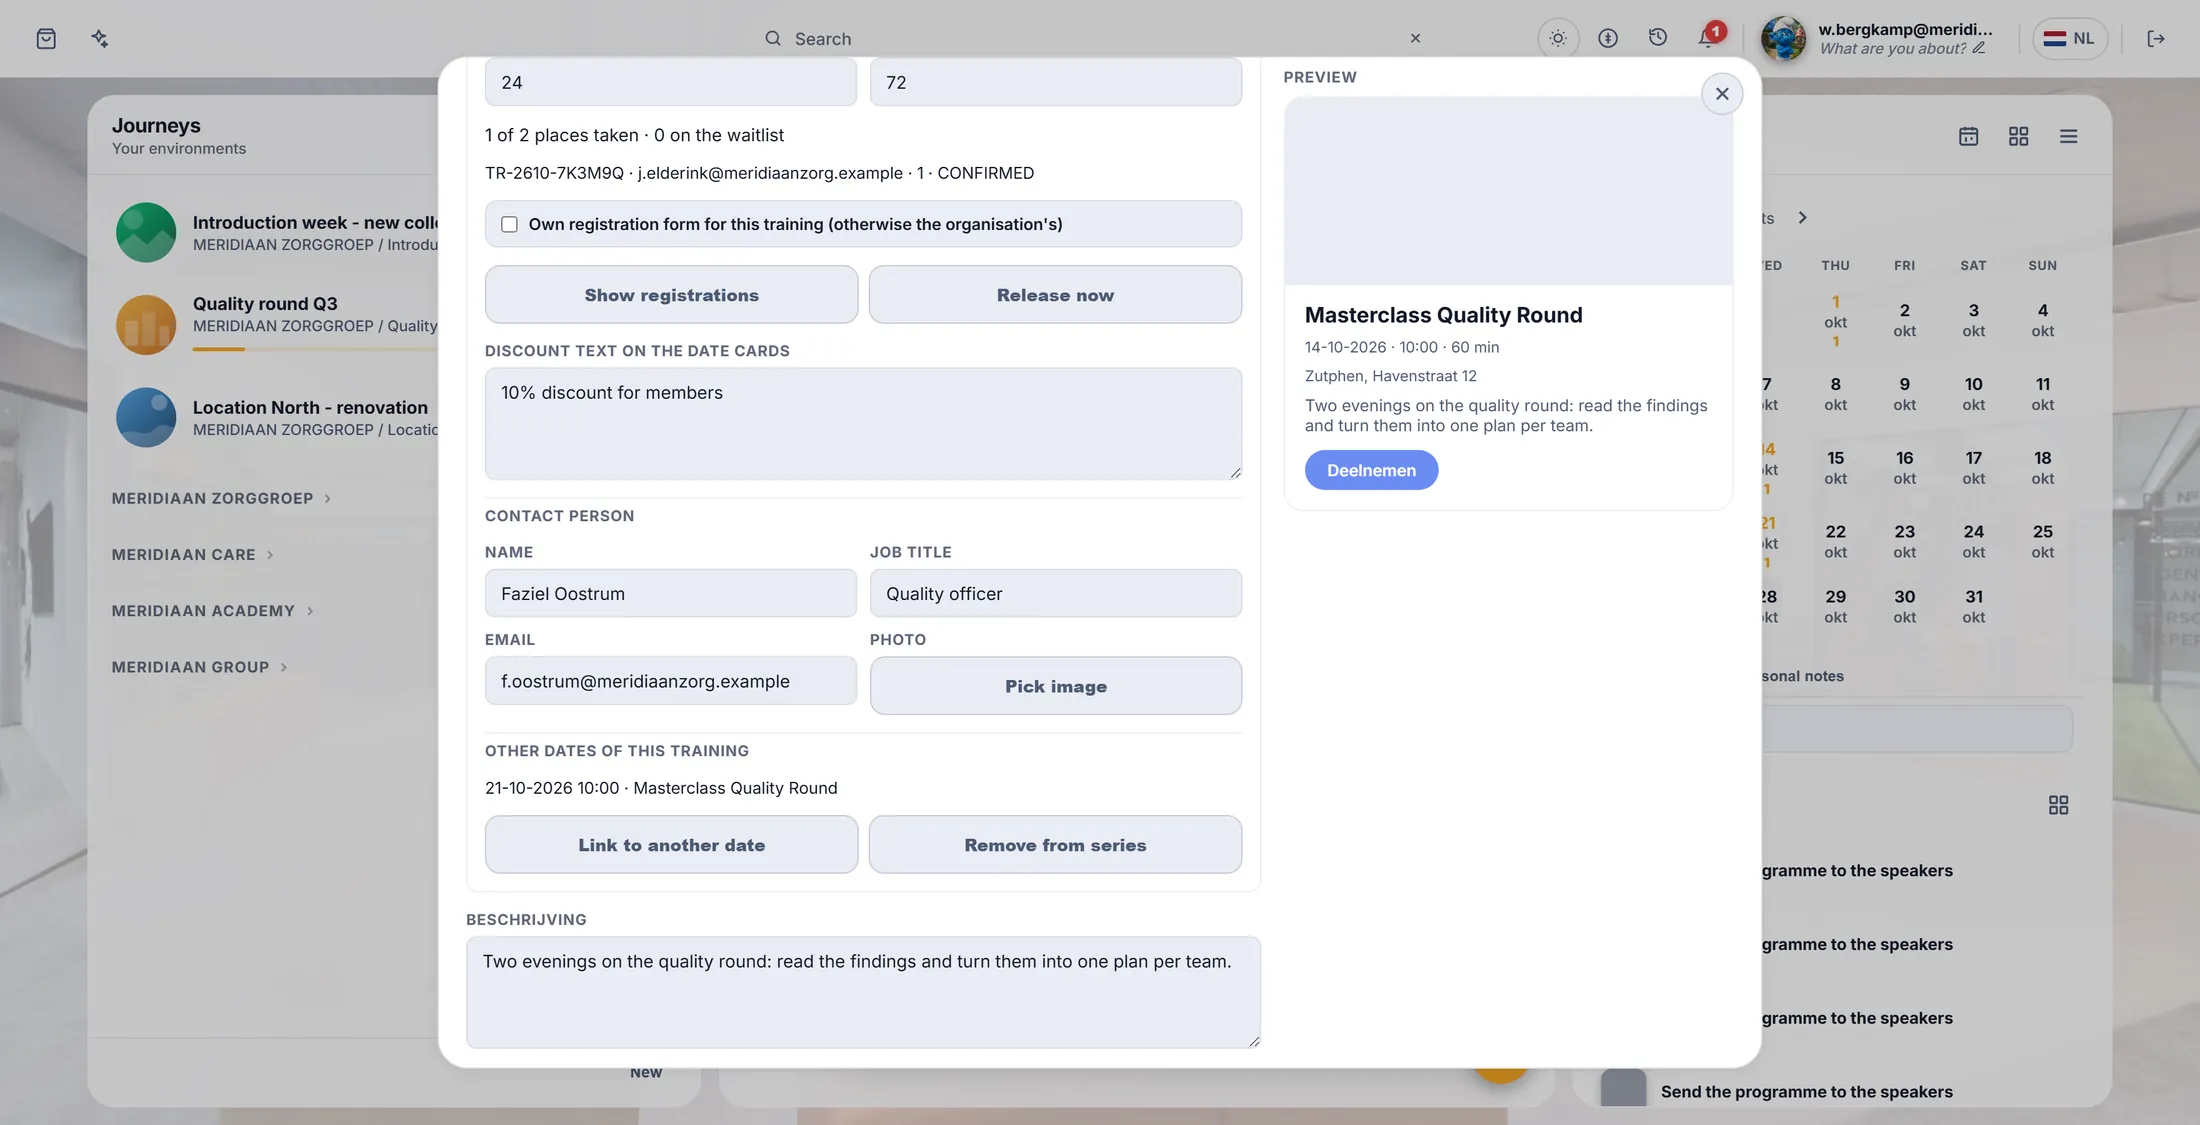
- Waitlist and registrations (only when registration is on): Hours offer 24 and Open to everyone from 72.
- The summary reads 0 of 2 places taken - 0 on the waitlist .
- Optional: tick Own registration form for this training, press + Add field and fill in Question, Type (Text, E-mail or Choice) and Required. Without the tick, the form of your organisation is used (part 4.2).
- Discount text on the date cards: for example "10% discount for members".
- Contact person: Name, Function, E-mail and Photo. A wrong address gives That e-mail address is not valid .
- At the bottom, fill in Description and Header image. The description shows as the intro on the detail page.
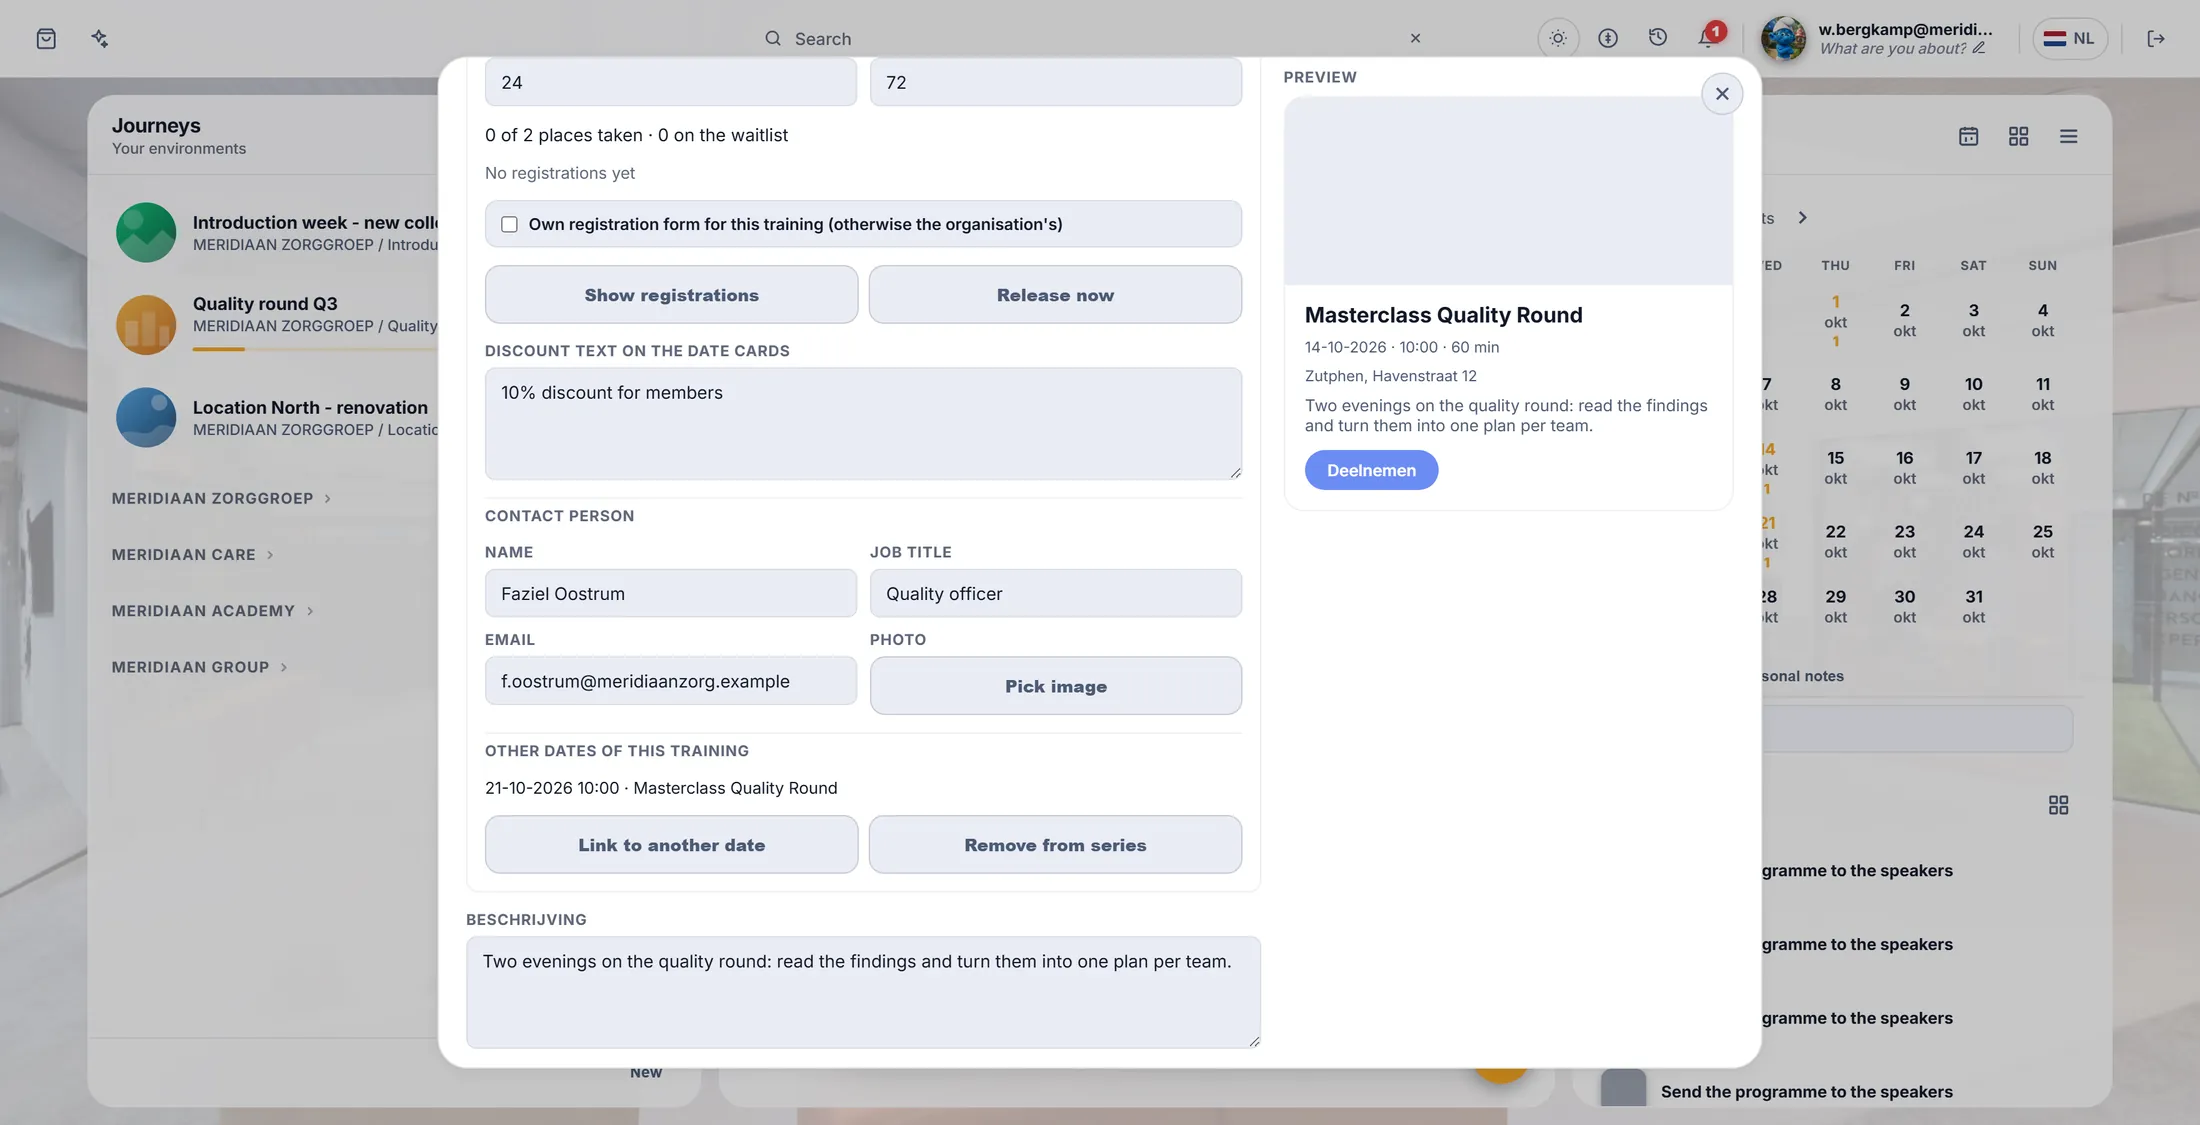
The waitlist summary counts places and people waiting. 1.3 - Bundle a second date into one series
Link a second date to the first.
- Make a second training as in 1.1, with the same name, one week later.
- Open the first training. At Other dates of this training press Link to another date.
- Choose the second one. It stands in the list and the button Remove from series appears.
- On the detail page you will see both date cards.
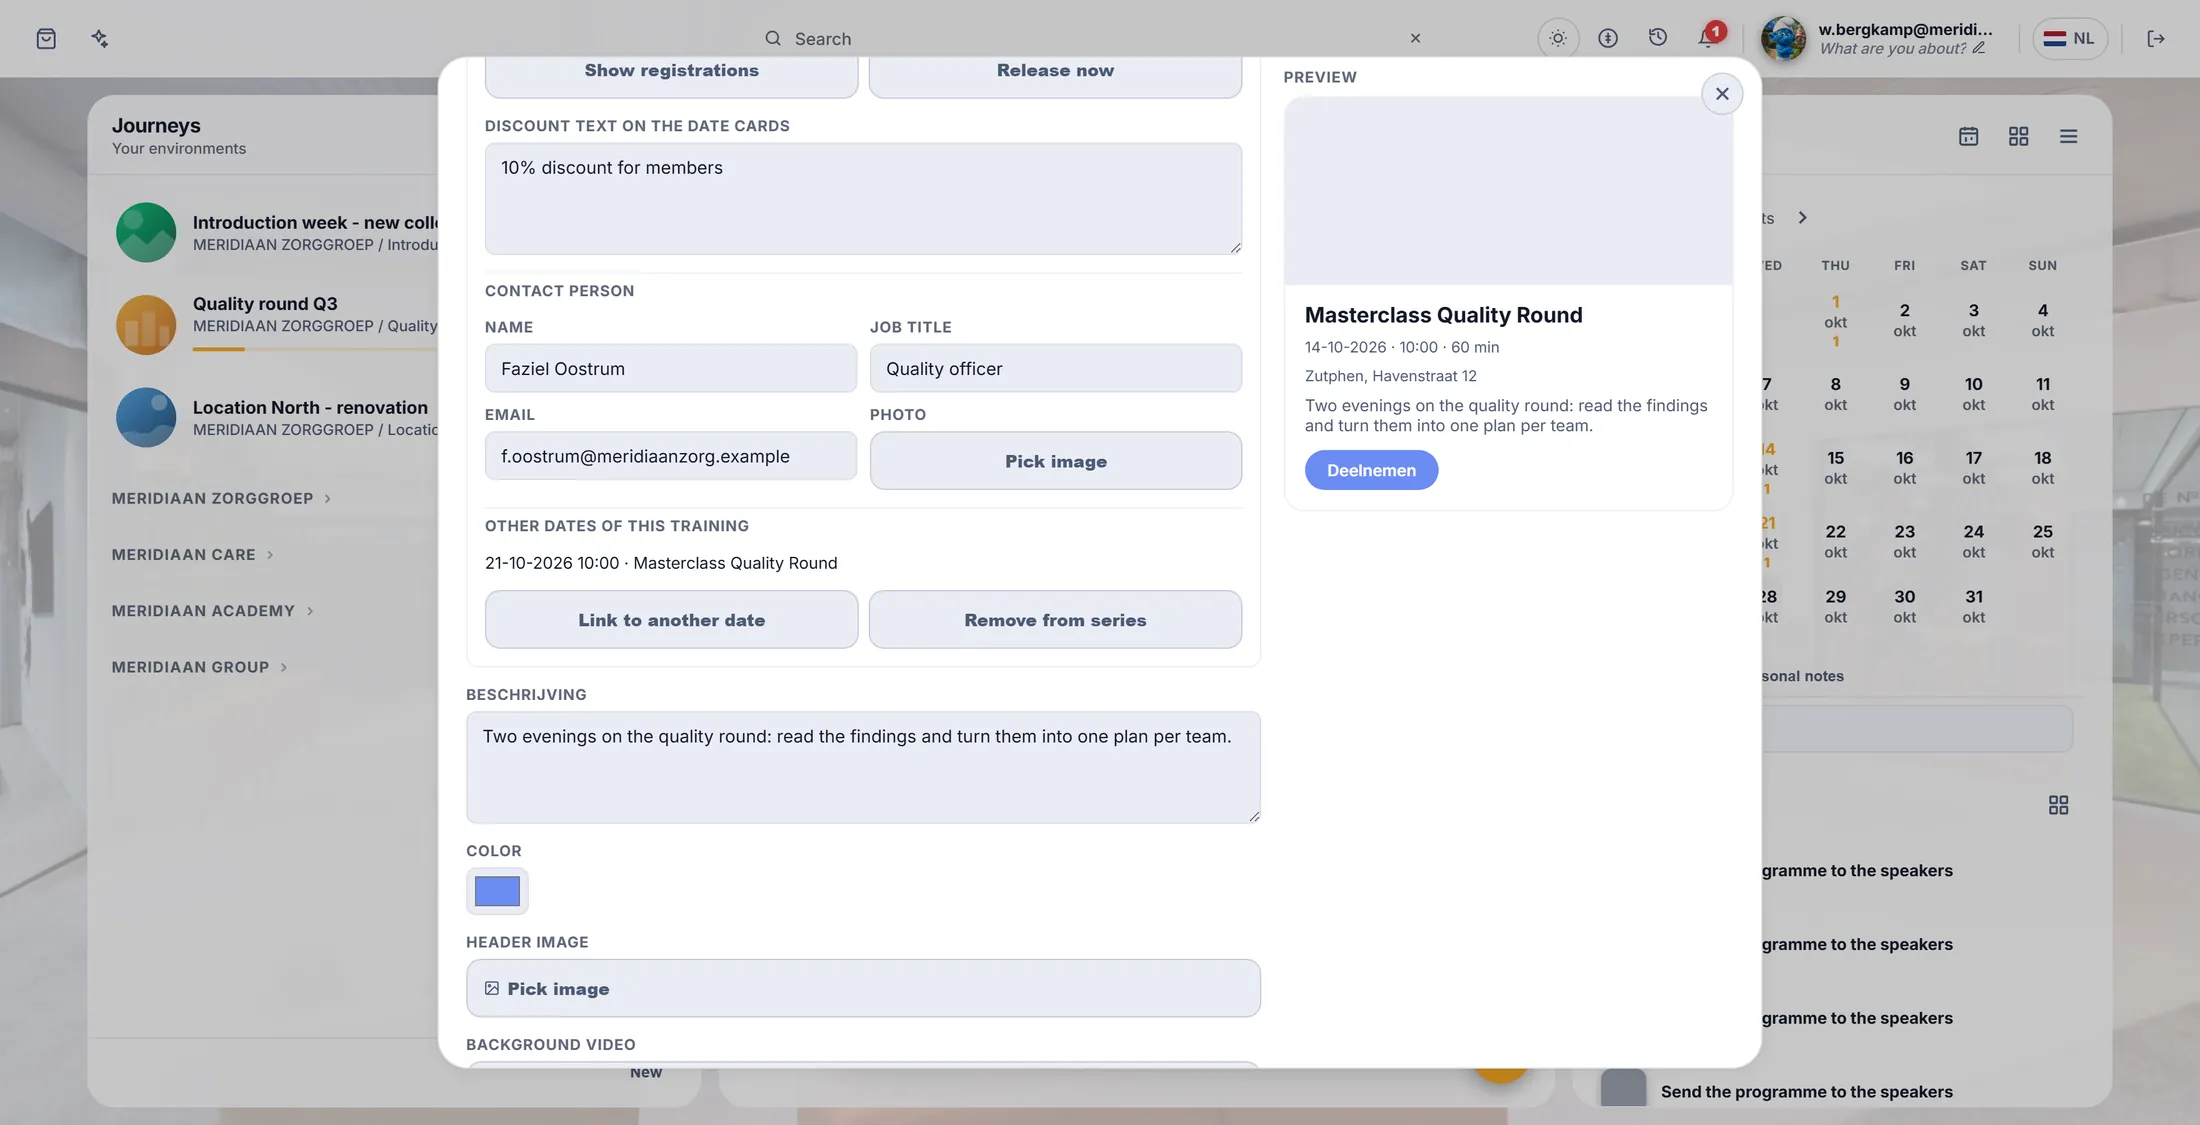
Two dates, one series. 2.1 - Shop item: set the price and PO orders
Open the shop item and set a price.
- Open the Editor, group Payments, section Organisation Shop Items.
- Click the shop item that step 1.2 made.
- Tab Price: set the Price. For now use 0 to try everything without paying.
- Tick Also accept PO orders (on invoice). On the detail page the question How do you pay? then appears.
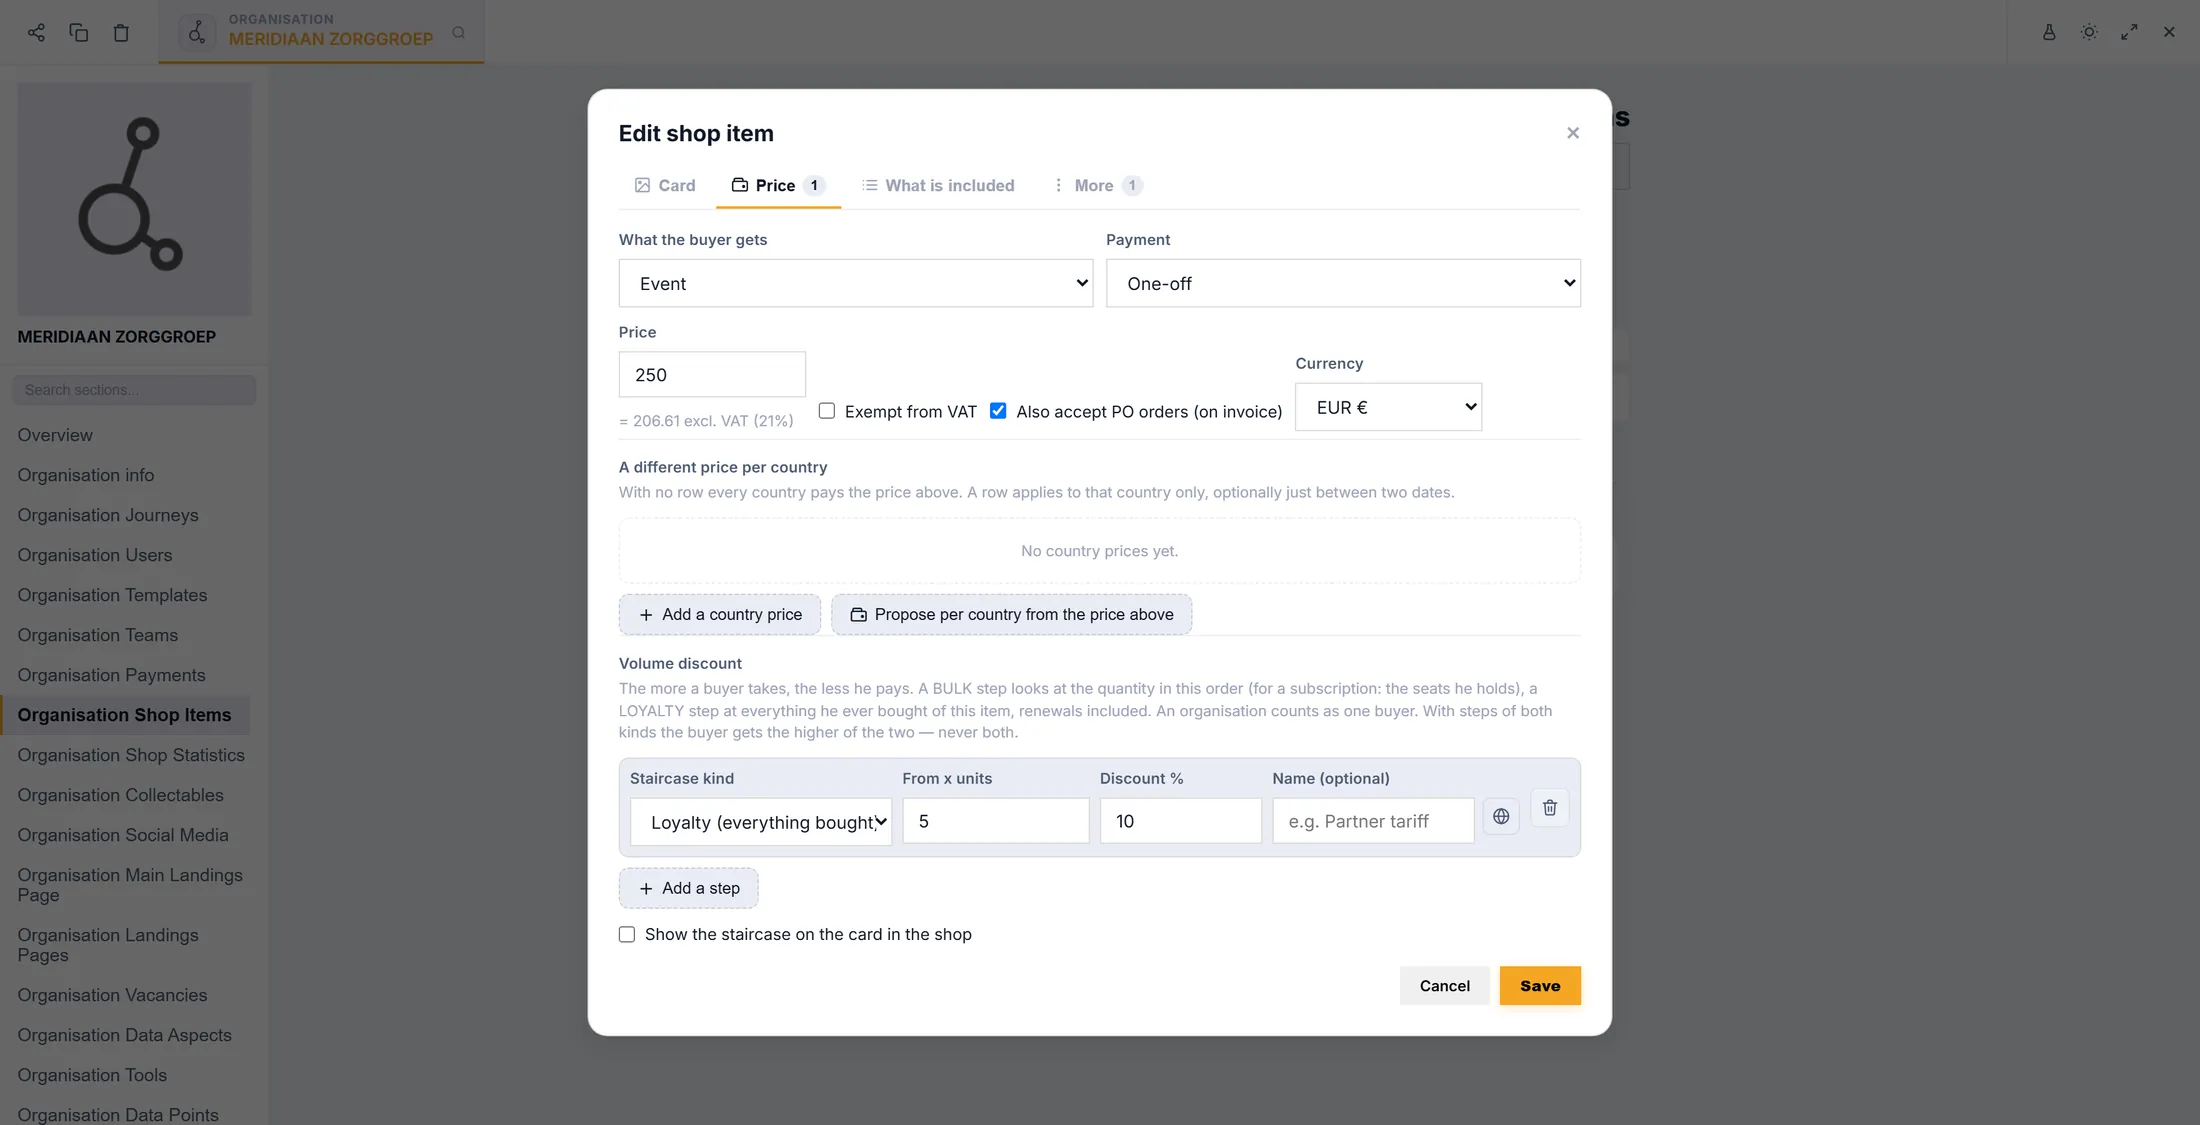
The Price tab. 2.2 - Optional: VAT exempt and tier discount
Show an exemption or a group discount on the date card.
- Tick Exempt from VAT if it applies.
- Press Add tier under Tier discount and give a number of participants and a percentage.
- The date card then says Exempt from VAT and from N participants X% discount .
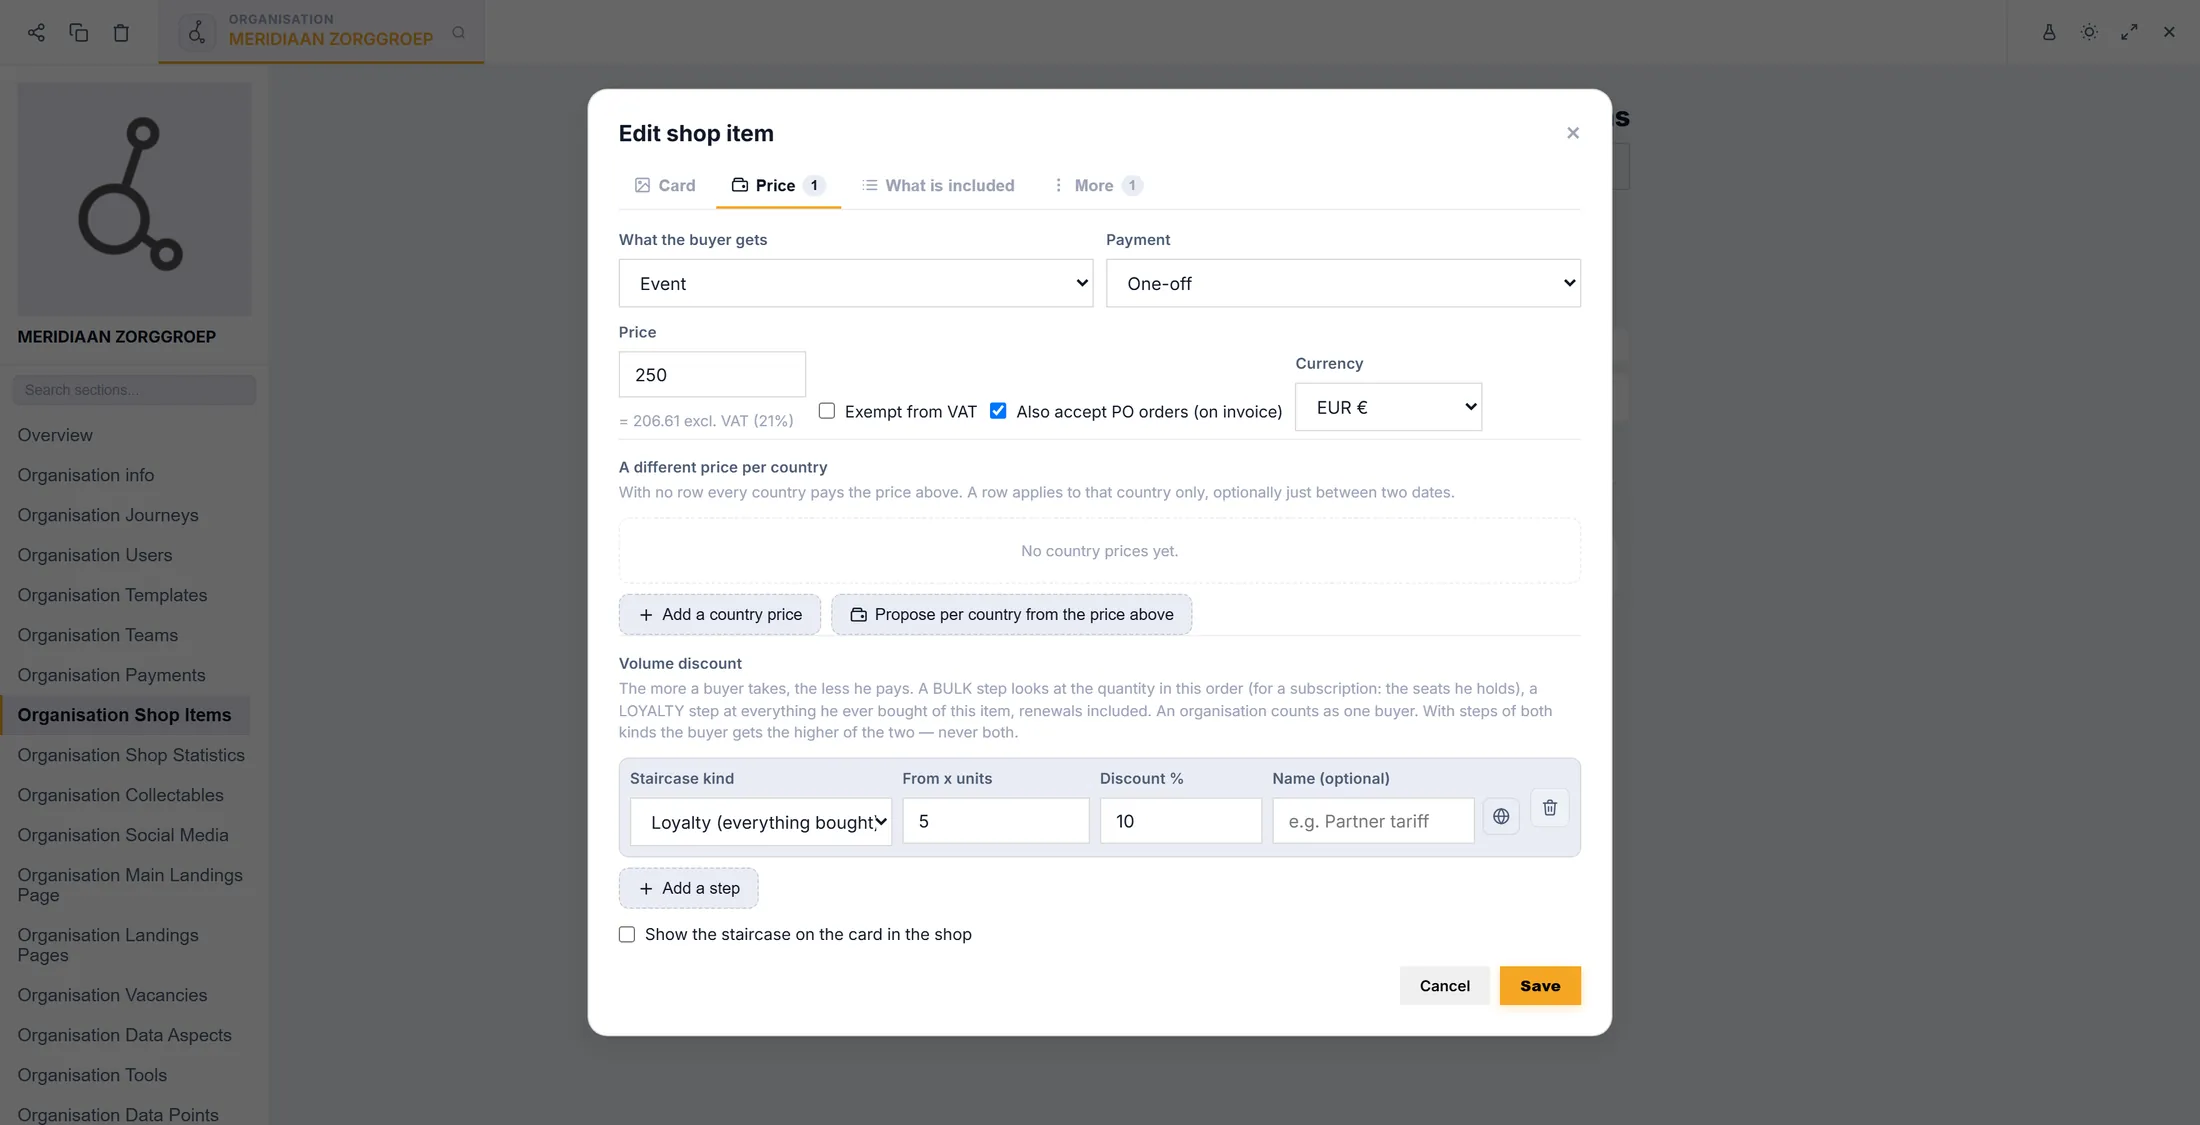
A tier: from 5 participants 10% off. 2.3 - A discount code and Save
Add a code, then save.
- Open the tab More, then Discount codes.
- Press Add code: for example ACADEMY100 , 100%.
- Press Save. It is saved and the price shows in the event popup.
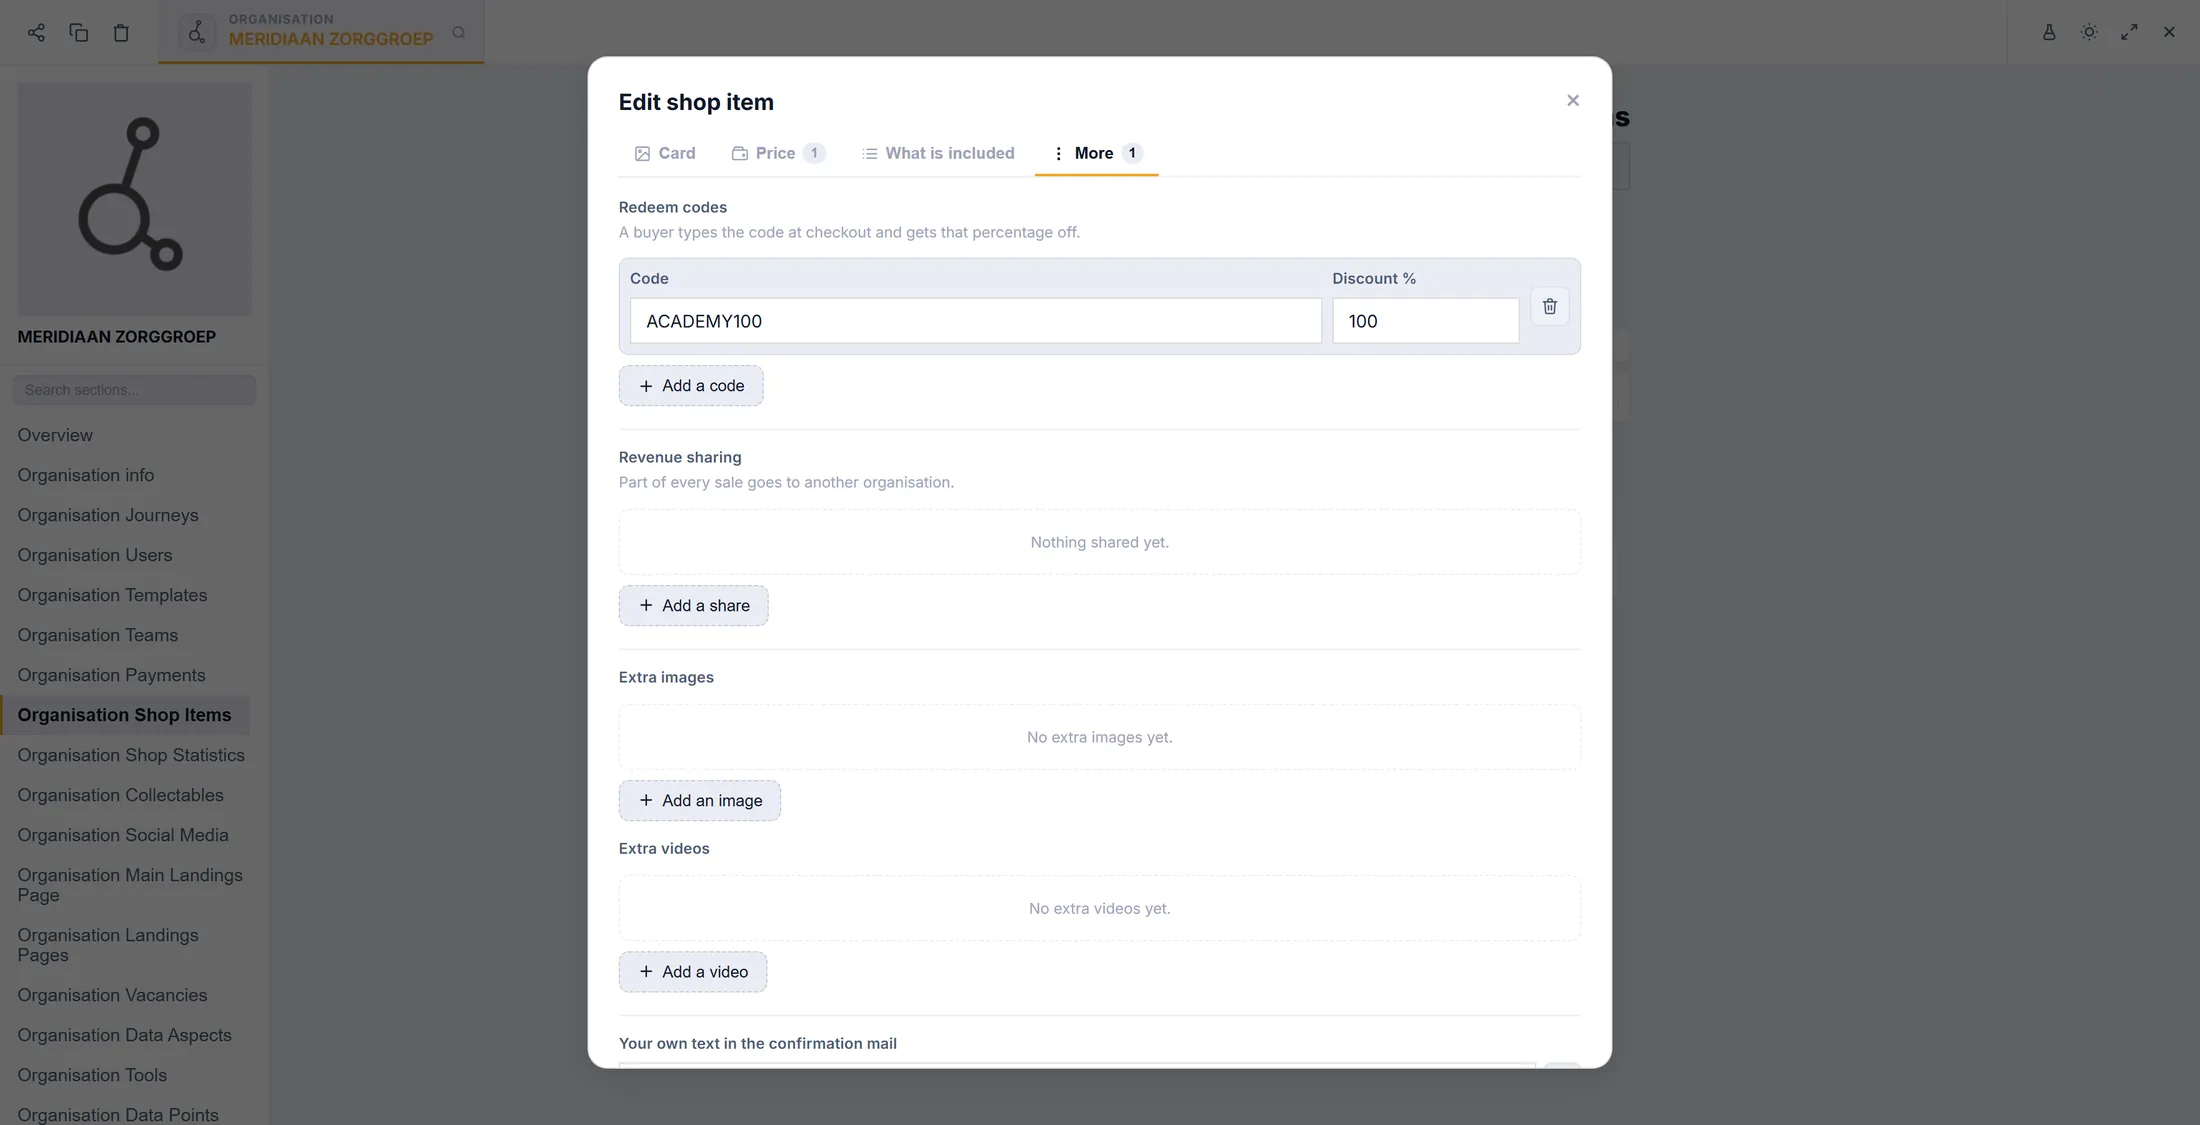
One code of 100%. 2.4 - Sign the sales agreement (only if asked)
Sign once, so you may sell.
- In the same section press Agreement.
- Asked for your invoice details? Fill them in first.
- Sign in the document. The status then reads Signed on <date> .
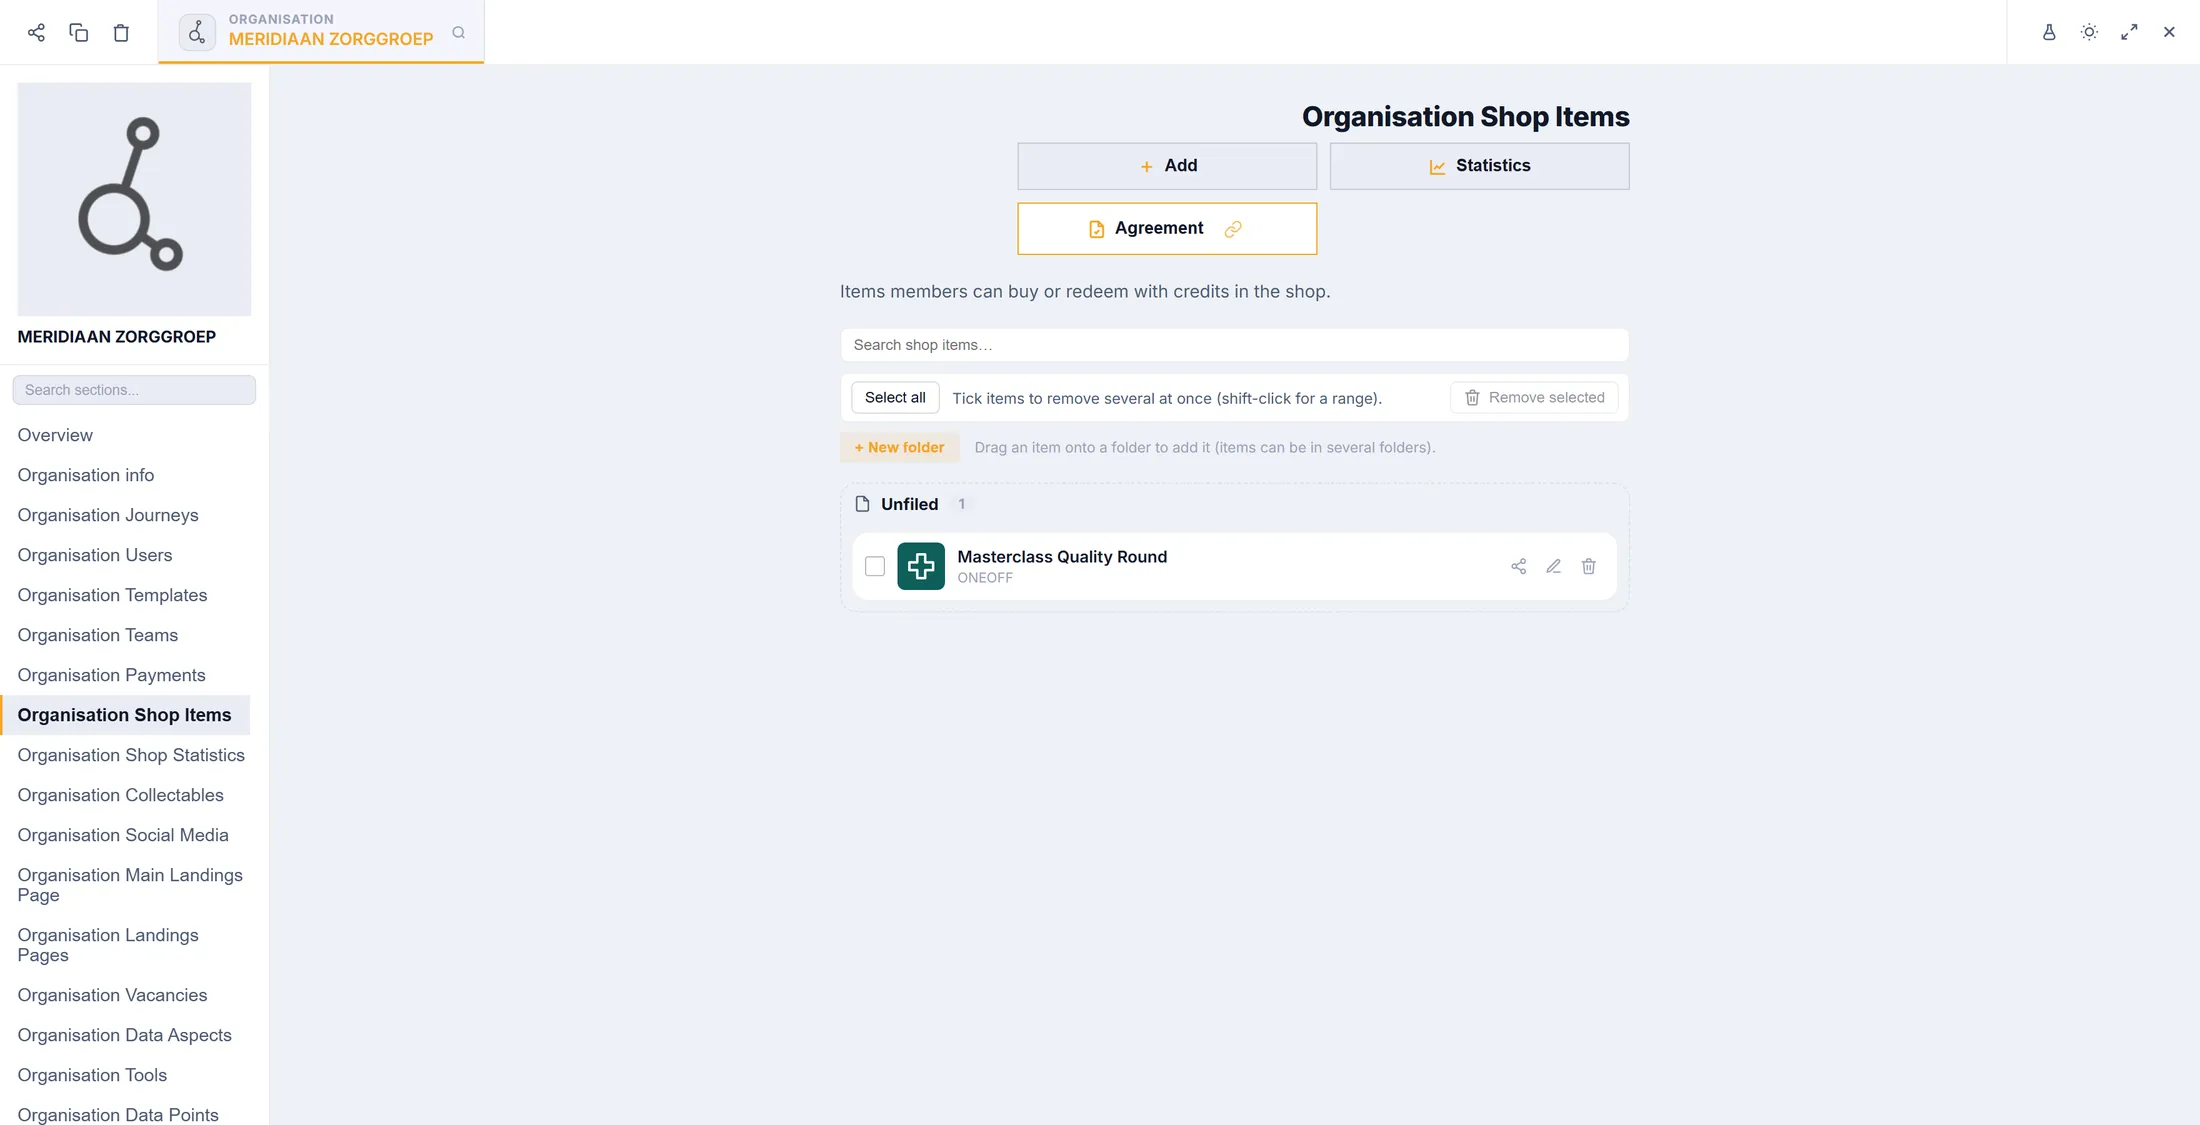
Signed once, then you may sell. 3.1 - Make the detail page template
Make a new page of the type detail template.
- Open the Editor, group Identity and public face, section Landings Pages.
- Press New page. At What are you making? choose the card Detail page template.
- Name: Training detail Meridiaan . Press Create page.
- The page stands under Detail page templates in the tree.
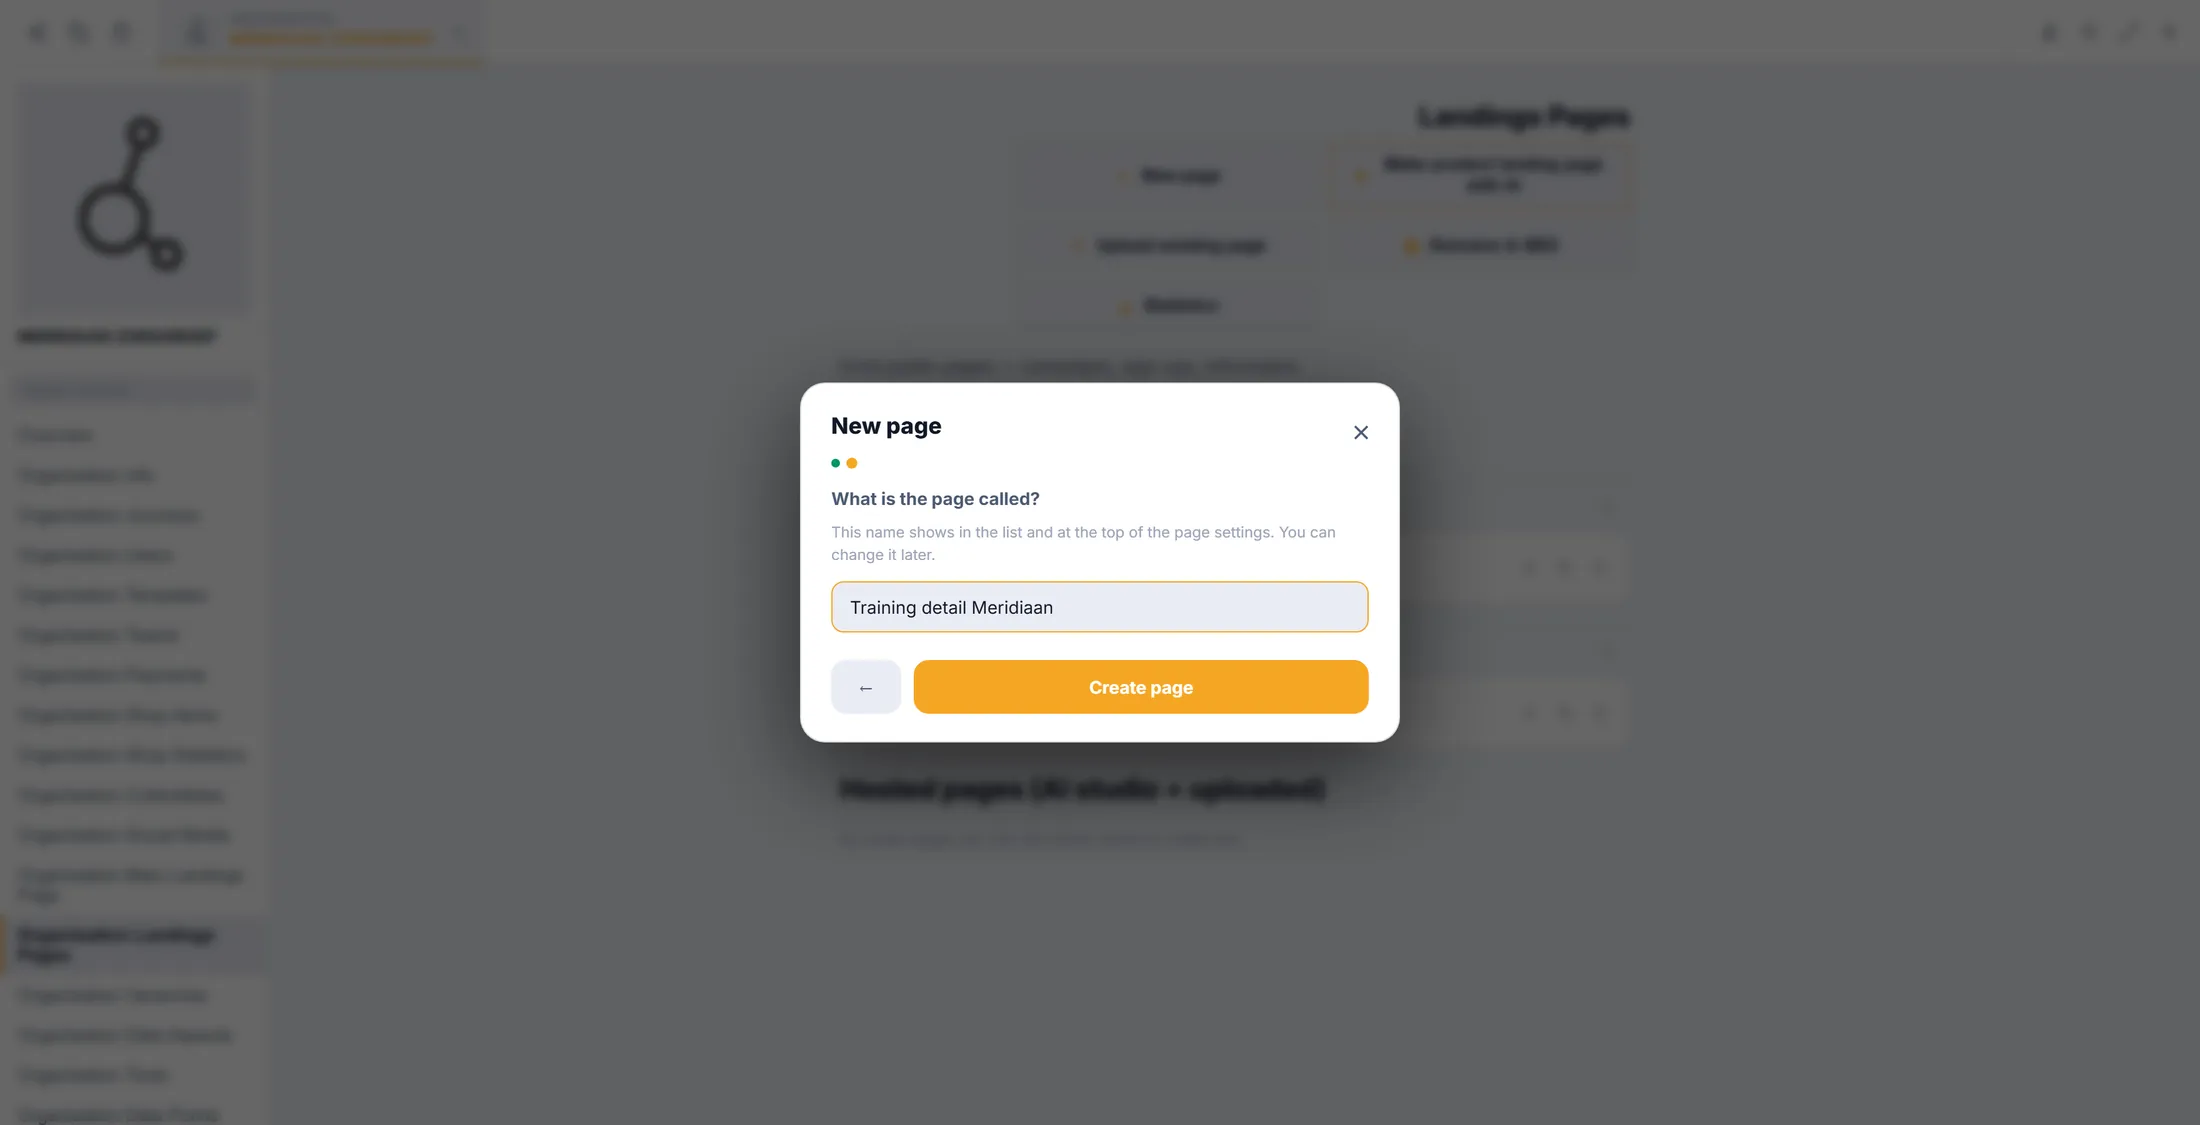
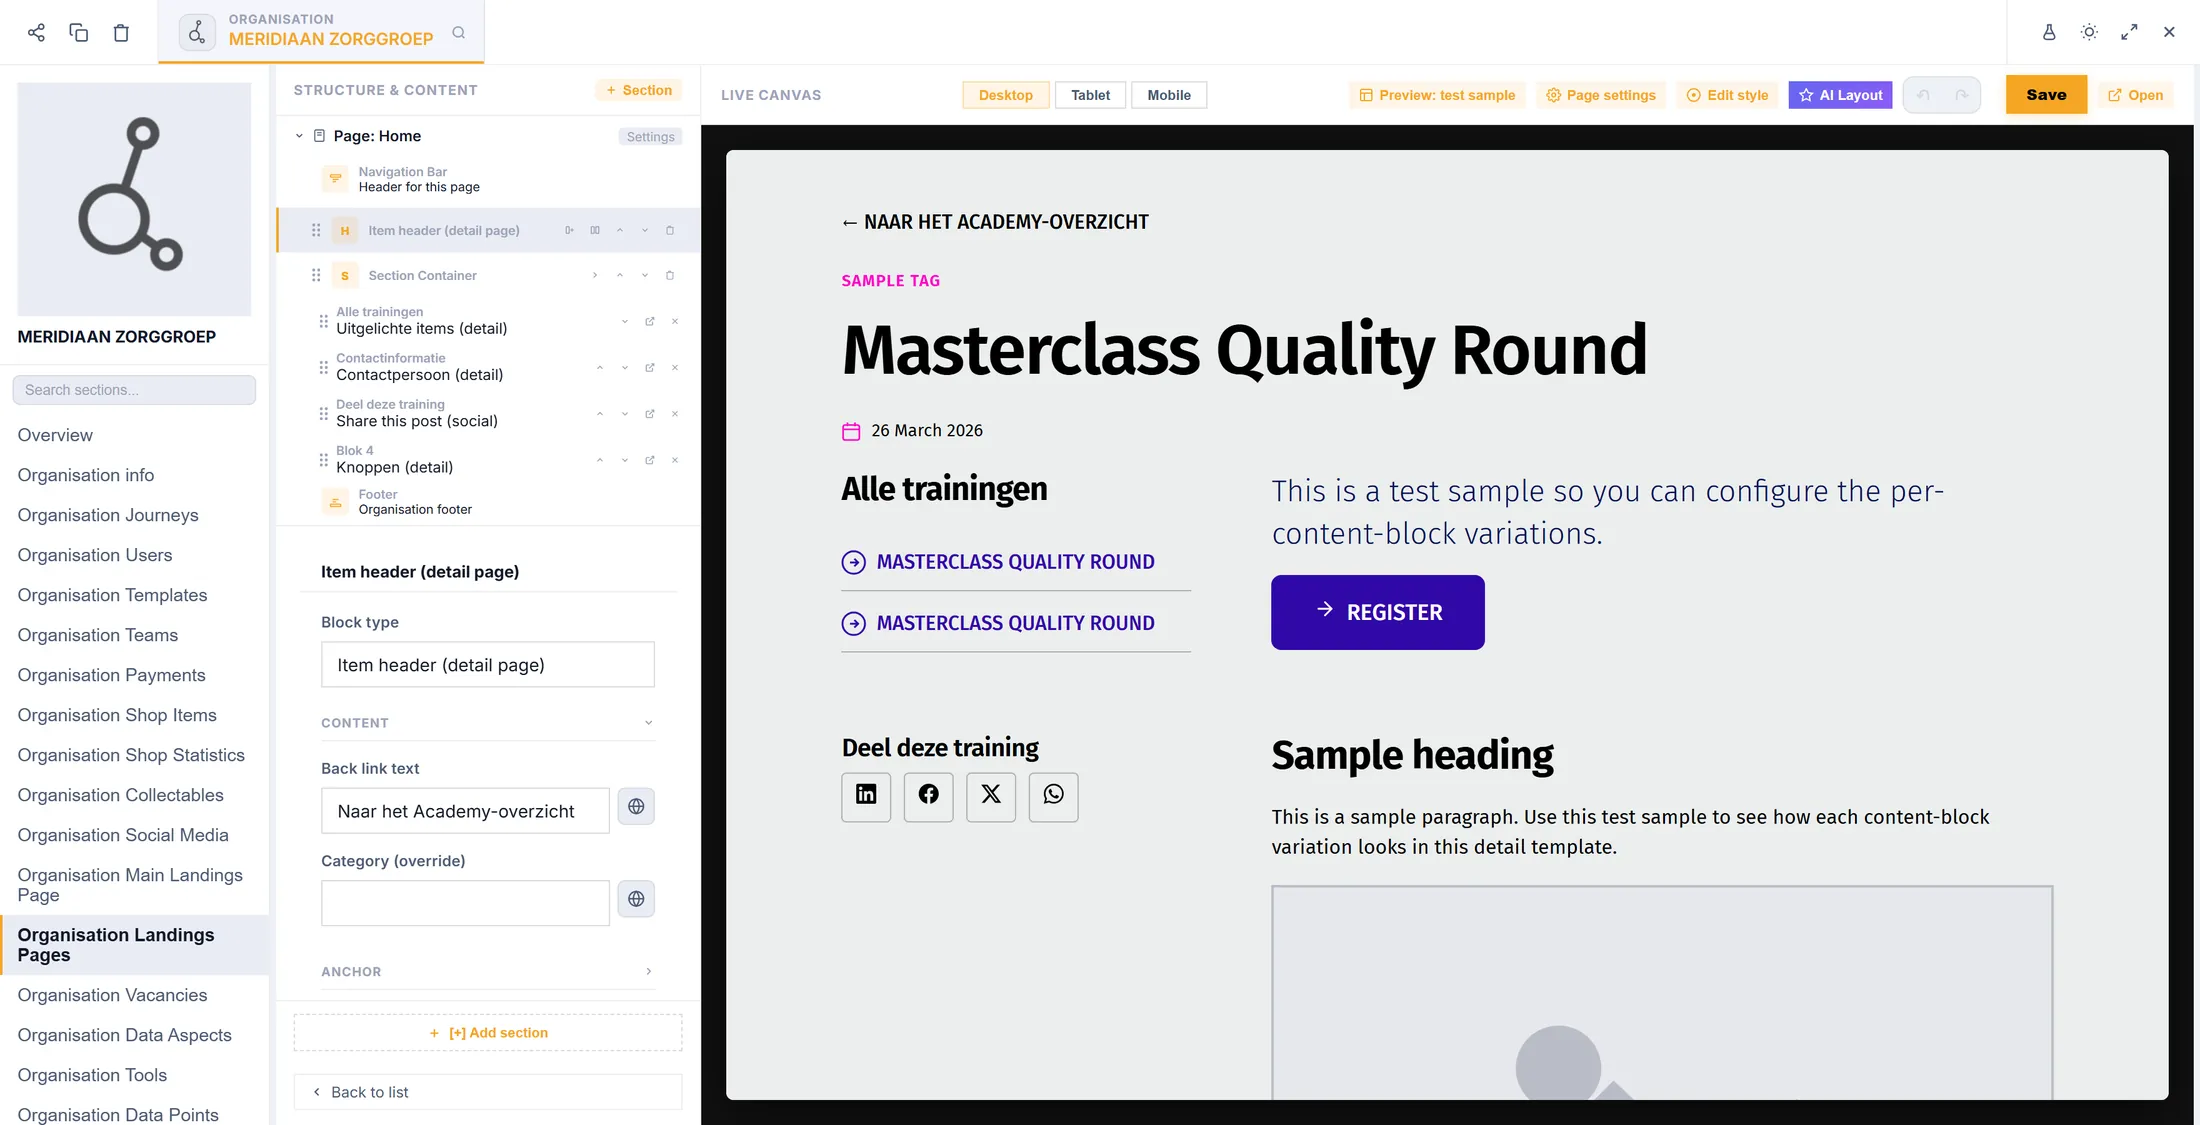
3.2 - Header and the two-column container
Add the header, then a container with a side column.
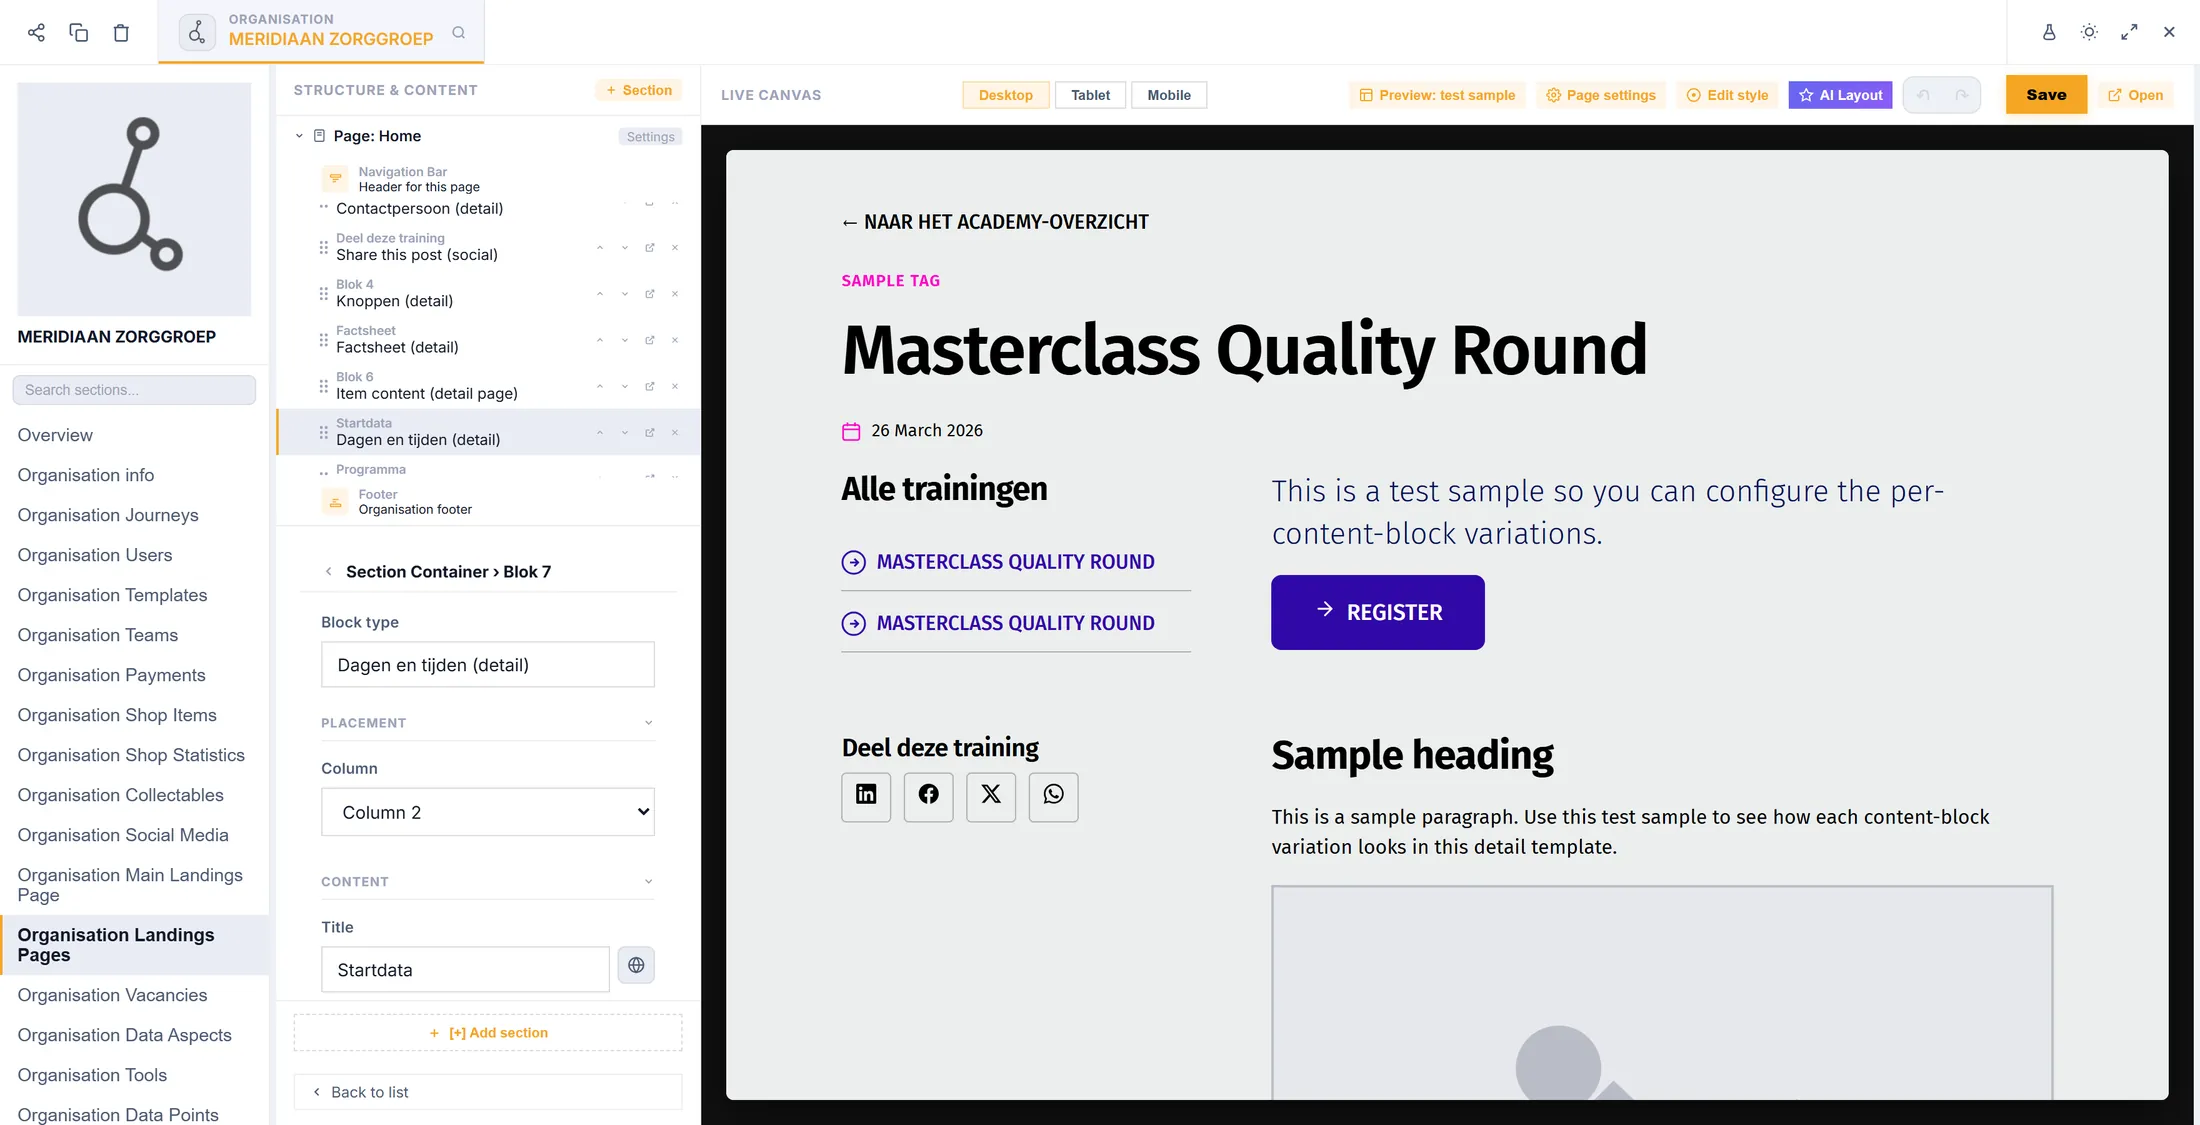
- Press [+] Add section and choose Item header (detail page). Set Back link text to "To the Academy overview".
- Press [+] Add section again and choose Section Container.
- Under Layout set Column layout to Sidebar left + main and Sidebar width to 280.
3.3 - Fill the side column and the main column
Put the blocks in the right column, in the right order.
- Column 1 (sidebar), with Add block: Featured items (detail) (title "All trainings"), Contact person (detail) and Share this post (social).
- Column 2 (main), in this order: Buttons (detail), Factsheet (detail), Item content (detail page), Days and times (detail), Programme parts (detail) and Registration form (detail).
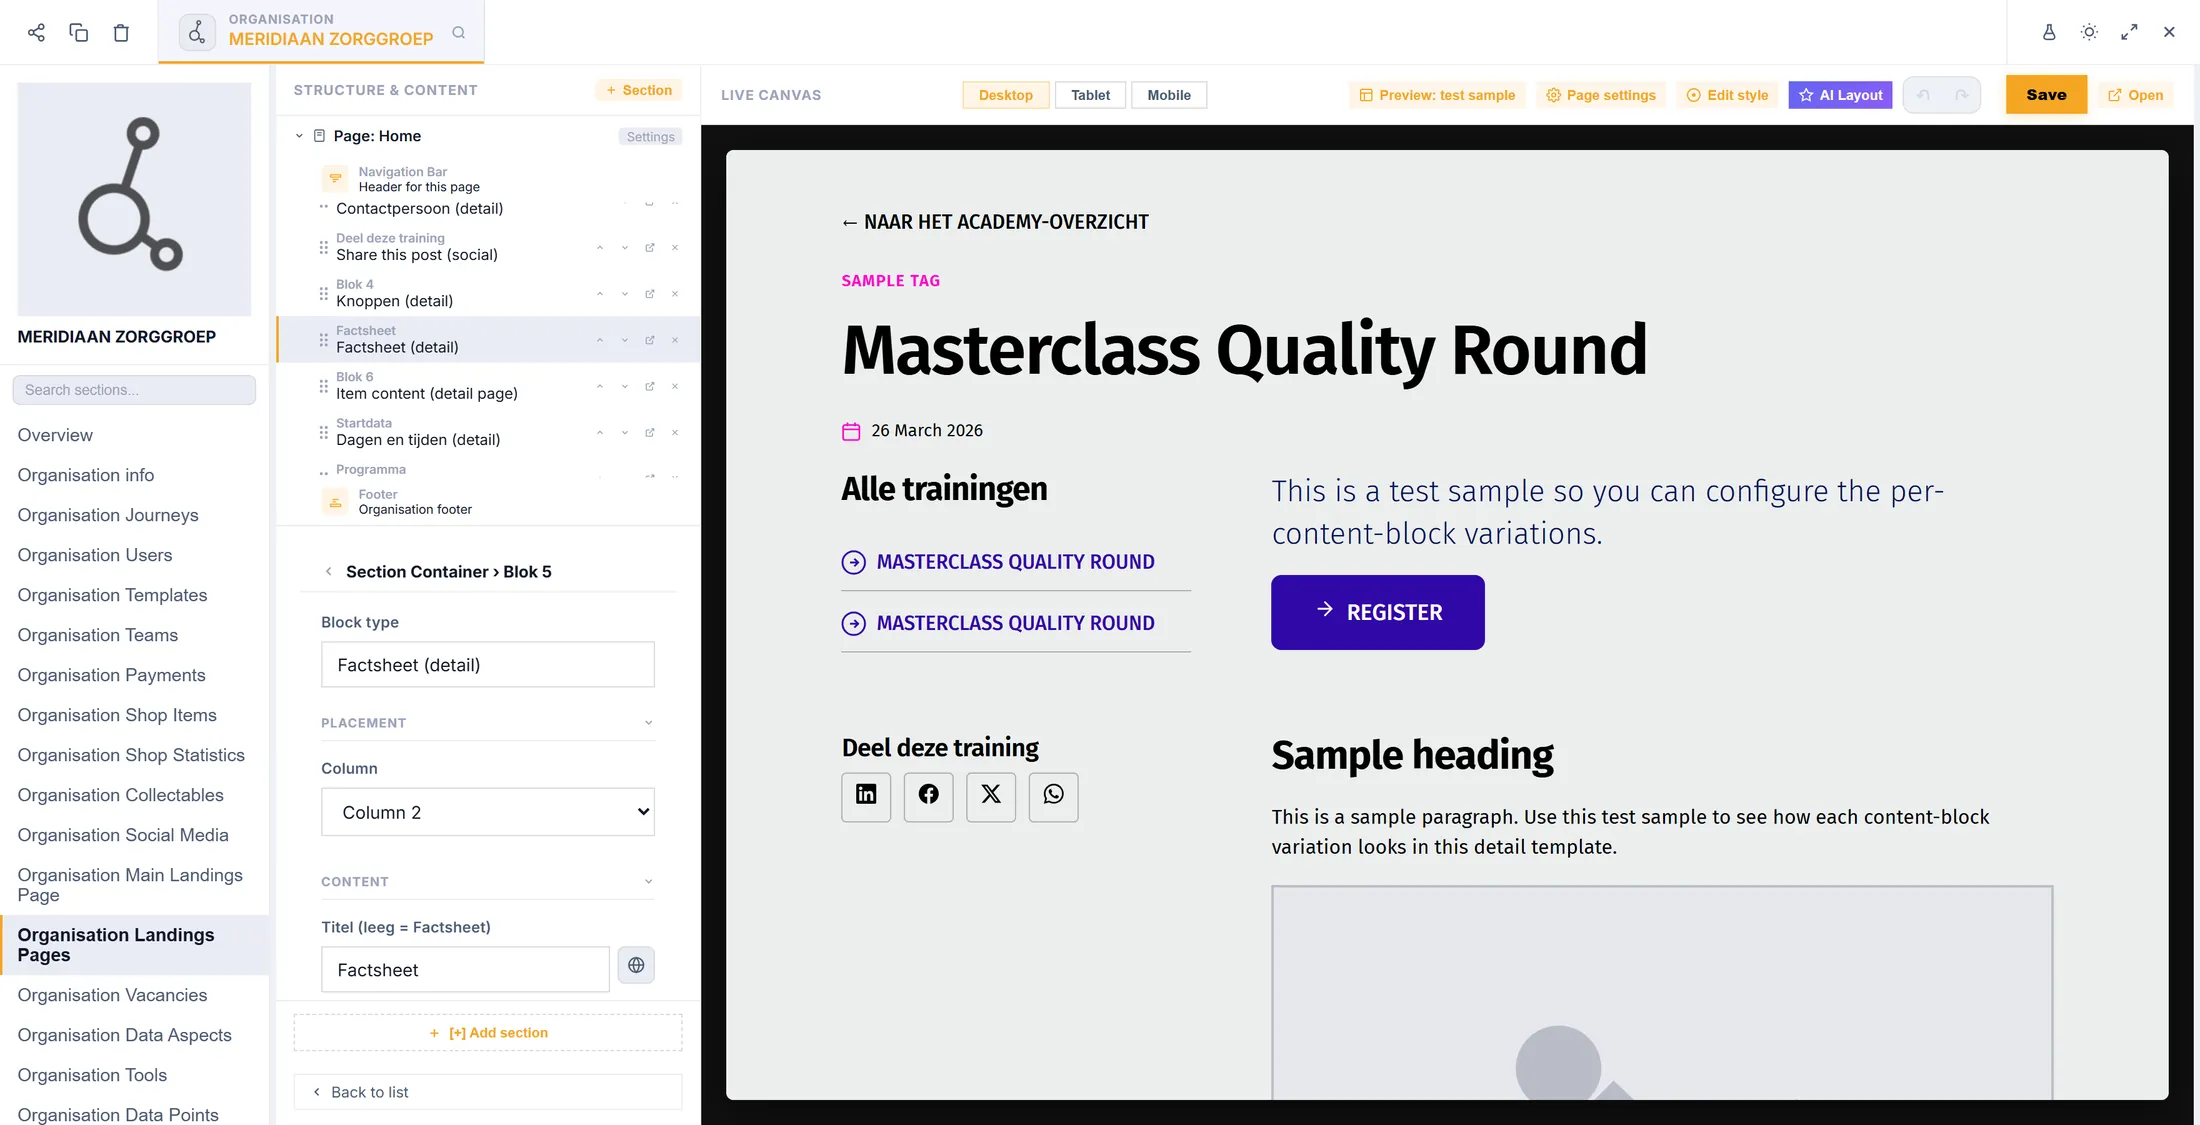
3.4 - Make the dates and the form work
Two settings make the date button and the form work.
- Block Days and times (detail): switch on Bar "Sign up now" + pick a date. At "Journeys (other dates)" choose your journey. Without this there is no Choose this date button.
- Block Registration form (detail): leave Title empty (it then says "Costs and registration"), fill in Link terms and conditions and Link privacy statement, and optionally a Newsletter audience.
- With a terms link, the tick for the terms is required.
3.5 - Blocks under the container
Add questions, related trainings and a call to action.
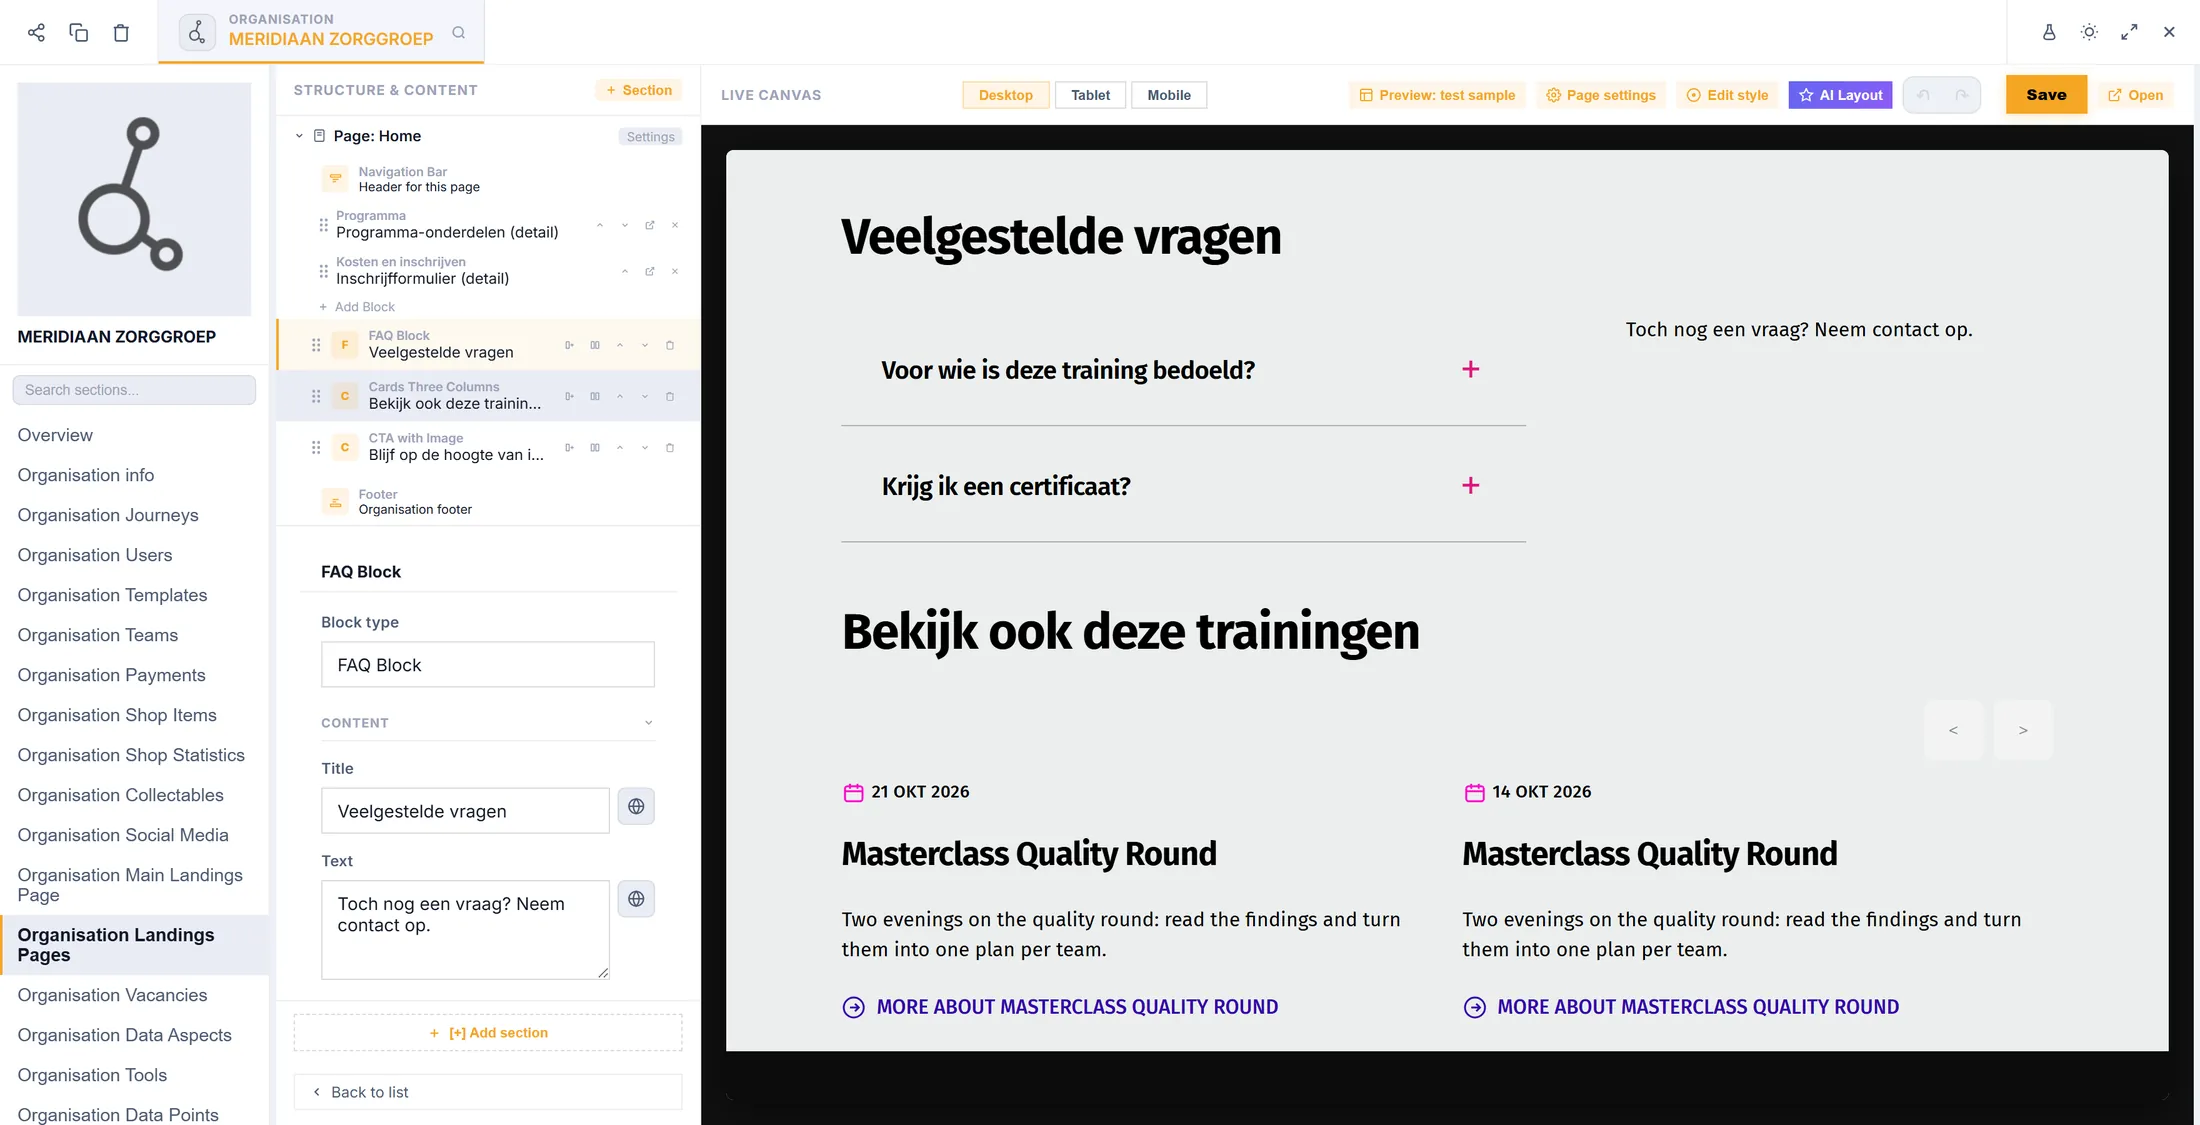
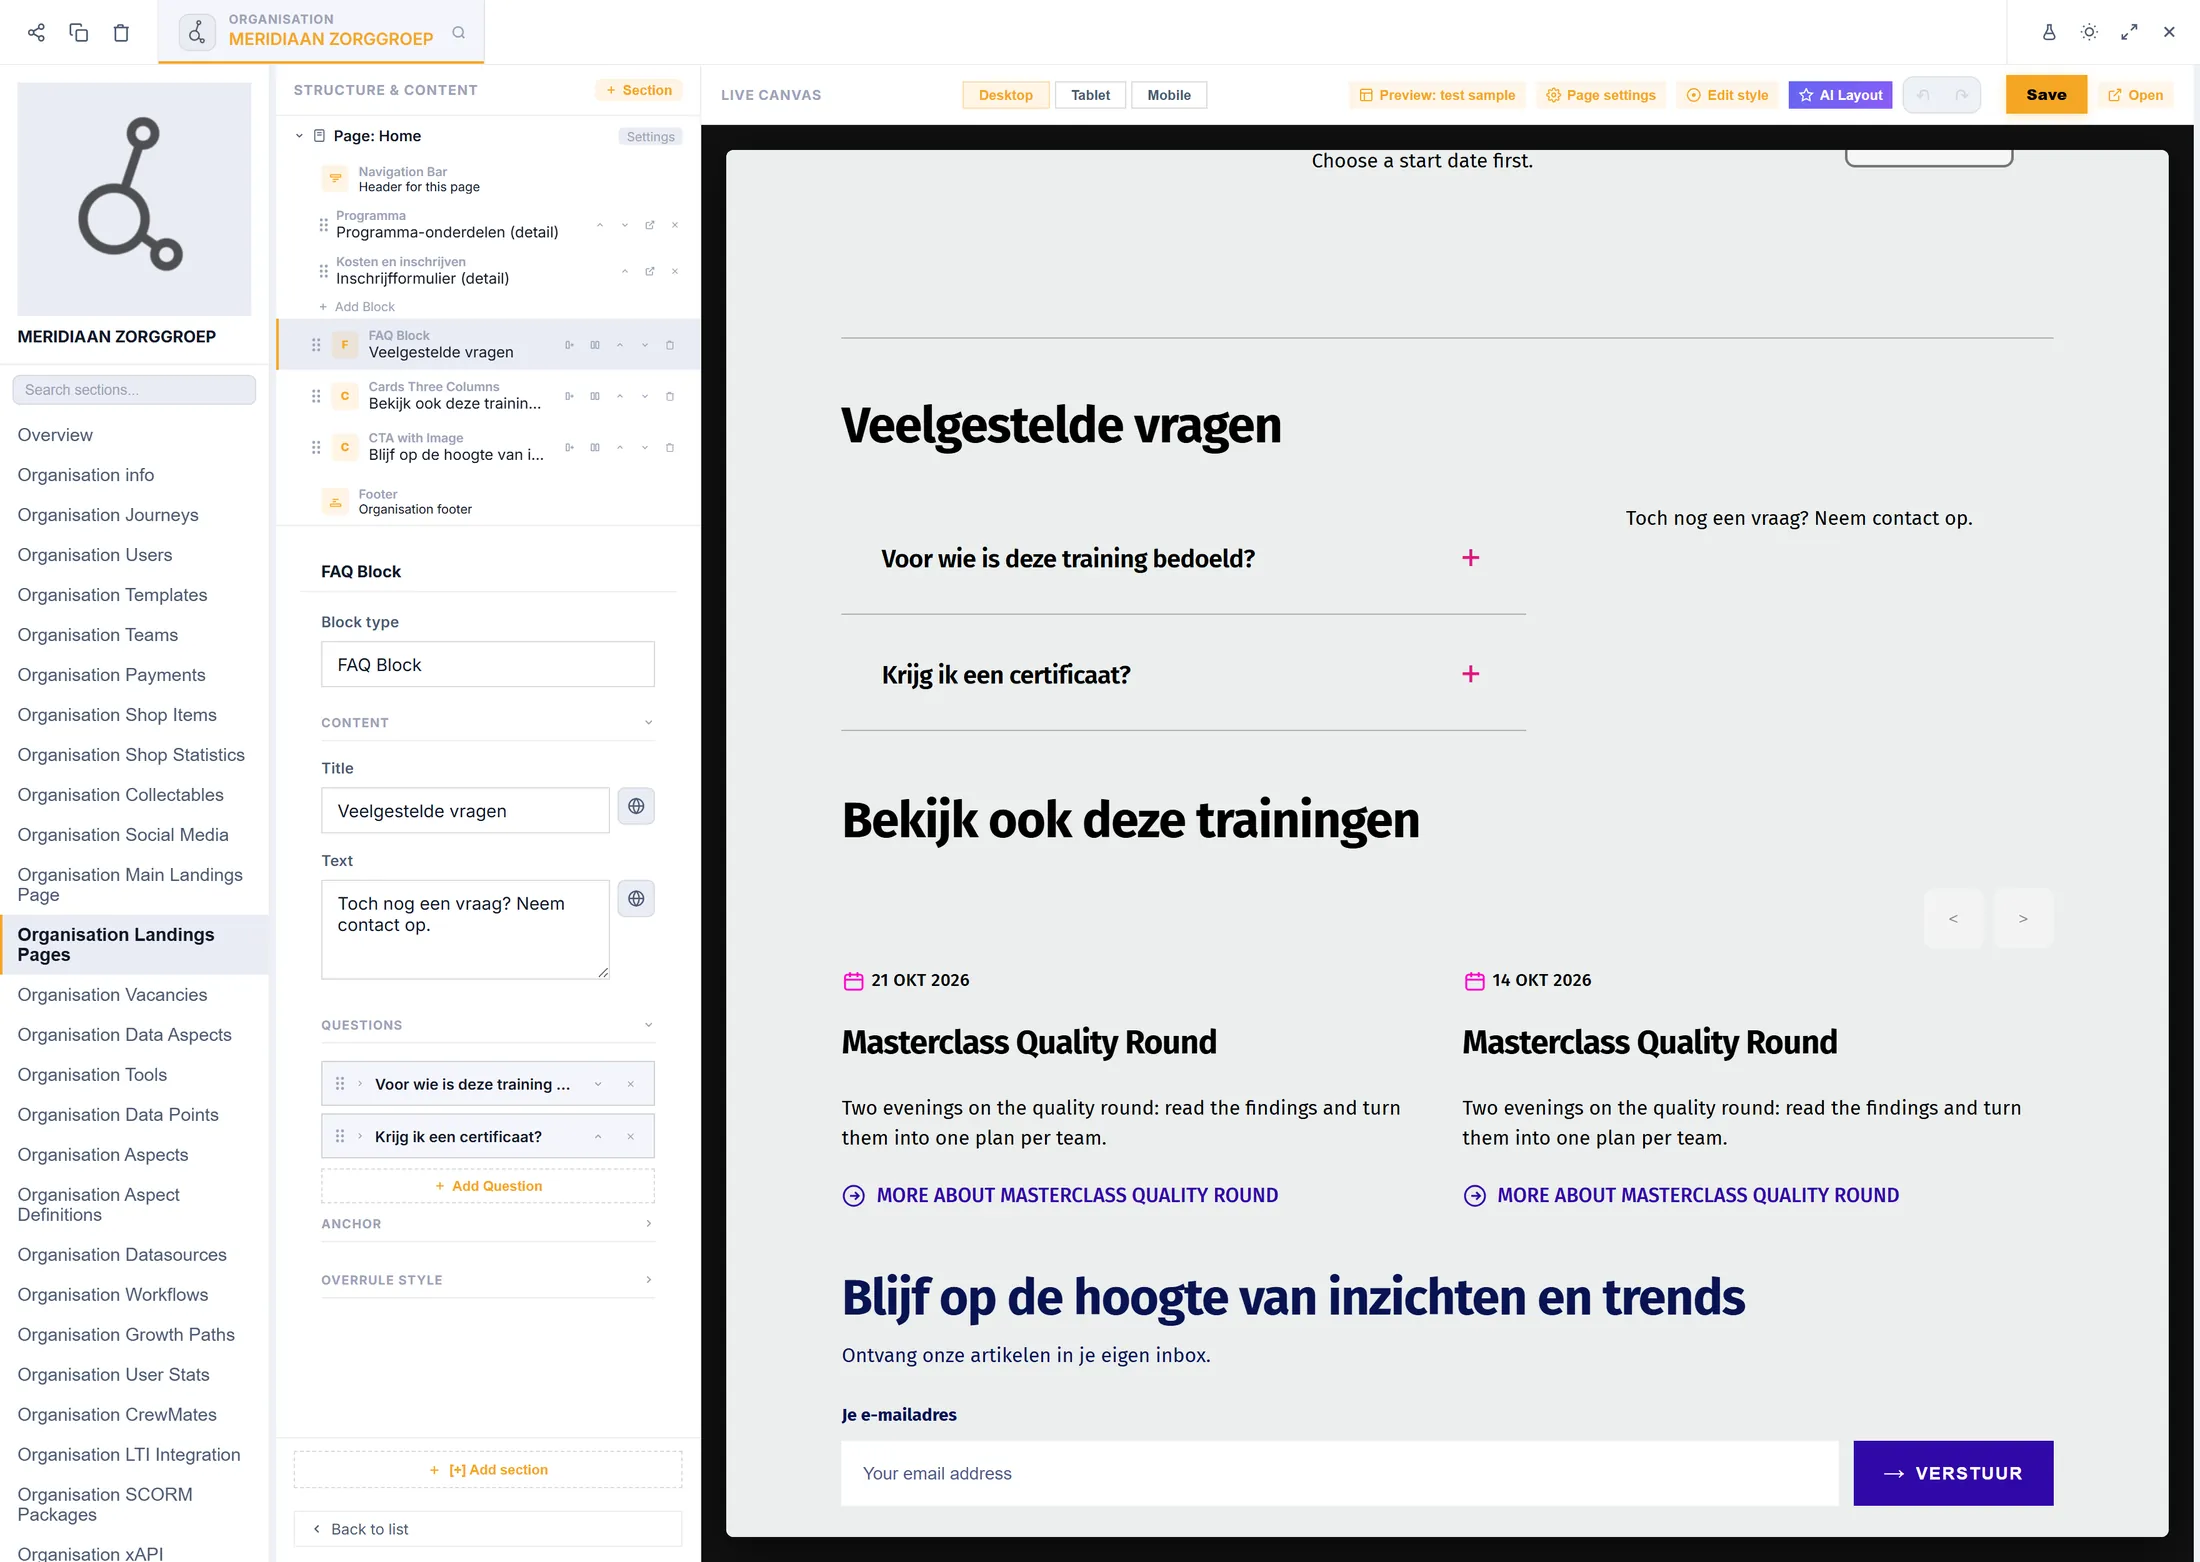
- Add an FAQ block with two questions.
- Add Cards Three Columns: Display = carousel, and Show on detail page = "Only posts with the same tag".
- Add a CTA with an image and a Newsletter audience.
3.6 - Preview with your own training, then go Live
Look at the page with real data, then switch it on.
- Press Preview: test preview, then Choose preview item and pick your training.
- You see the page with your factsheet, contact and dates. The form is there with a greyed-out button. That is right.
- Open Page settings, set the status to Live - publicly visible and press Save.
4.1 - Link the template to Trainings
Tell CoVince which template Trainings use.
- Open the Editor, group Data and measurement, section Organisation Data Aspects. Scroll down.
- Block Detail page templates: in the dropdown Trainings choose Training detail Meridiaan .
- Press Save detail page templates. It is saved. Empty means "CoVince standard".
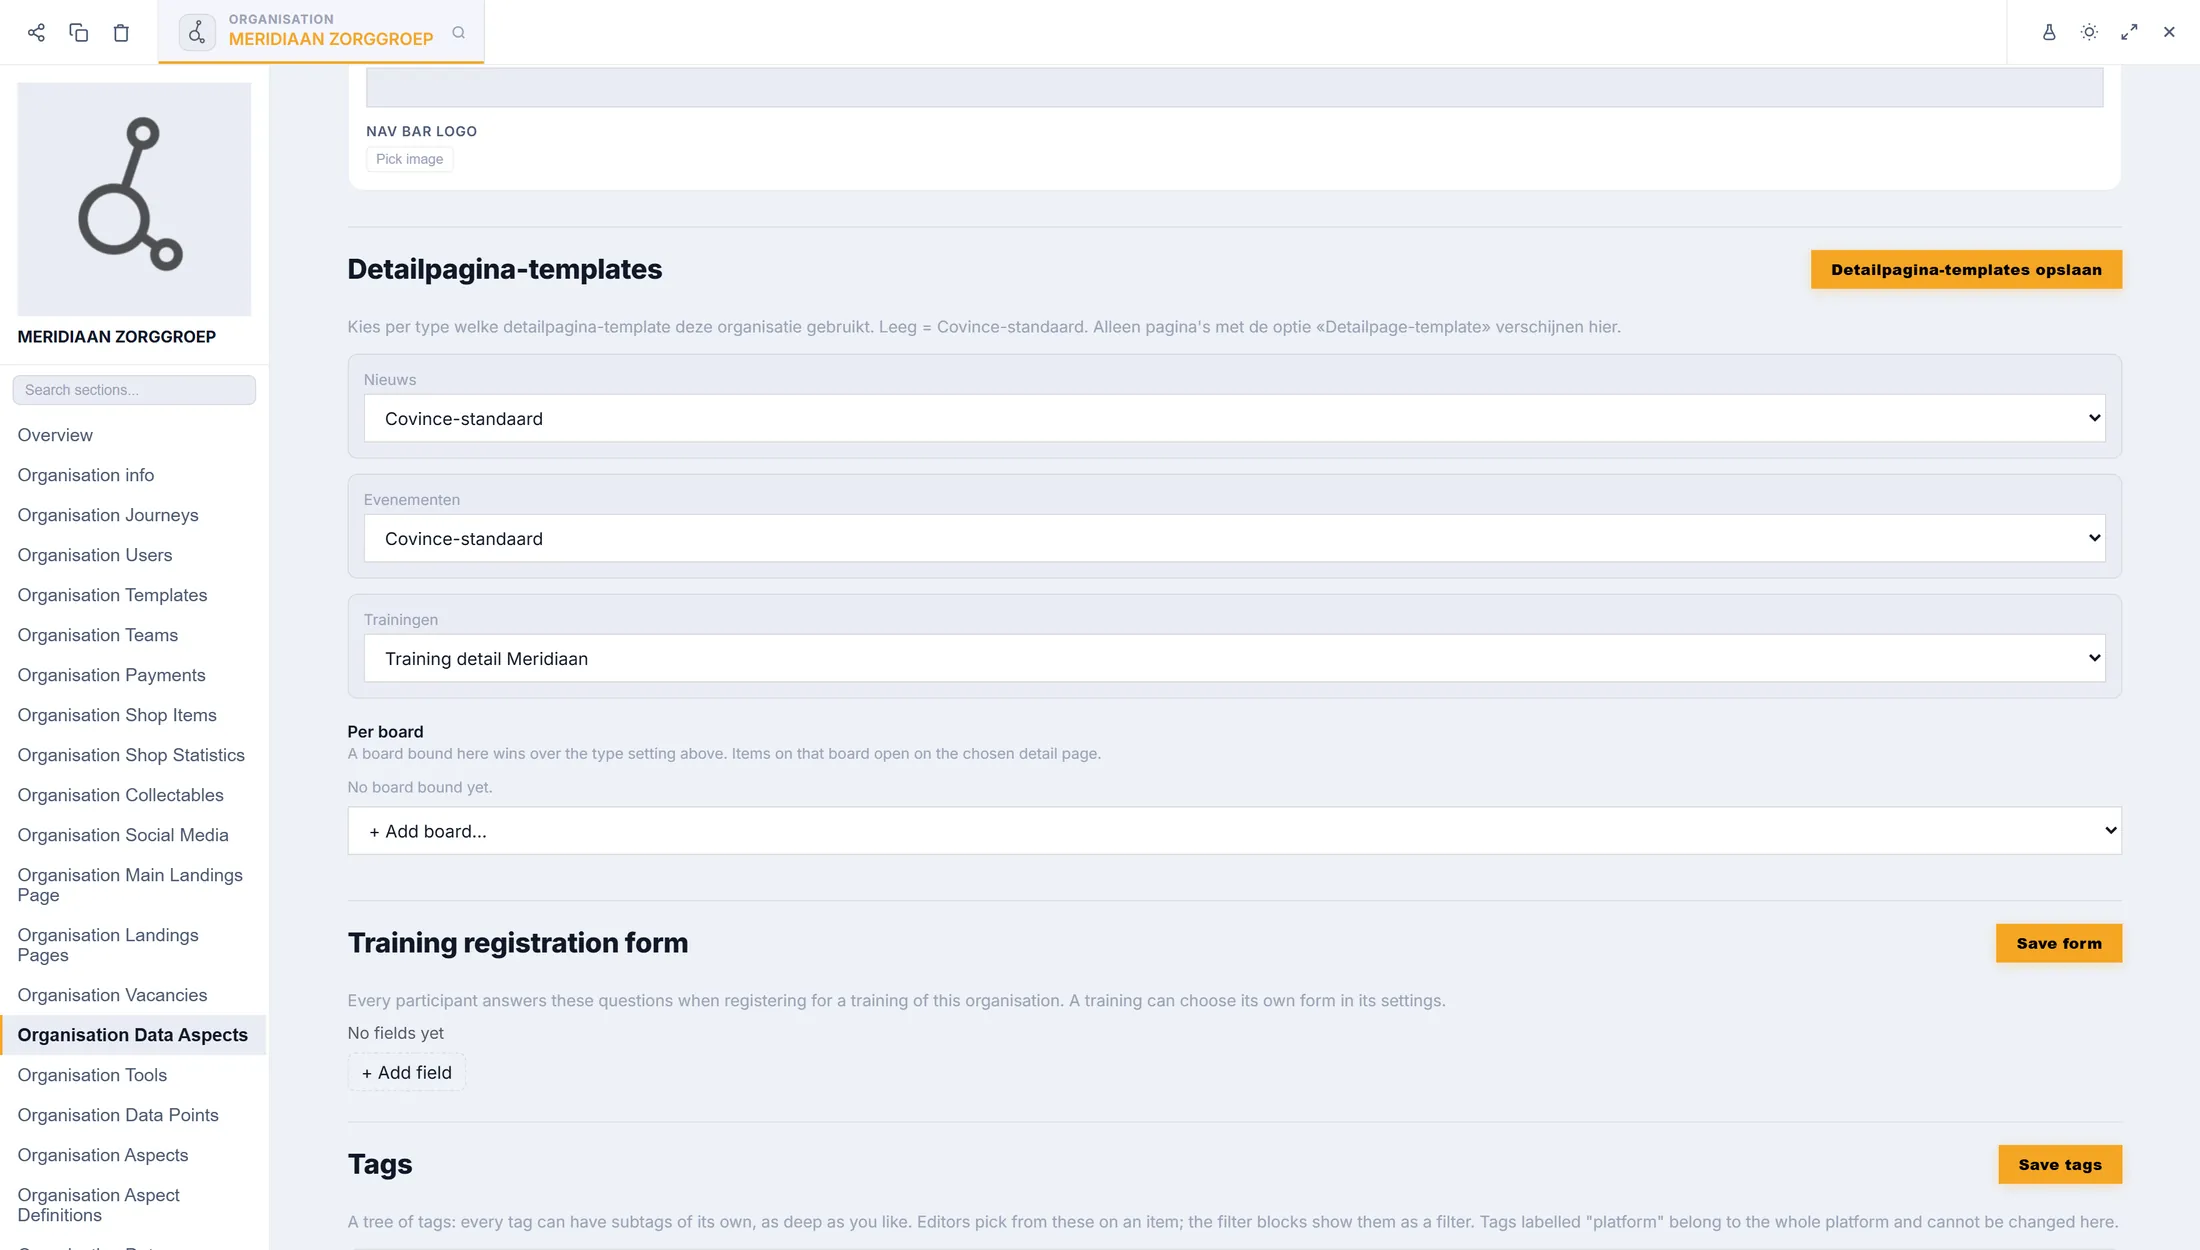
Trainings use your template. 4.2 - The registration form for all trainings
Set the questions every training asks.
- In the block Registration form trainings add questions: for example "Function" (required) and "Level" (a choice).
- Press Save form.
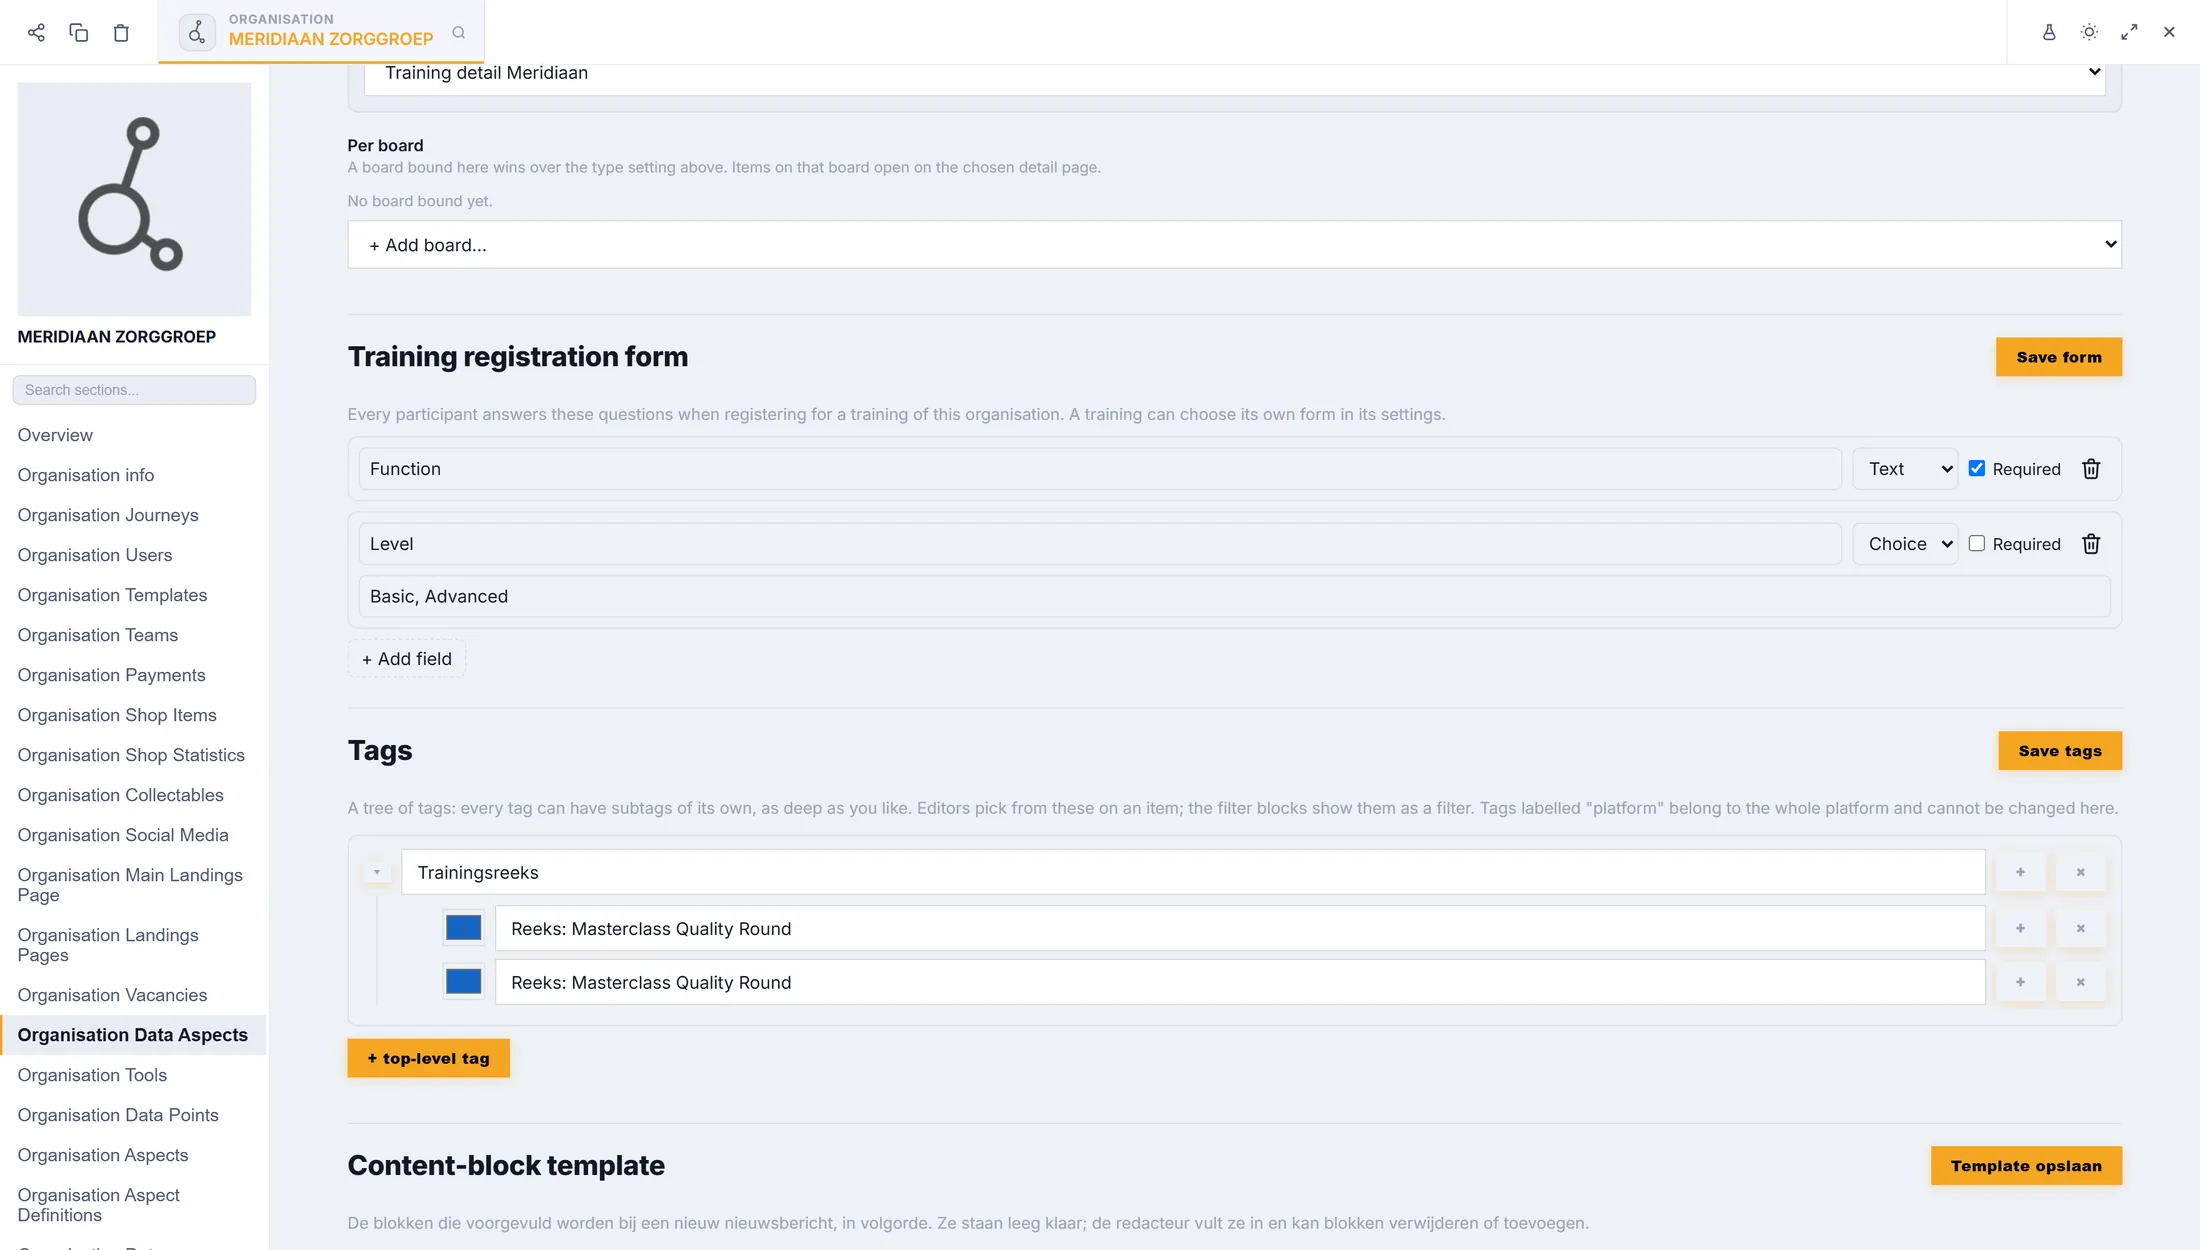
Two questions for every training. 4.3 - Check it as a visitor
Open the training in a private window.
- In the private window open the address of your training: the event address with the id of your training (you find it in the address of the event popup, or in the "open event" link).
- You are sent on to your template page, with your training in it.
The visitor sees your template with your training. 5.1 - Optional: an overview page with a filter
A page that lists all trainings.
- Make a new regular page called Academy .
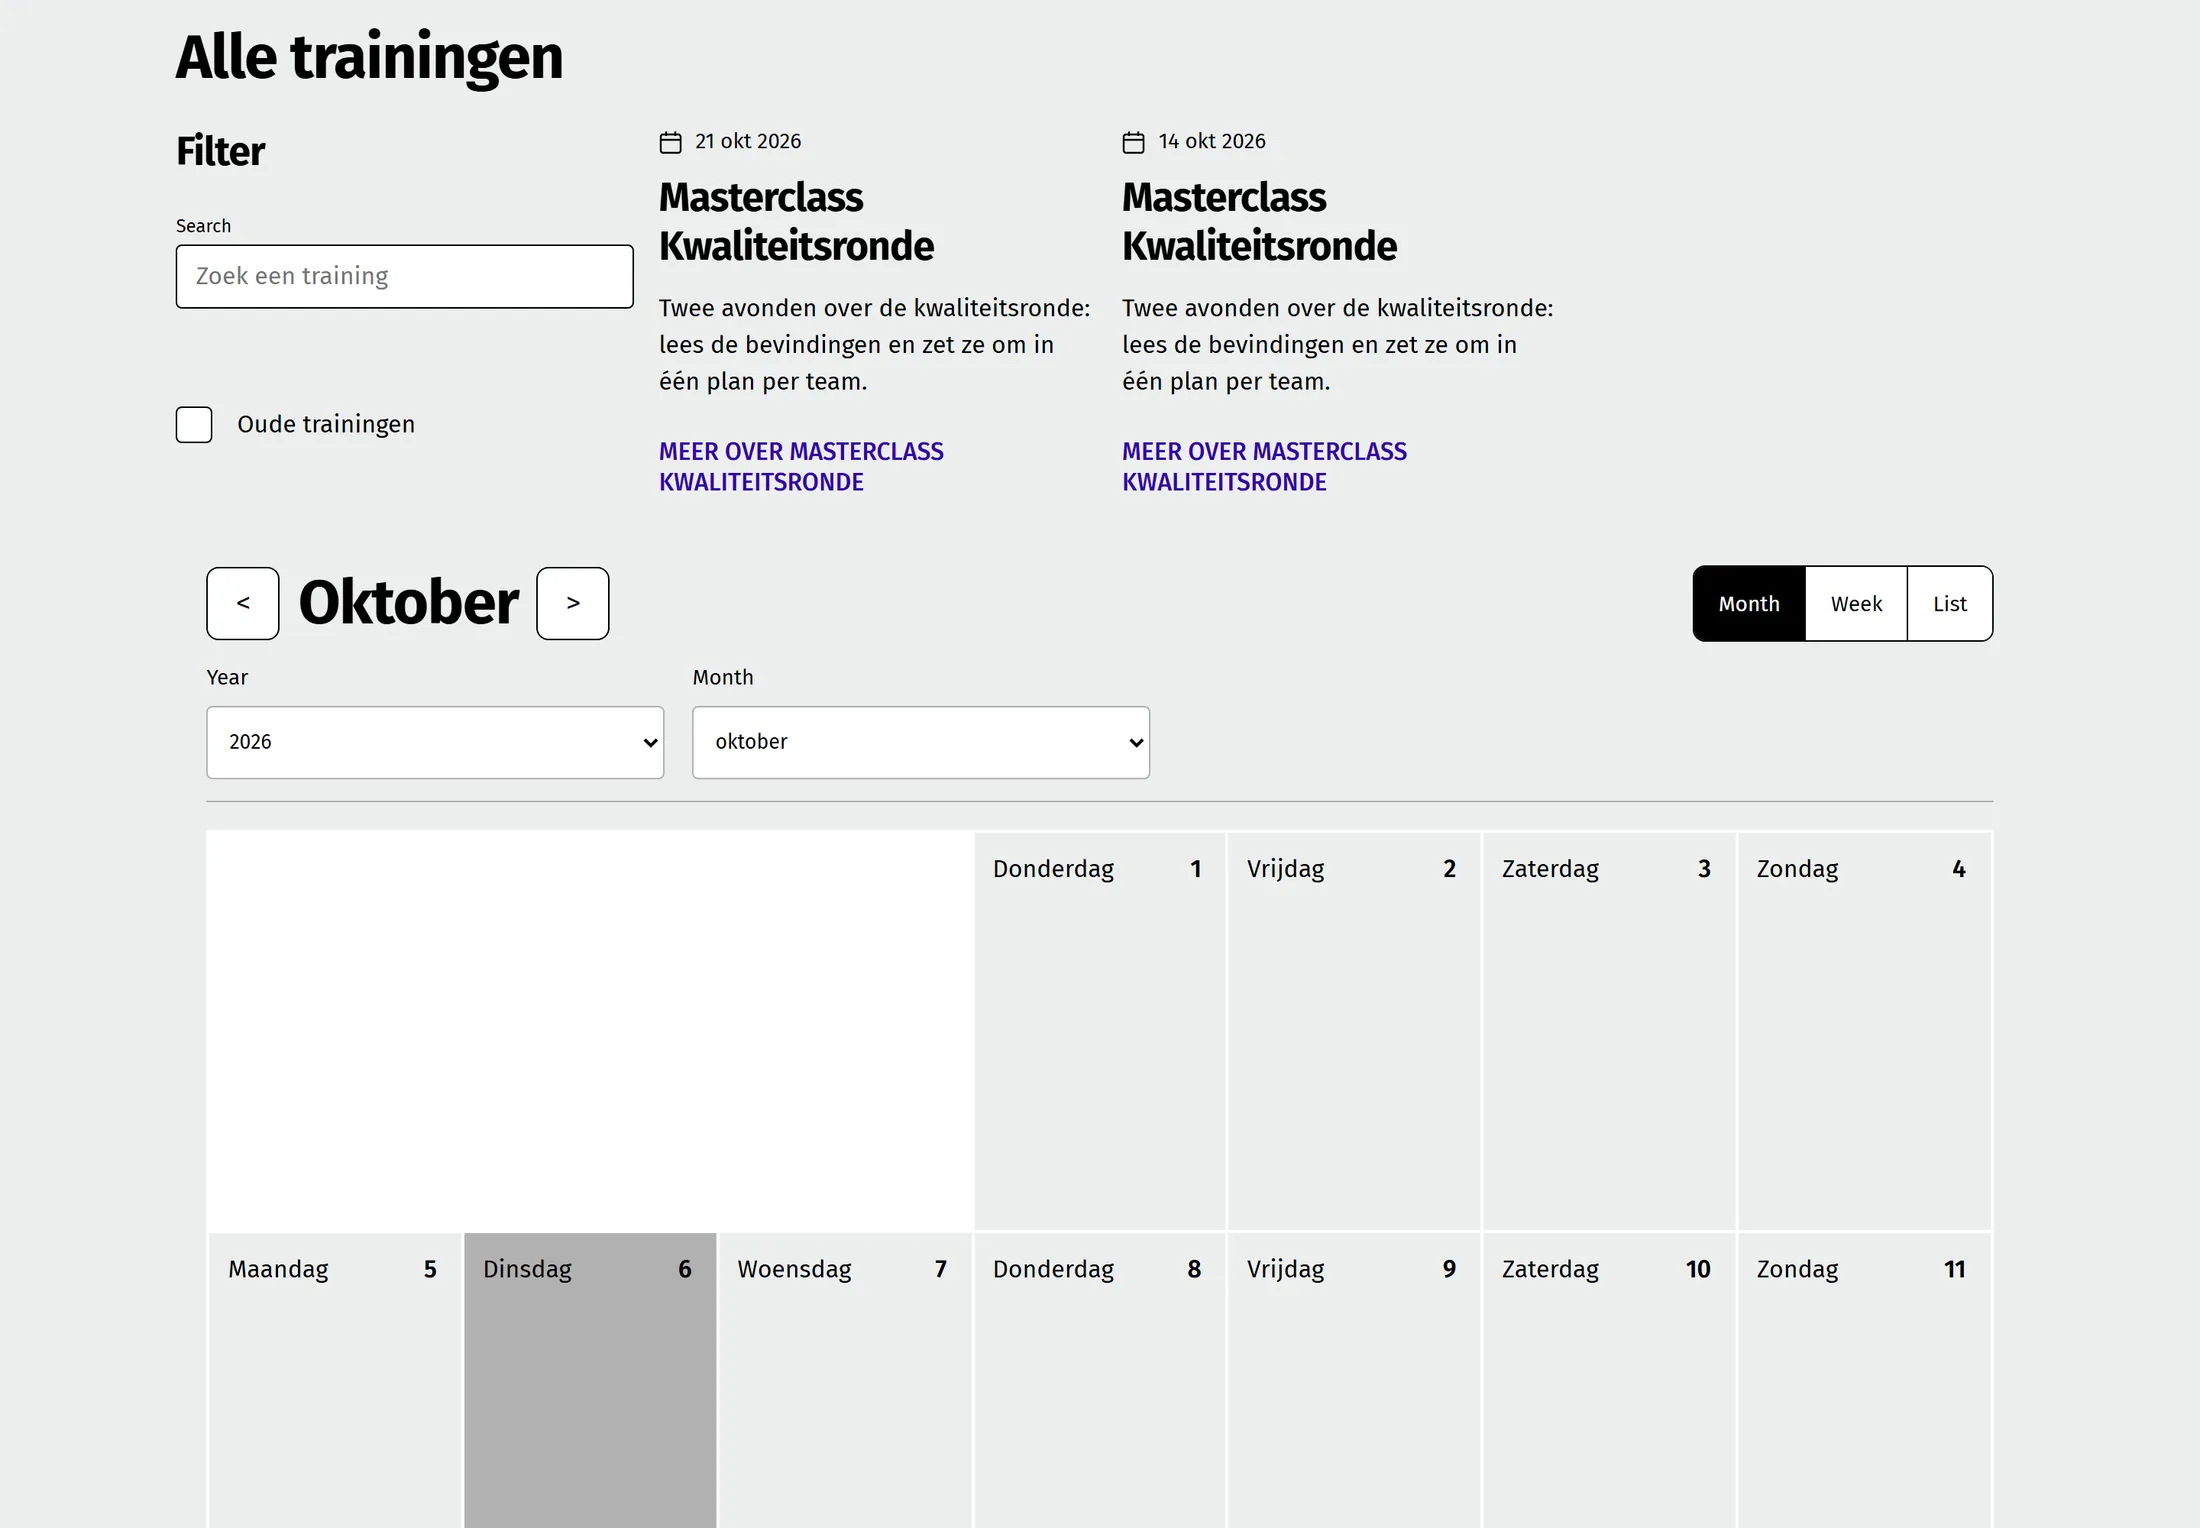
- Add the block Filter with cards: Post types = TRAININGS, switch on the search box, Only upcoming items and the tick for past ones with the text "Old trainings".
- Search finds on title and description. Past trainings show only after the tick.
5.2 - Optional: a calendar of trainings
Show the trainings in a calendar.
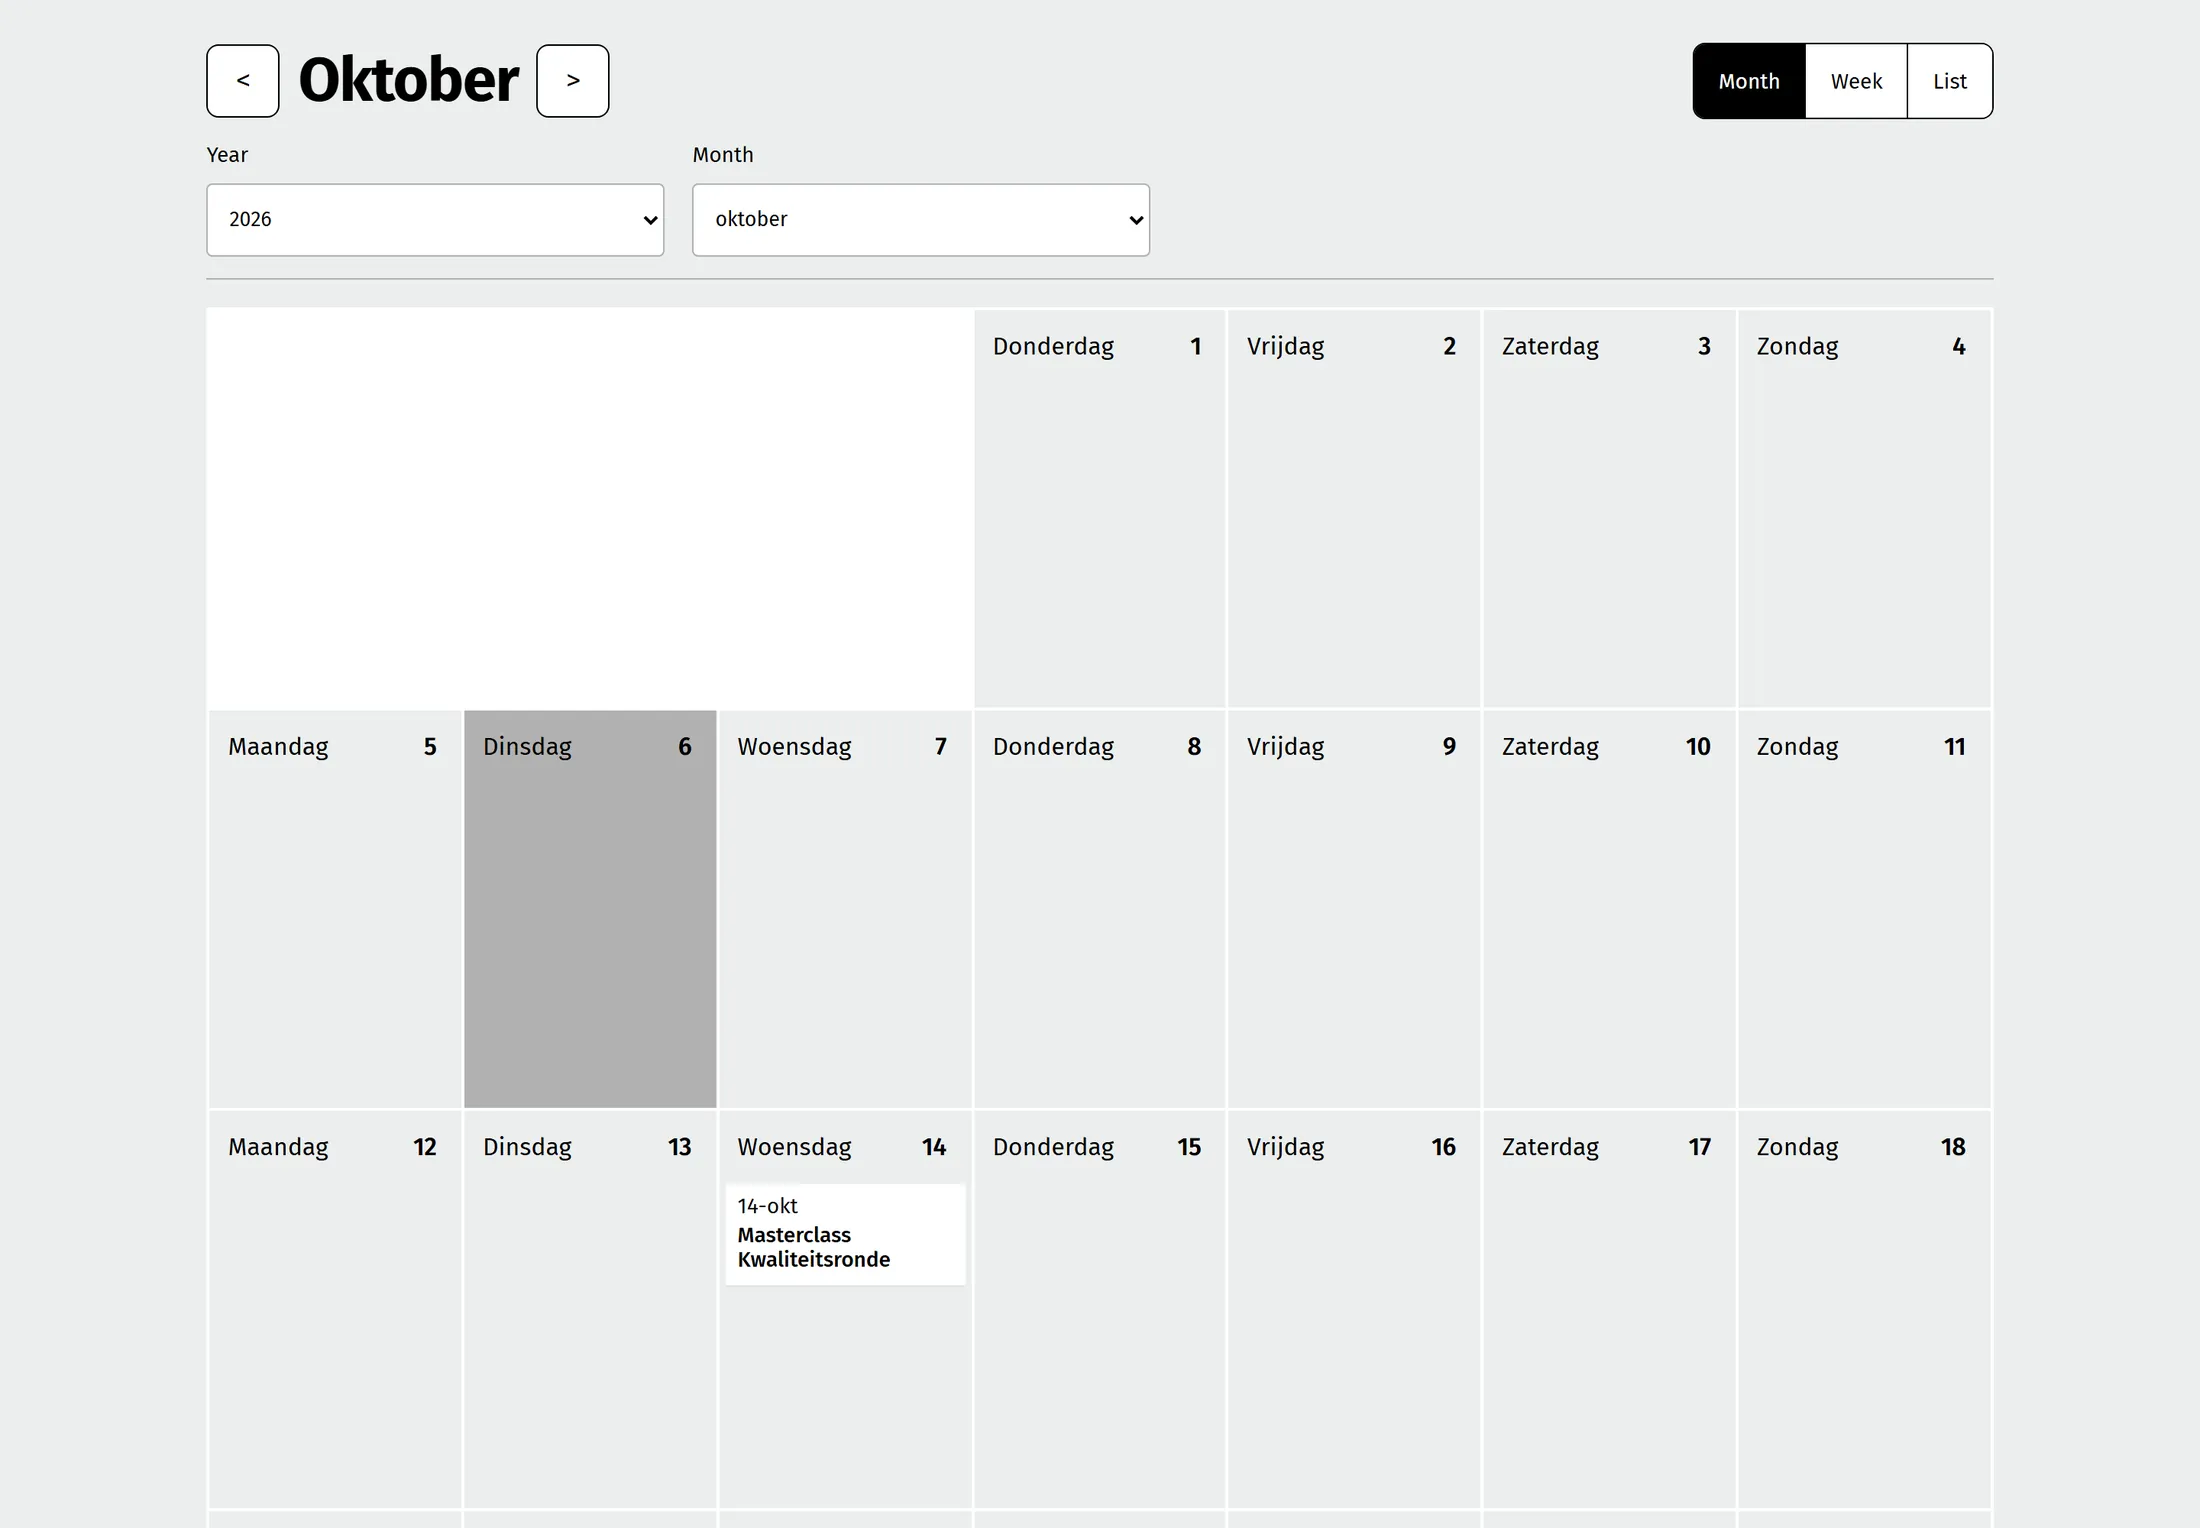
- Add the block Calendar: Organisations = your organisation, Event types = Training.
- You get Month, Week and List. Click a training to open its detail page. On a phone it shows as a list.
6.1 - As a visitor: pick a date
Log in and choose a date on the training page.
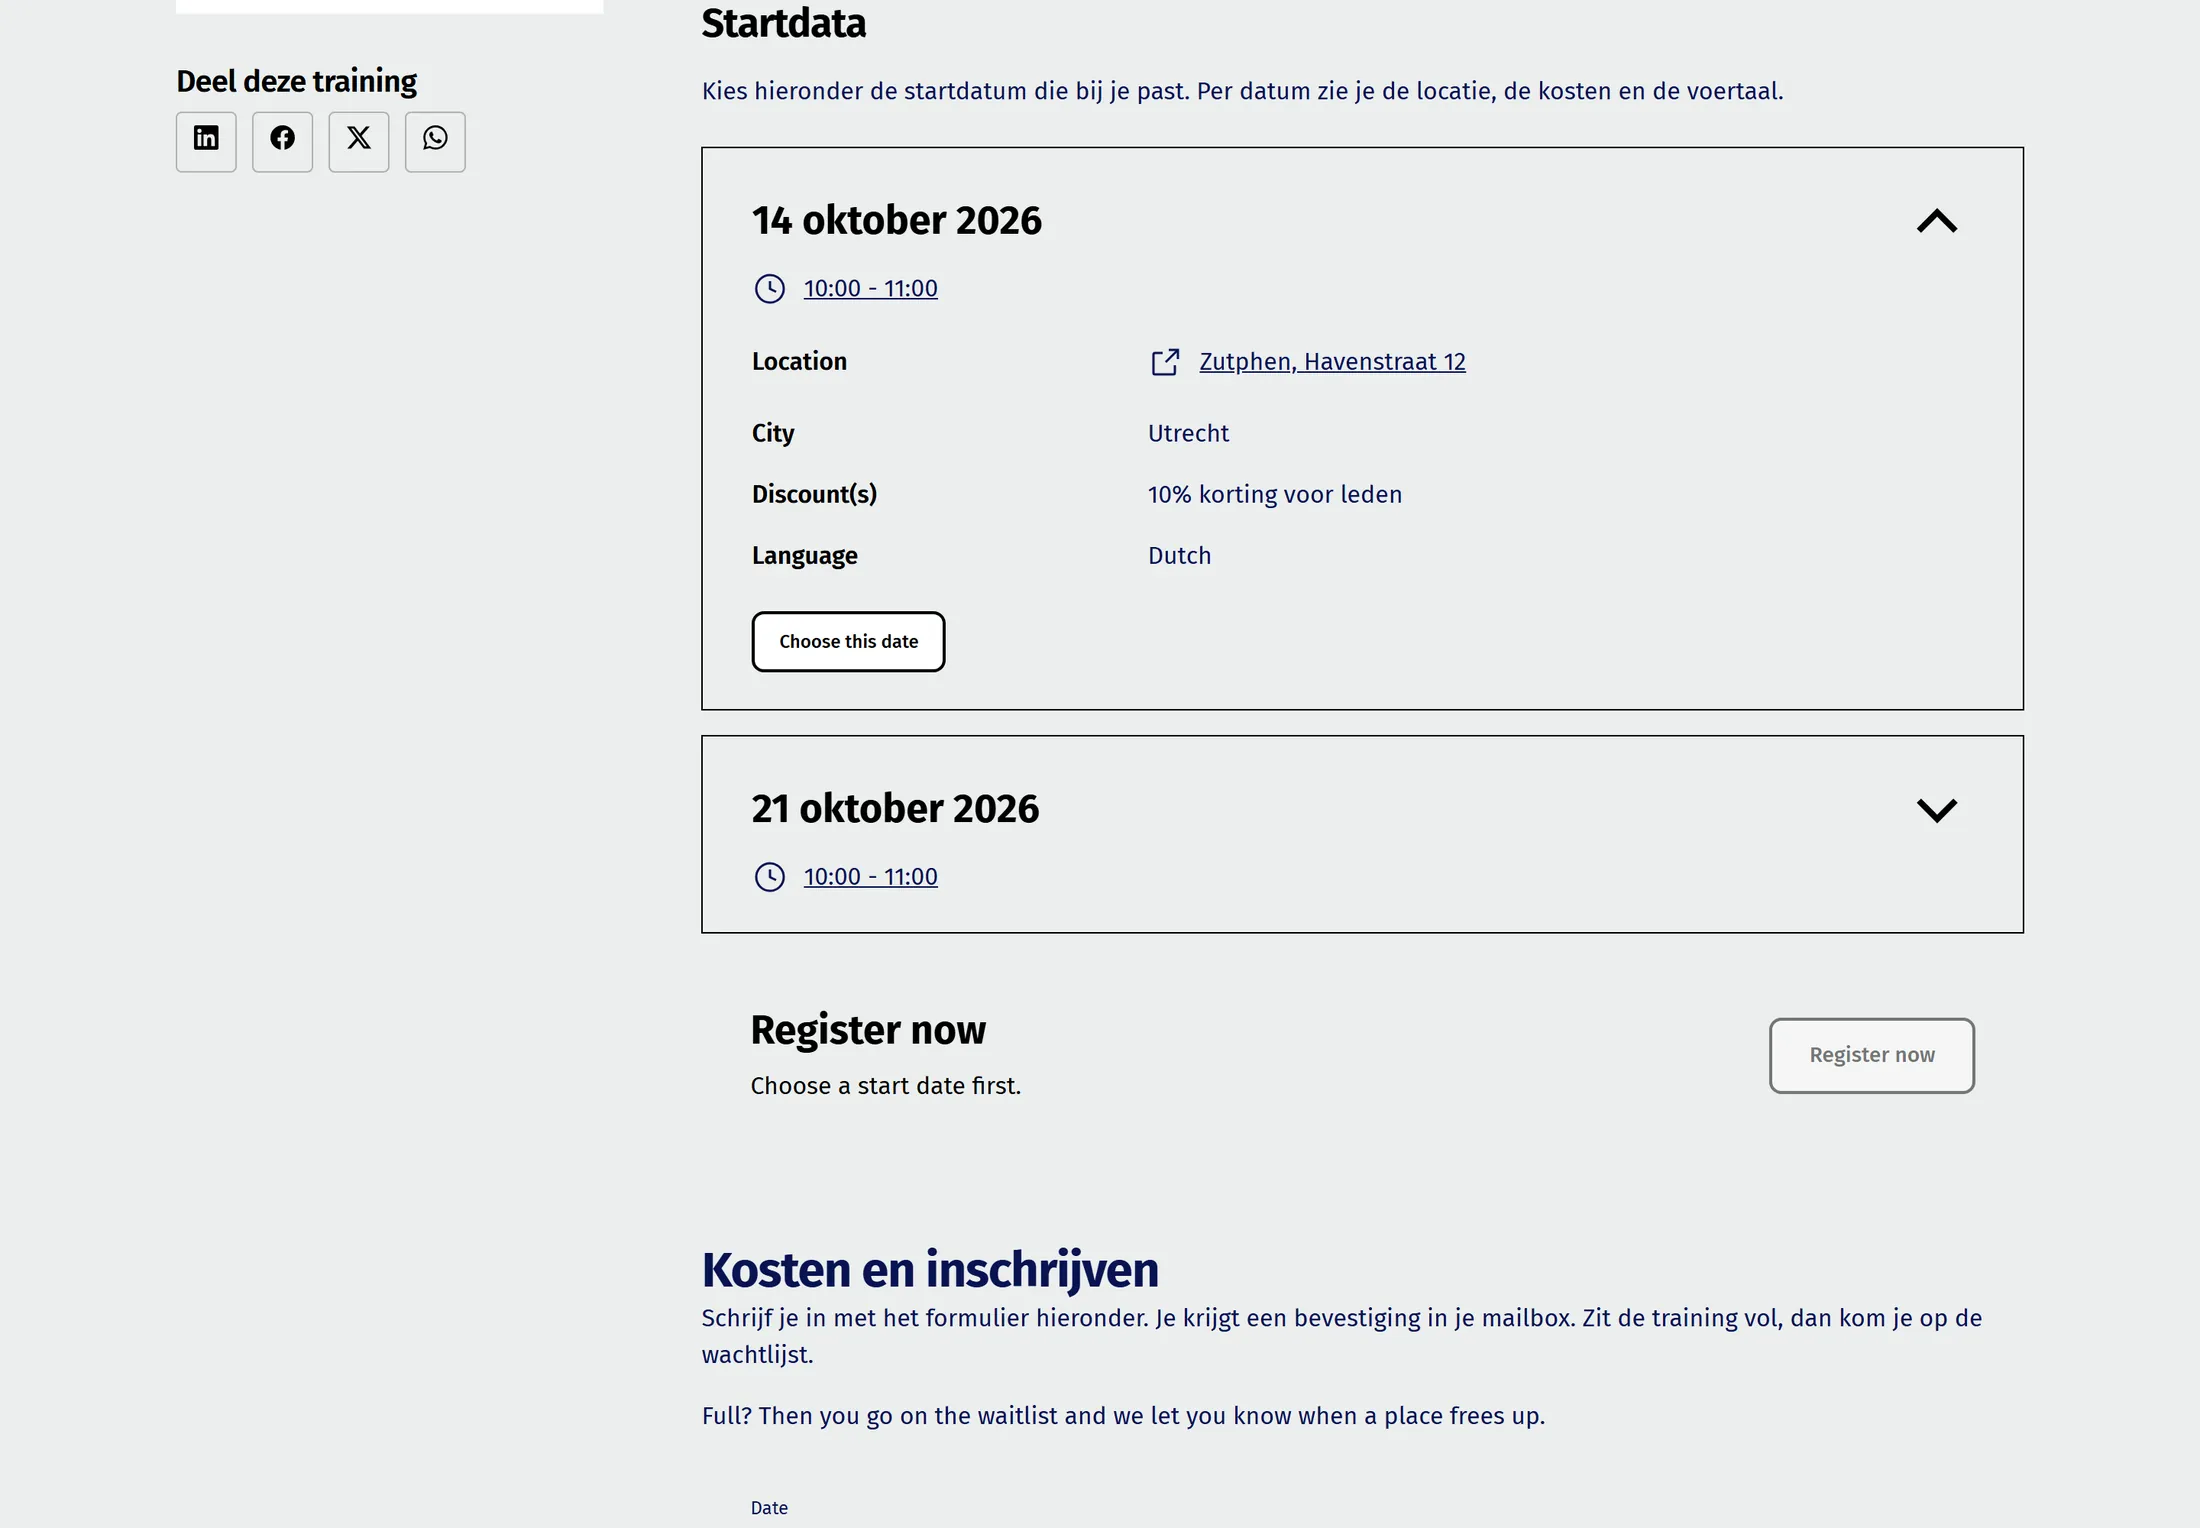
- Press Sign up at the top. The page scrolls to the start dates.
- Open a date card and press Choose this date.
- The bar Sign up now becomes active and the form shows the date.
6.2 - Fill in the form and register (free)
Sign up for one place, free of charge.
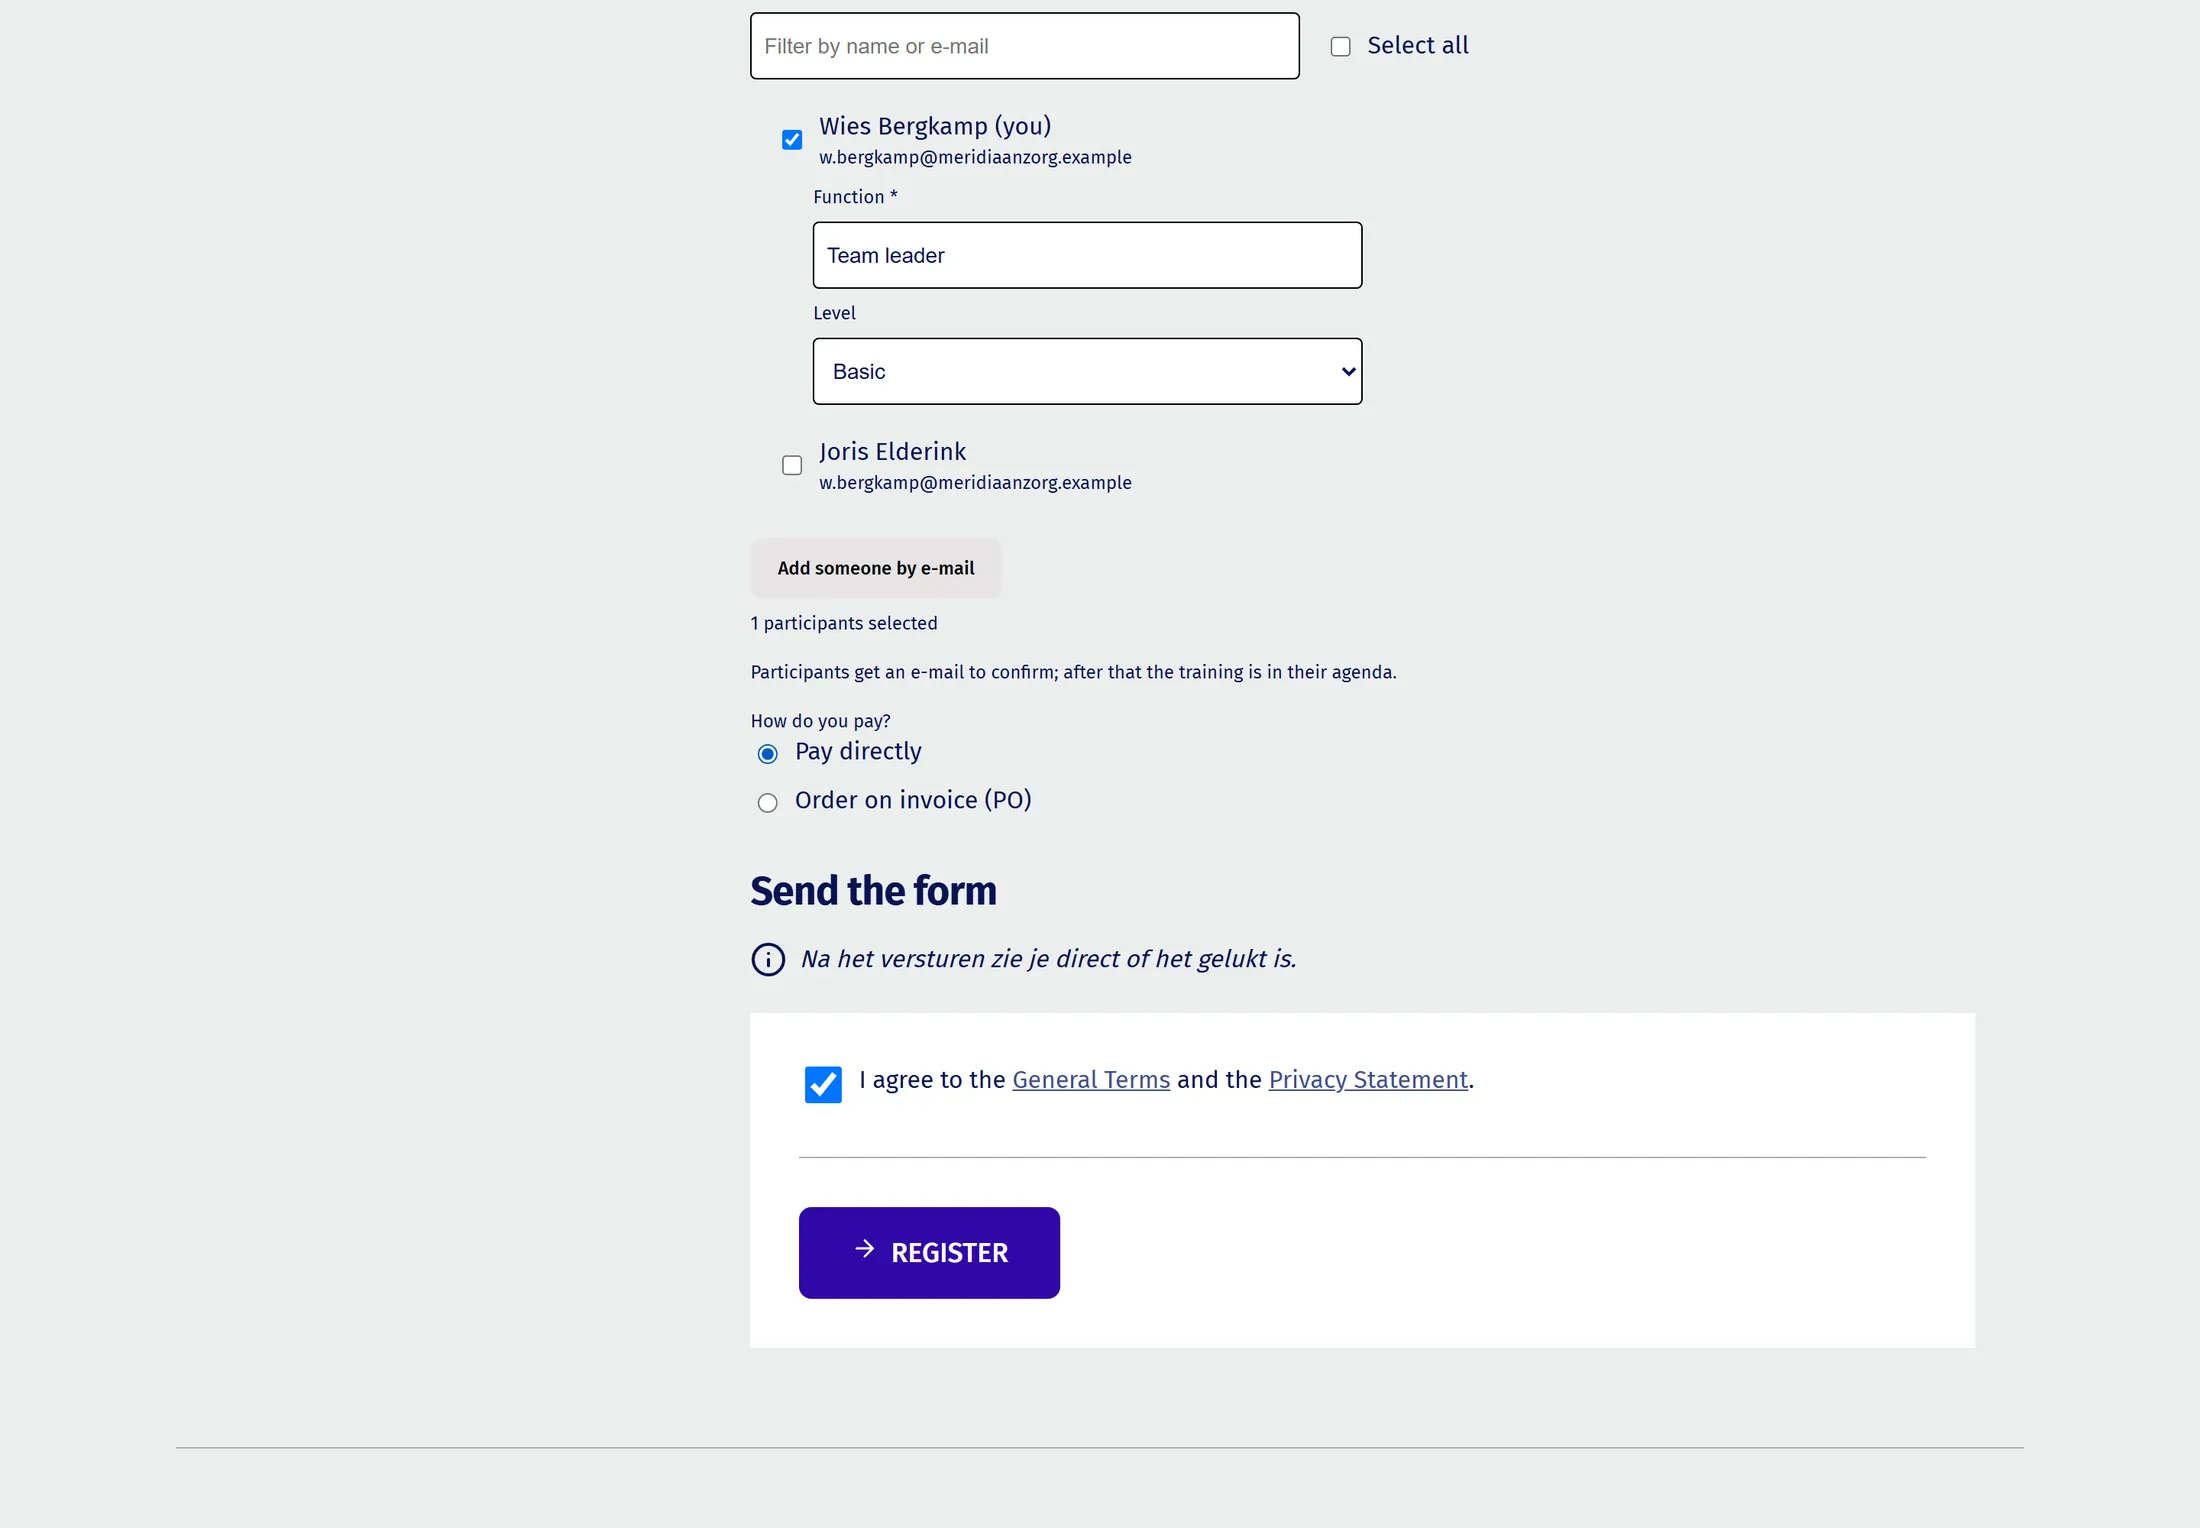
- Number of places: 1. Fill in the questions.
- Tick I agree to the Terms and Conditions and press Register. Without the tick: First agree to the terms and conditions. and nothing is sent.
- At a price of 0 press Confirm without paying.
- You see Thank you for registering! with your reservation number and Add to my calendar (an .ics file downloads). A confirmation mail with the same file arrives.
6.3 - As the organiser: see the place taken
Look at the summary in the event popup.
- In your own window open the event popup of that date.
- The summary now reads 1 of 2 places taken .
One of two places is taken. 6.4 - Order on account (PO)
Pay by invoice with a PO reference.
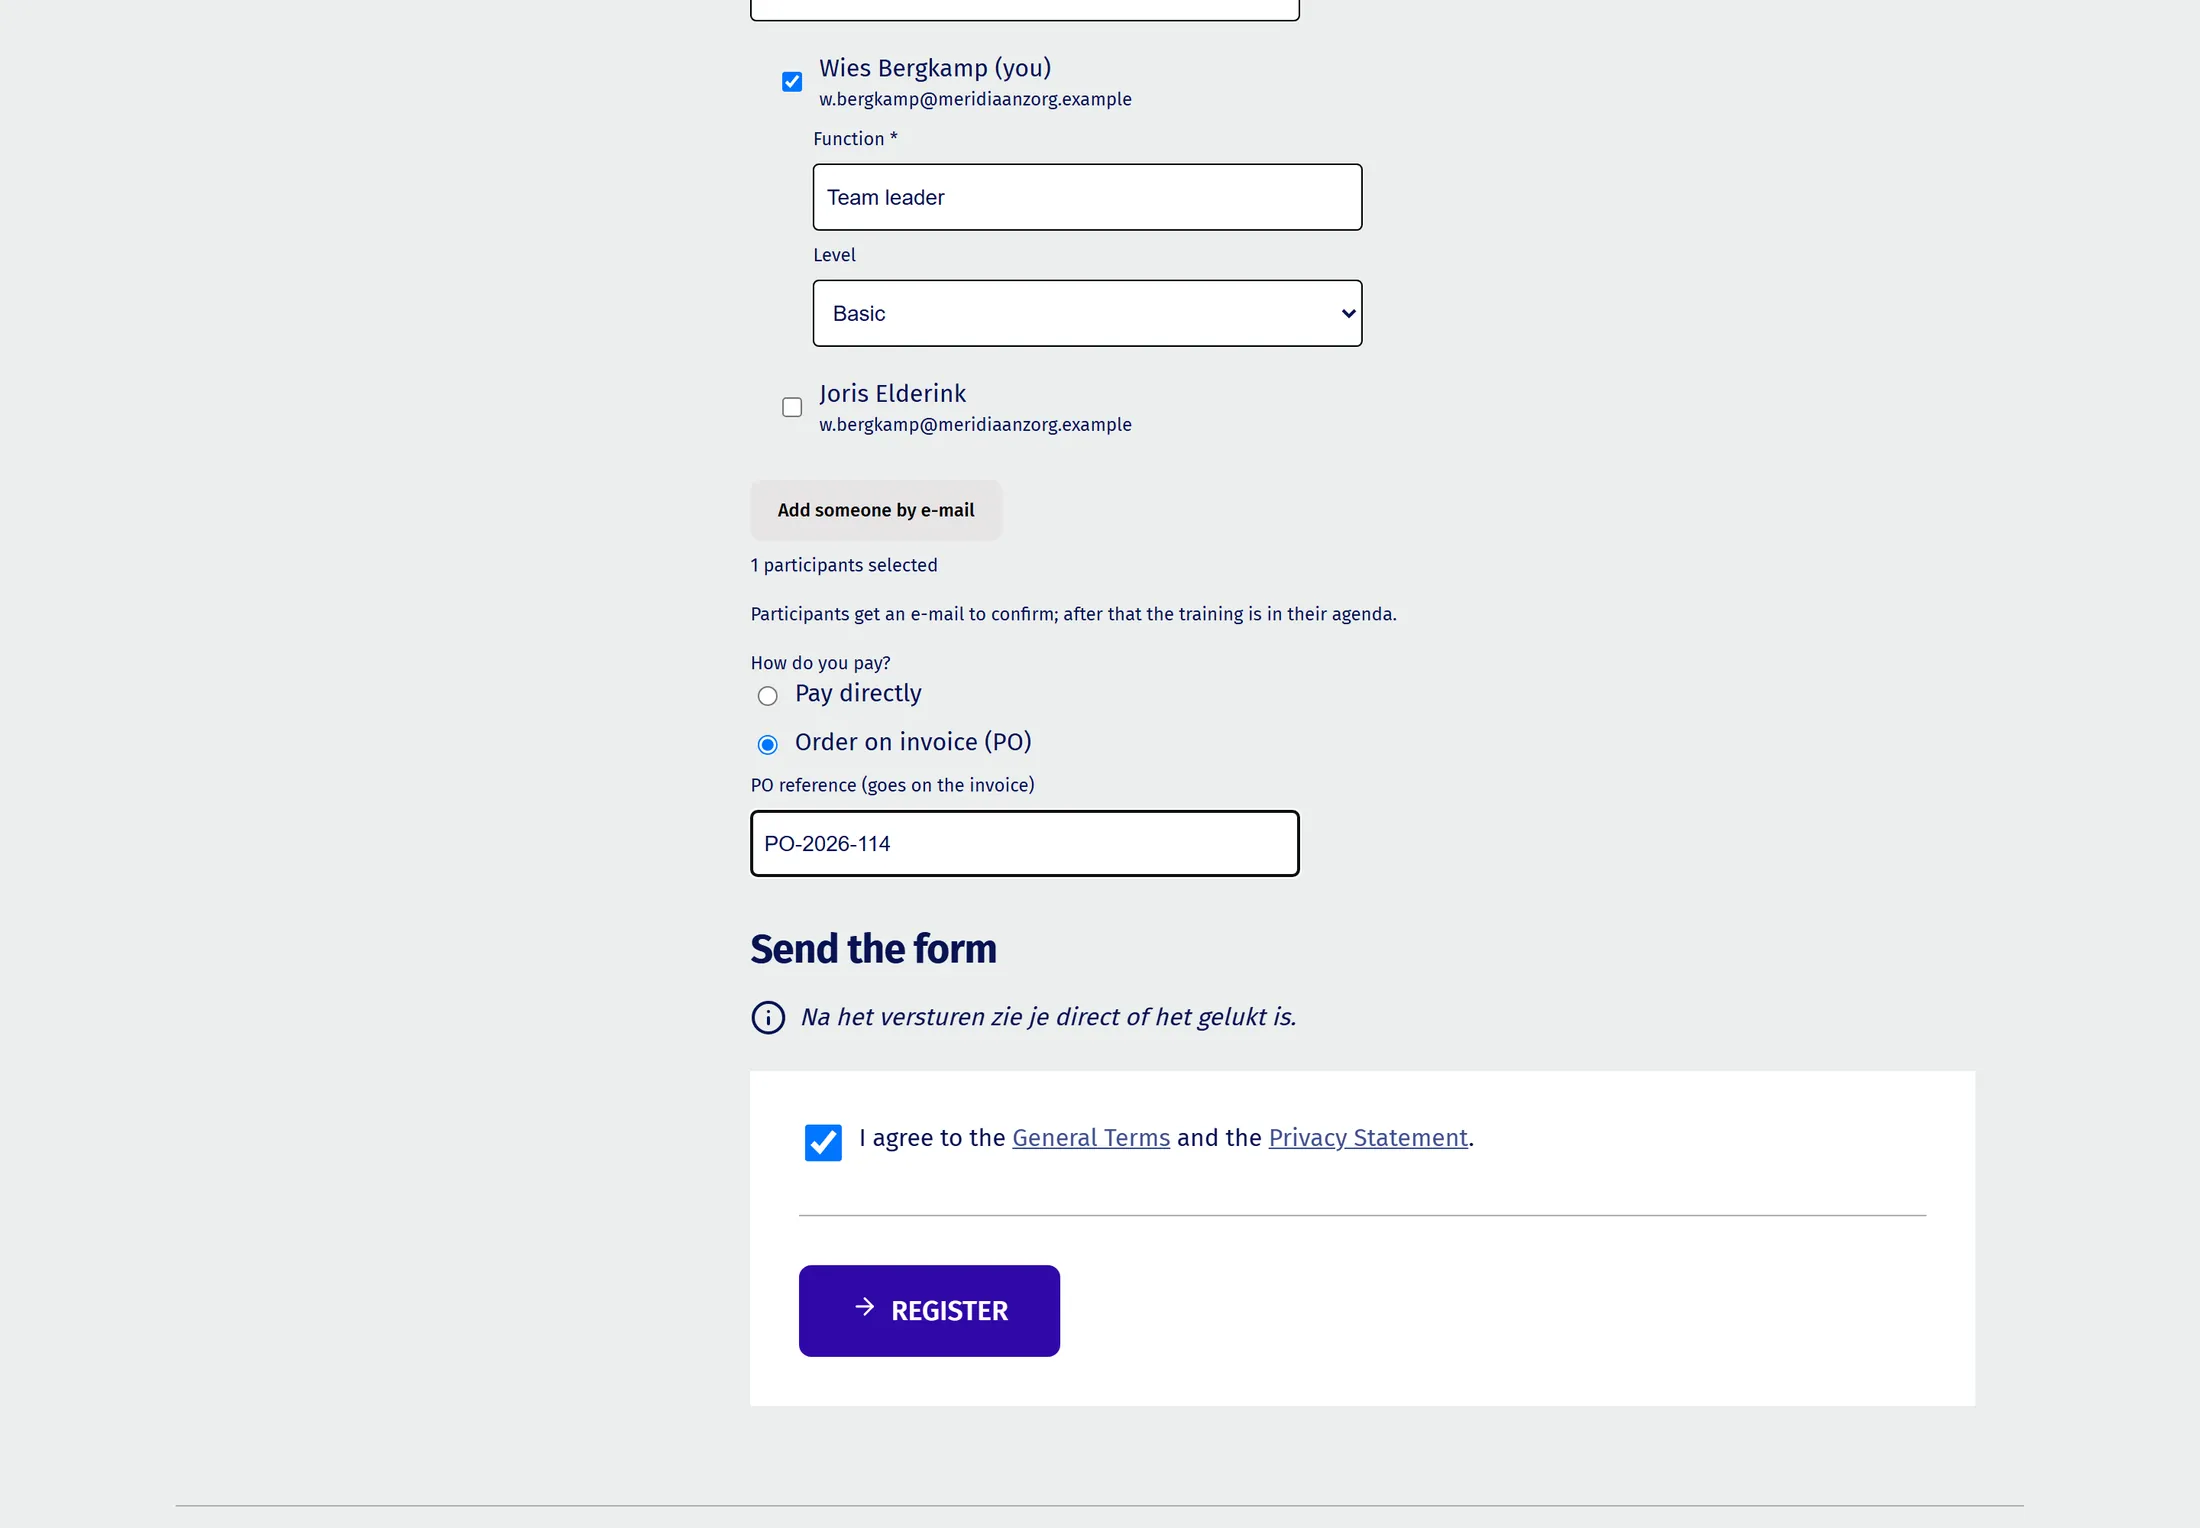
- Under How do you pay? choose Order on account (PO).
- Fill in the PO reference and press Register.
- You see Your registration on account is in; your place is reserved. Without a reference: Fill in your PO reference.
6.5 - Pay with a discount code
Use a code of 100%, or pay online.
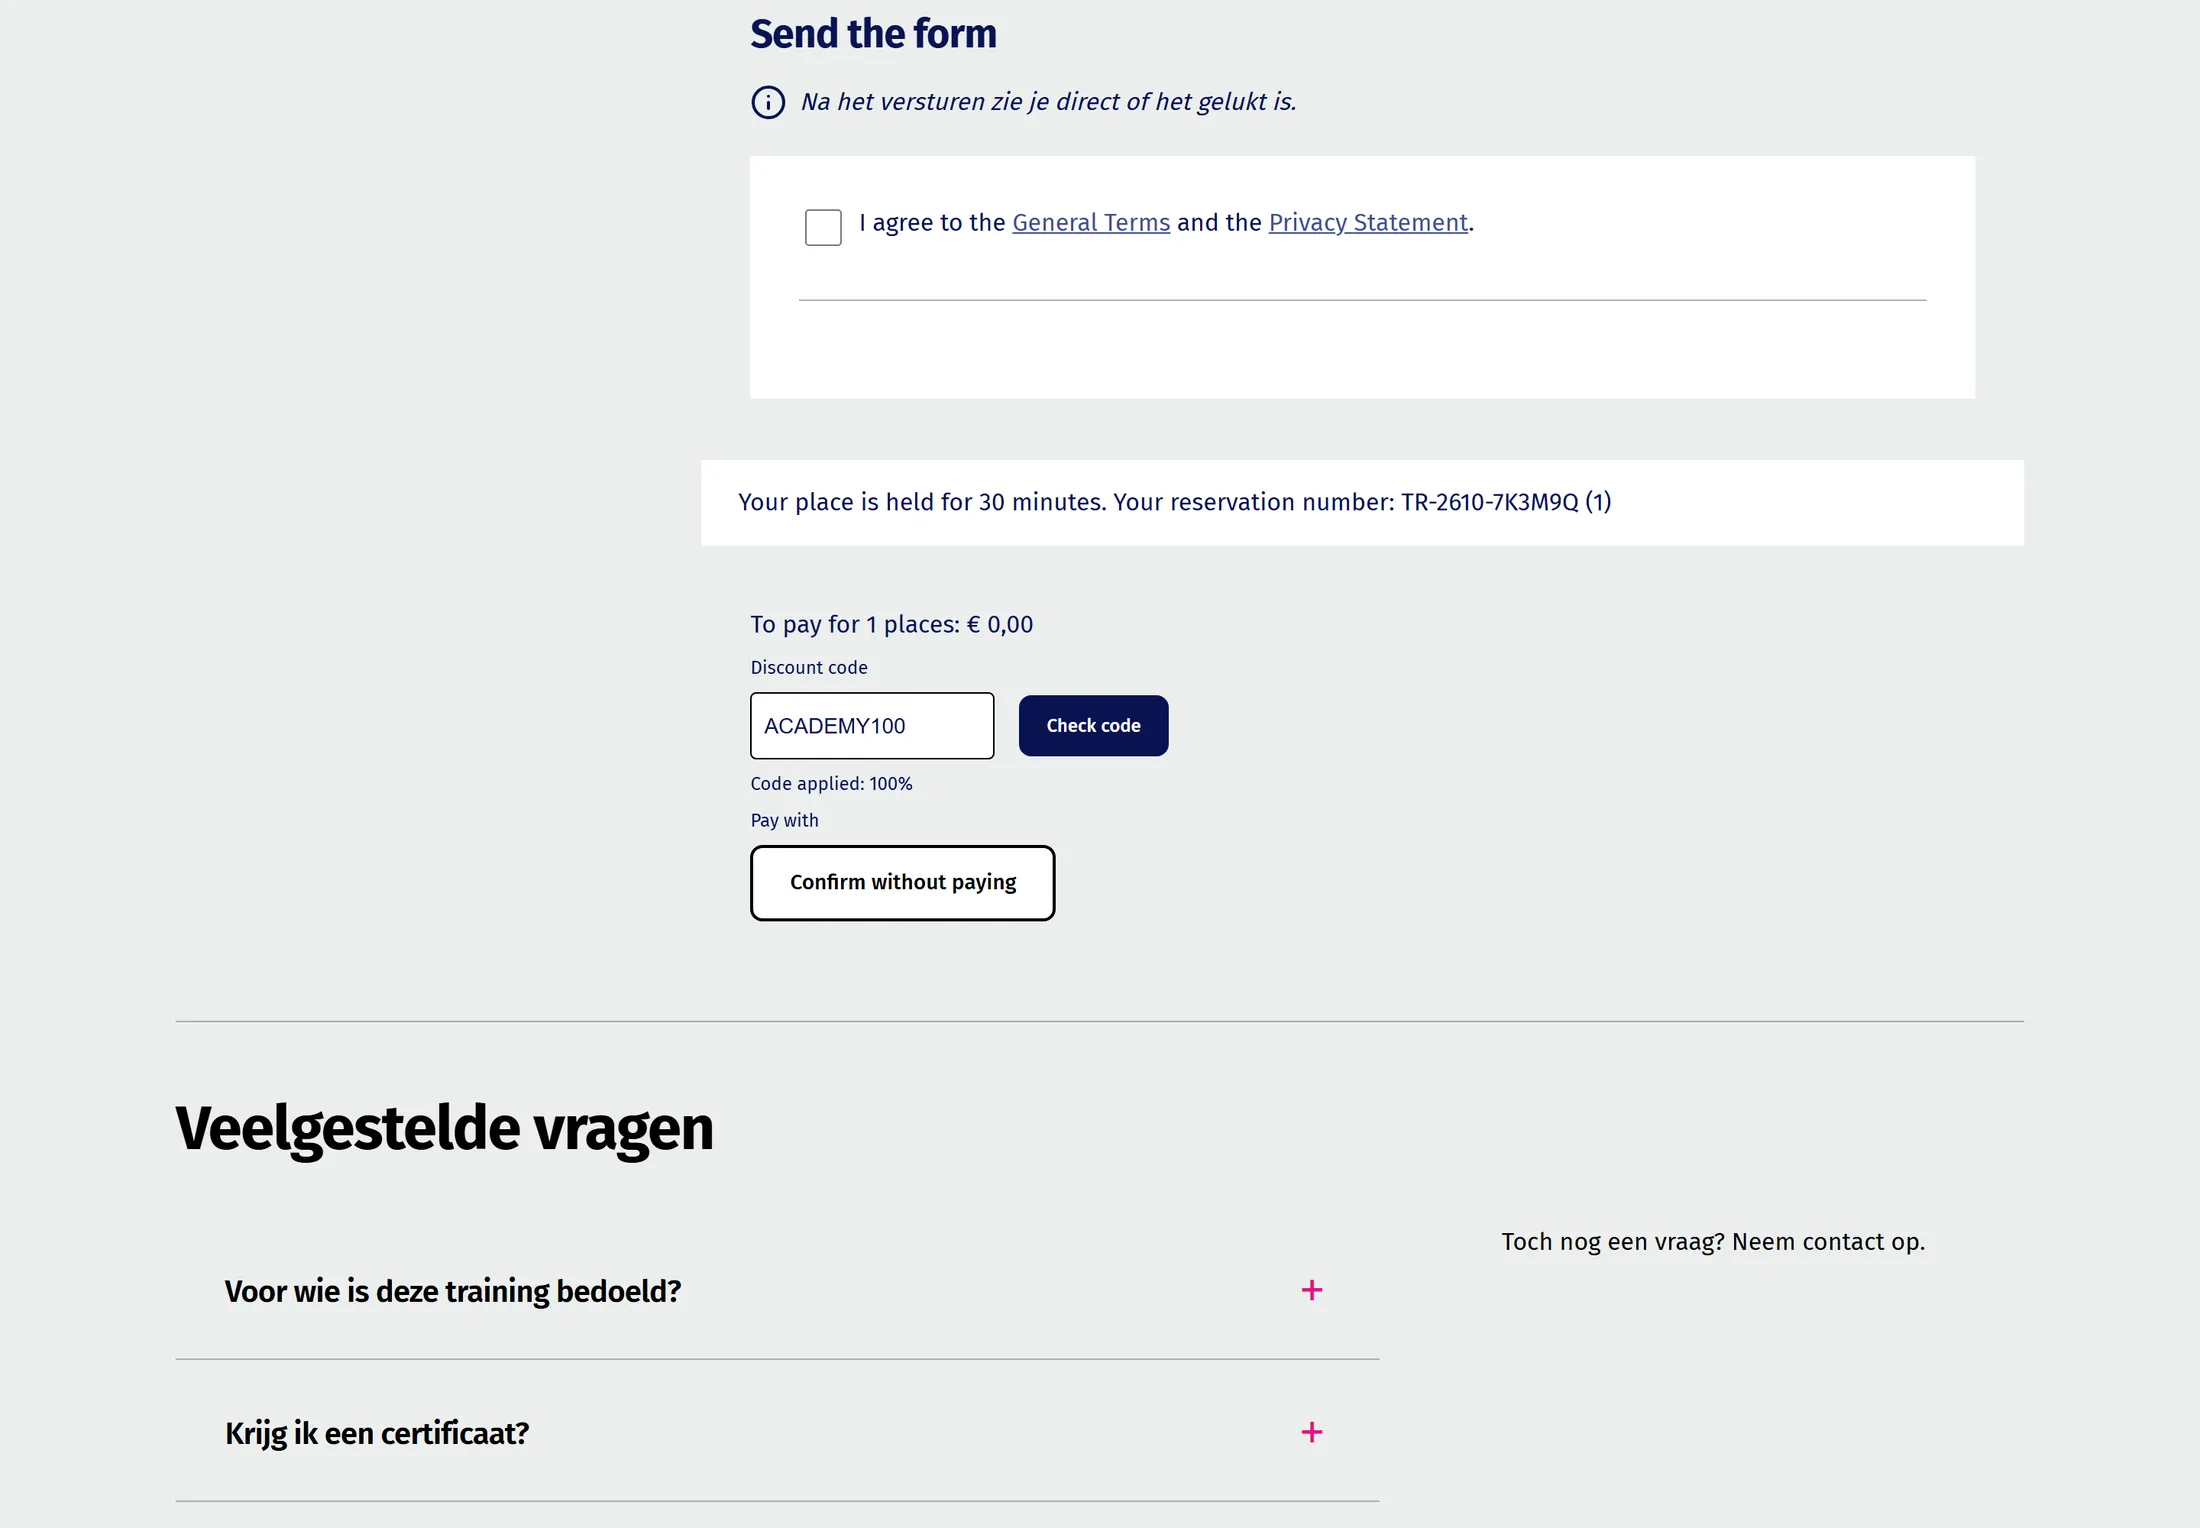
- Give the shop item a price, for example 250 (PO off). Press Register to reach the payment step.
- Fill in Discount code ACADEMY100 and press Check code.
- You see Code applied: 100% and one button, Confirm without paying. Then the thank-you panel.
- A wrong code says This code is not valid for this training.
- Without a code, choose Pay with and a method. Your place is held for 30 minutes while you pay.
6.6 - Register several people
As admin, sign up colleagues.
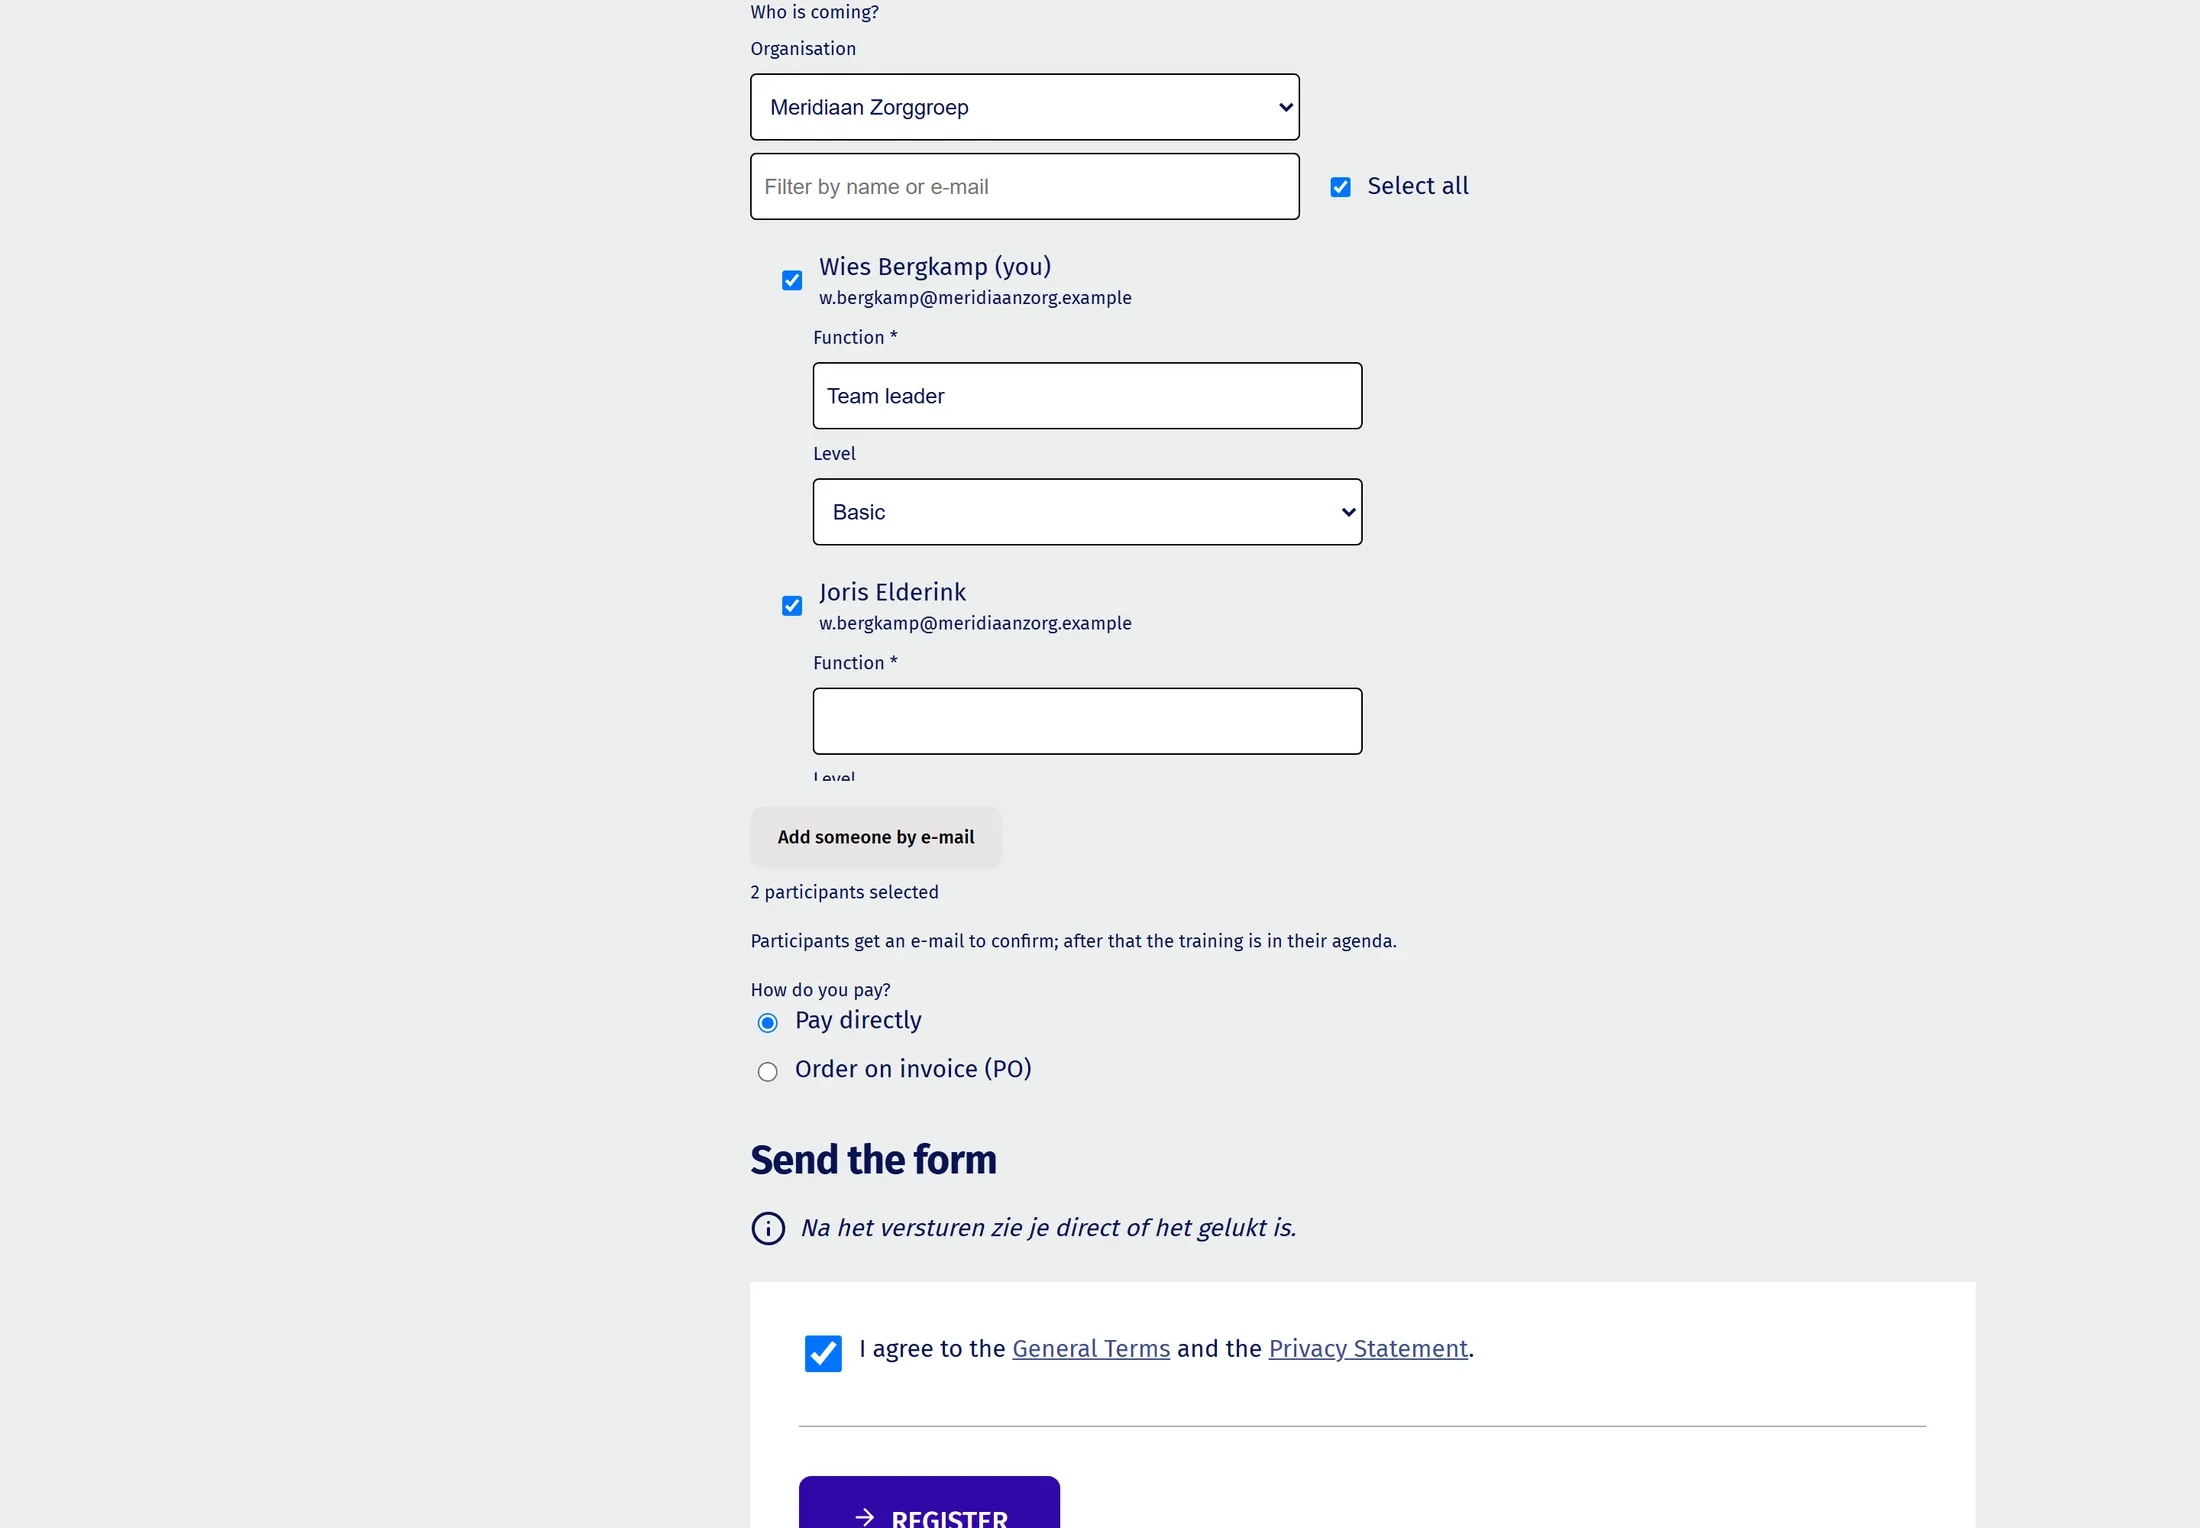
- As an organisation admin, under Who is coming? tick members, press Select all, or Add someone by e-mail (use a second address of your own).
- The number of places follows the ticks. You are shown as "(you)".
- Press Register. Each other participant gets the mail You are registered for a training with a confirmation link.
- After the click: Thank you, your participation is confirmed. The training is in your agenda.
6.7 - Full: waitlist and a place frees up
Join the waitlist, leave it, and get an offer.
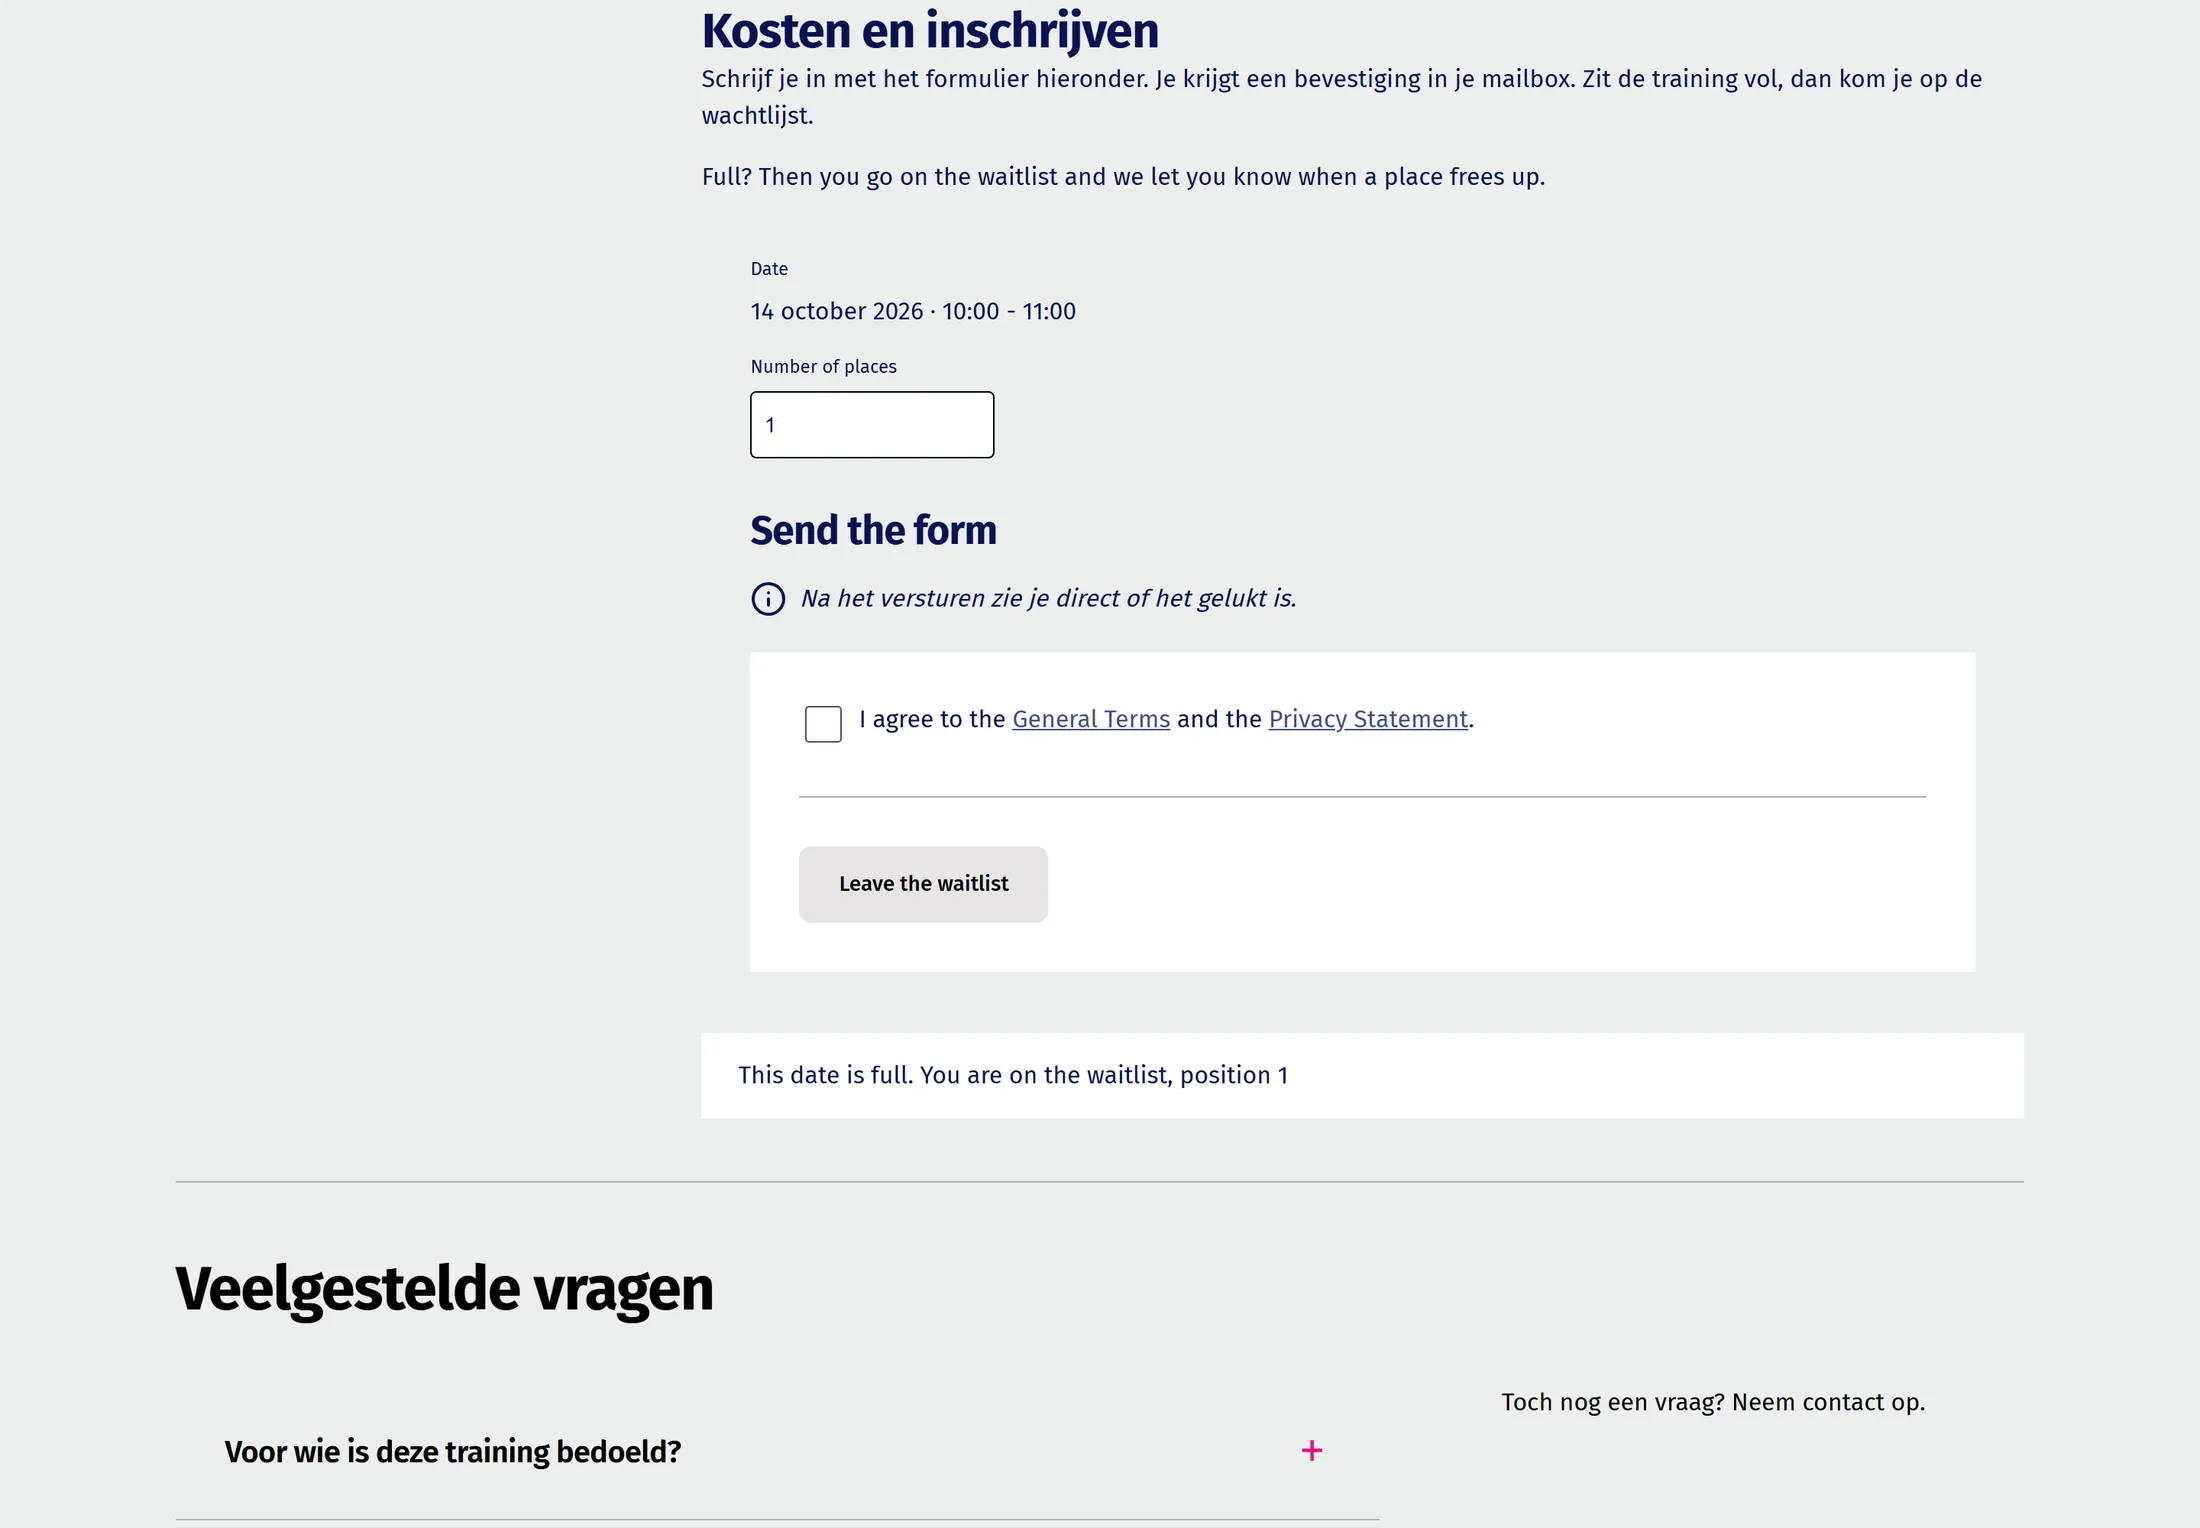
- With capacity 2 and two places taken, register someone else. The button now says Put me on the waitlist.
- You see This date is full. You are on the waitlist, place 1.
- Press Leave the waitlist: You are no longer on the waitlist. Then join again.
- As organiser raise the capacity to 3 (or press Release now). You see 1 place(s) offered to the waitlist .
- The person waiting gets the mail A place is free for you and sees A place is free for you. Register before ...
6.8 - Keep me informed
Follow a training without registering.
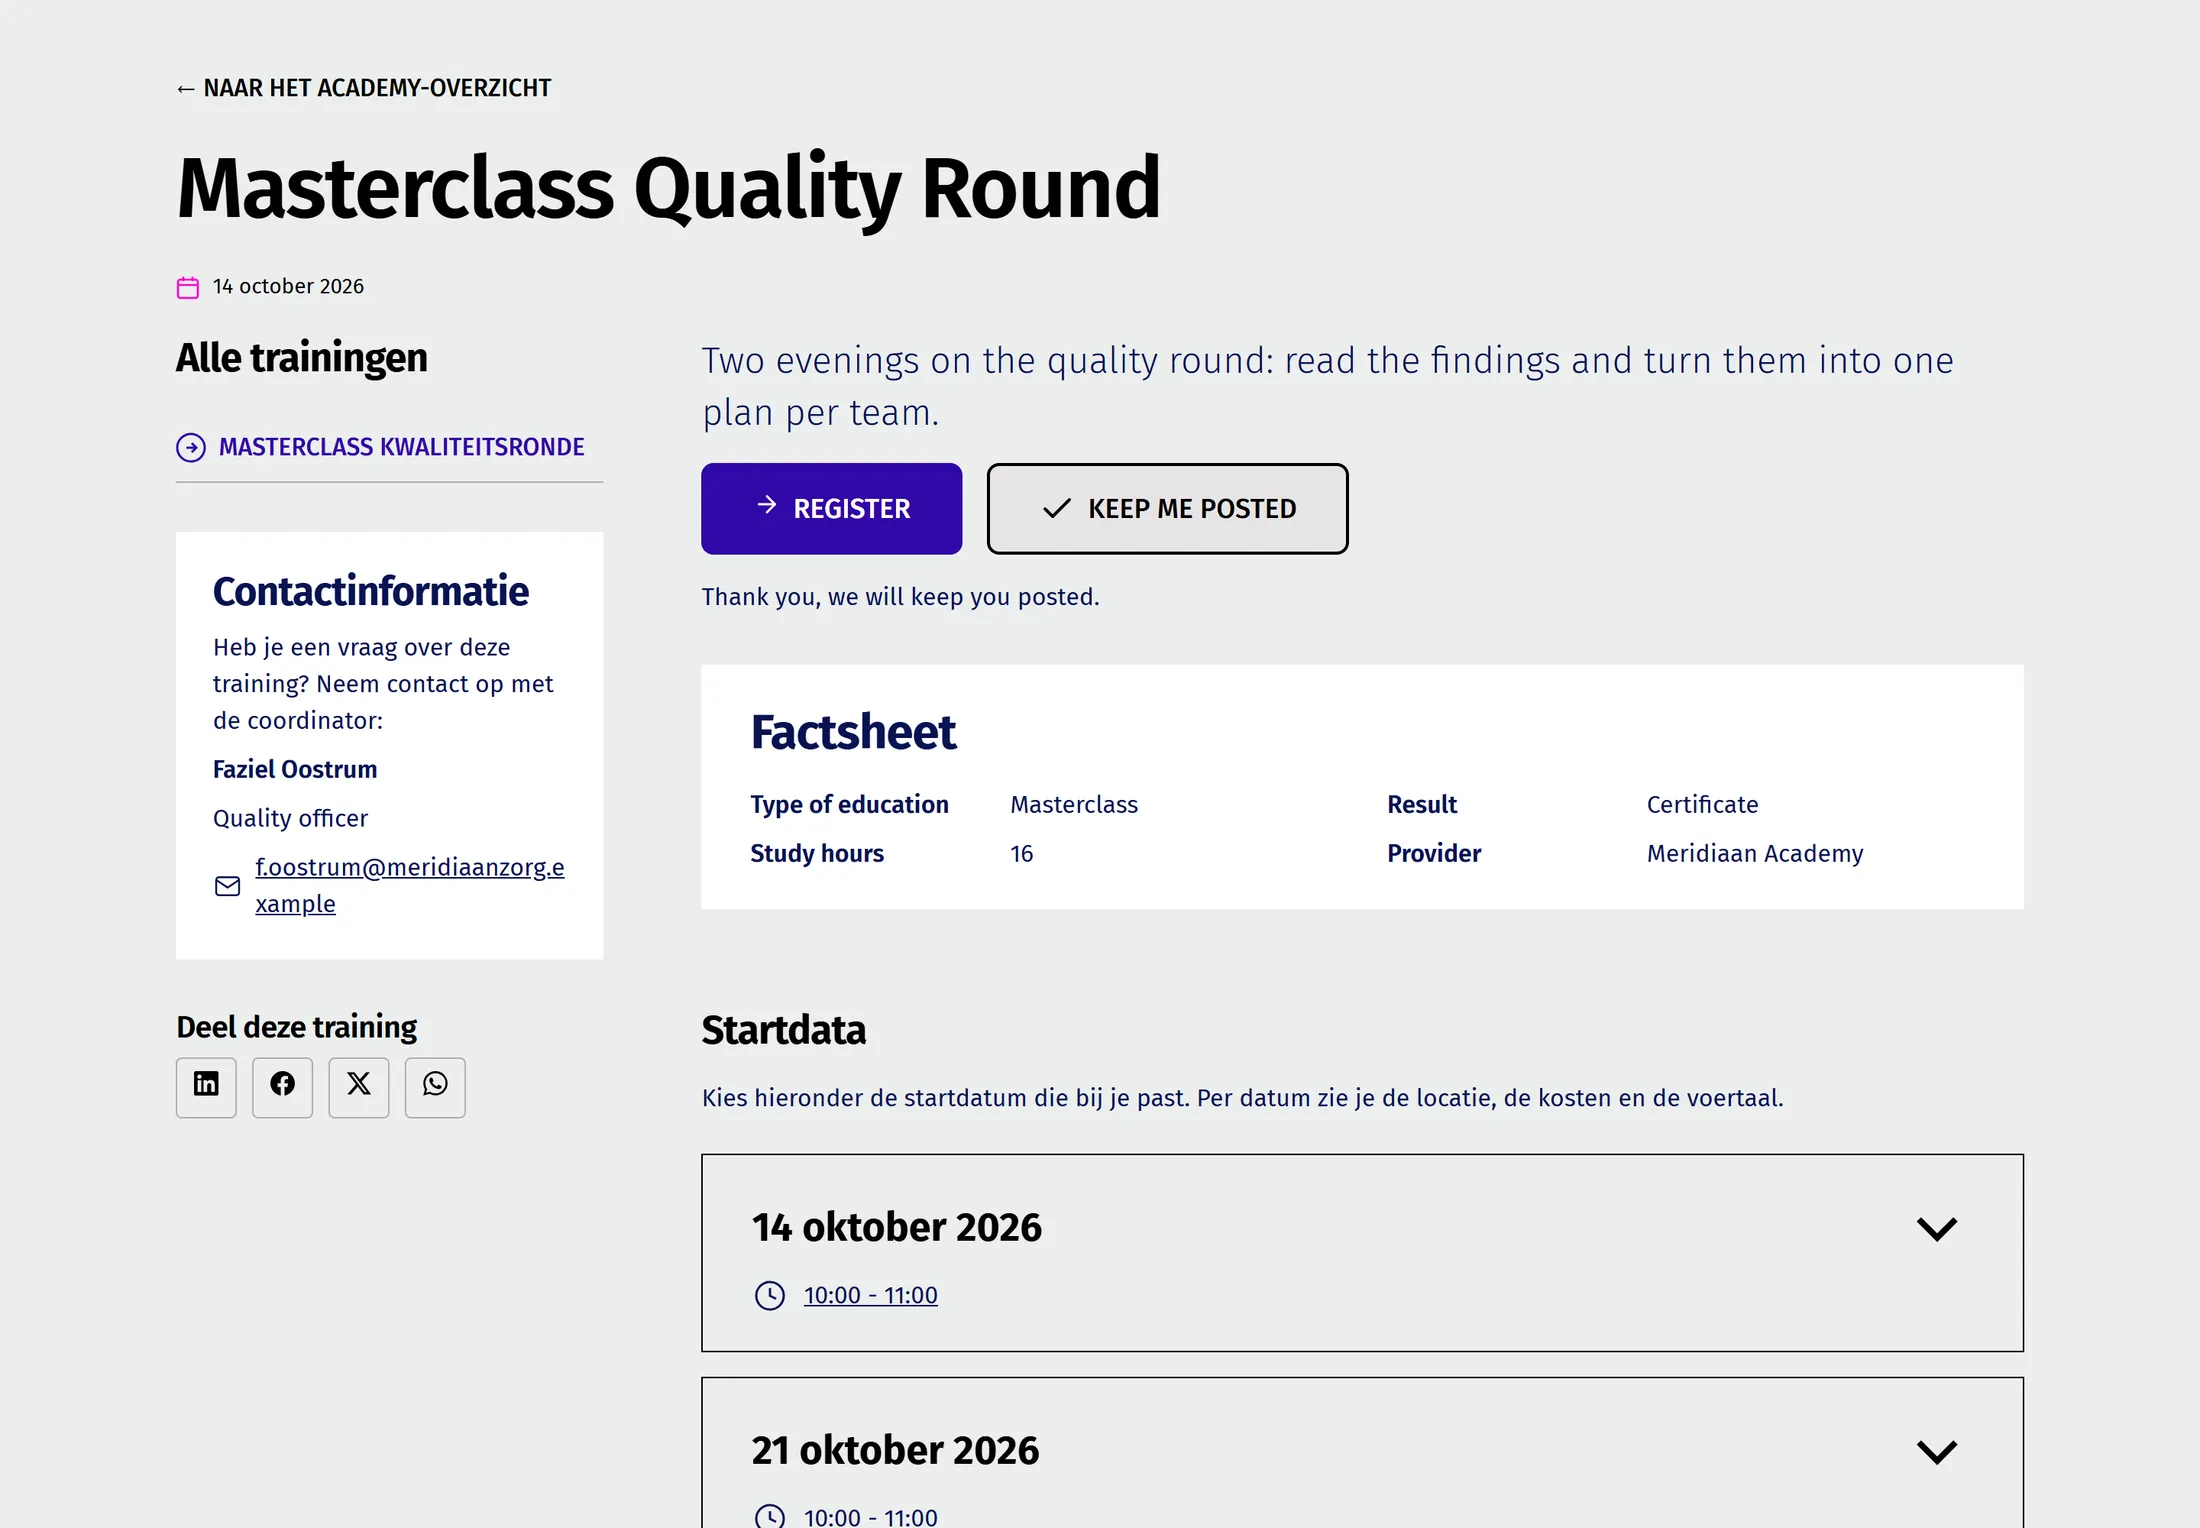
- Press the button Keep me informed at the top.
- You see Thank you, we will keep you informed.
7 - Afterwards: see who registered
Open the list of registrations for a date.
- Open the event popup of the date and press Show registrations.
- Each line reads "reservation - e-mail - places - status [- PO]". The waitlist reads "#place - e-mail - places - status".
- Press Release now with no free place: No free place for the waitlist right now.
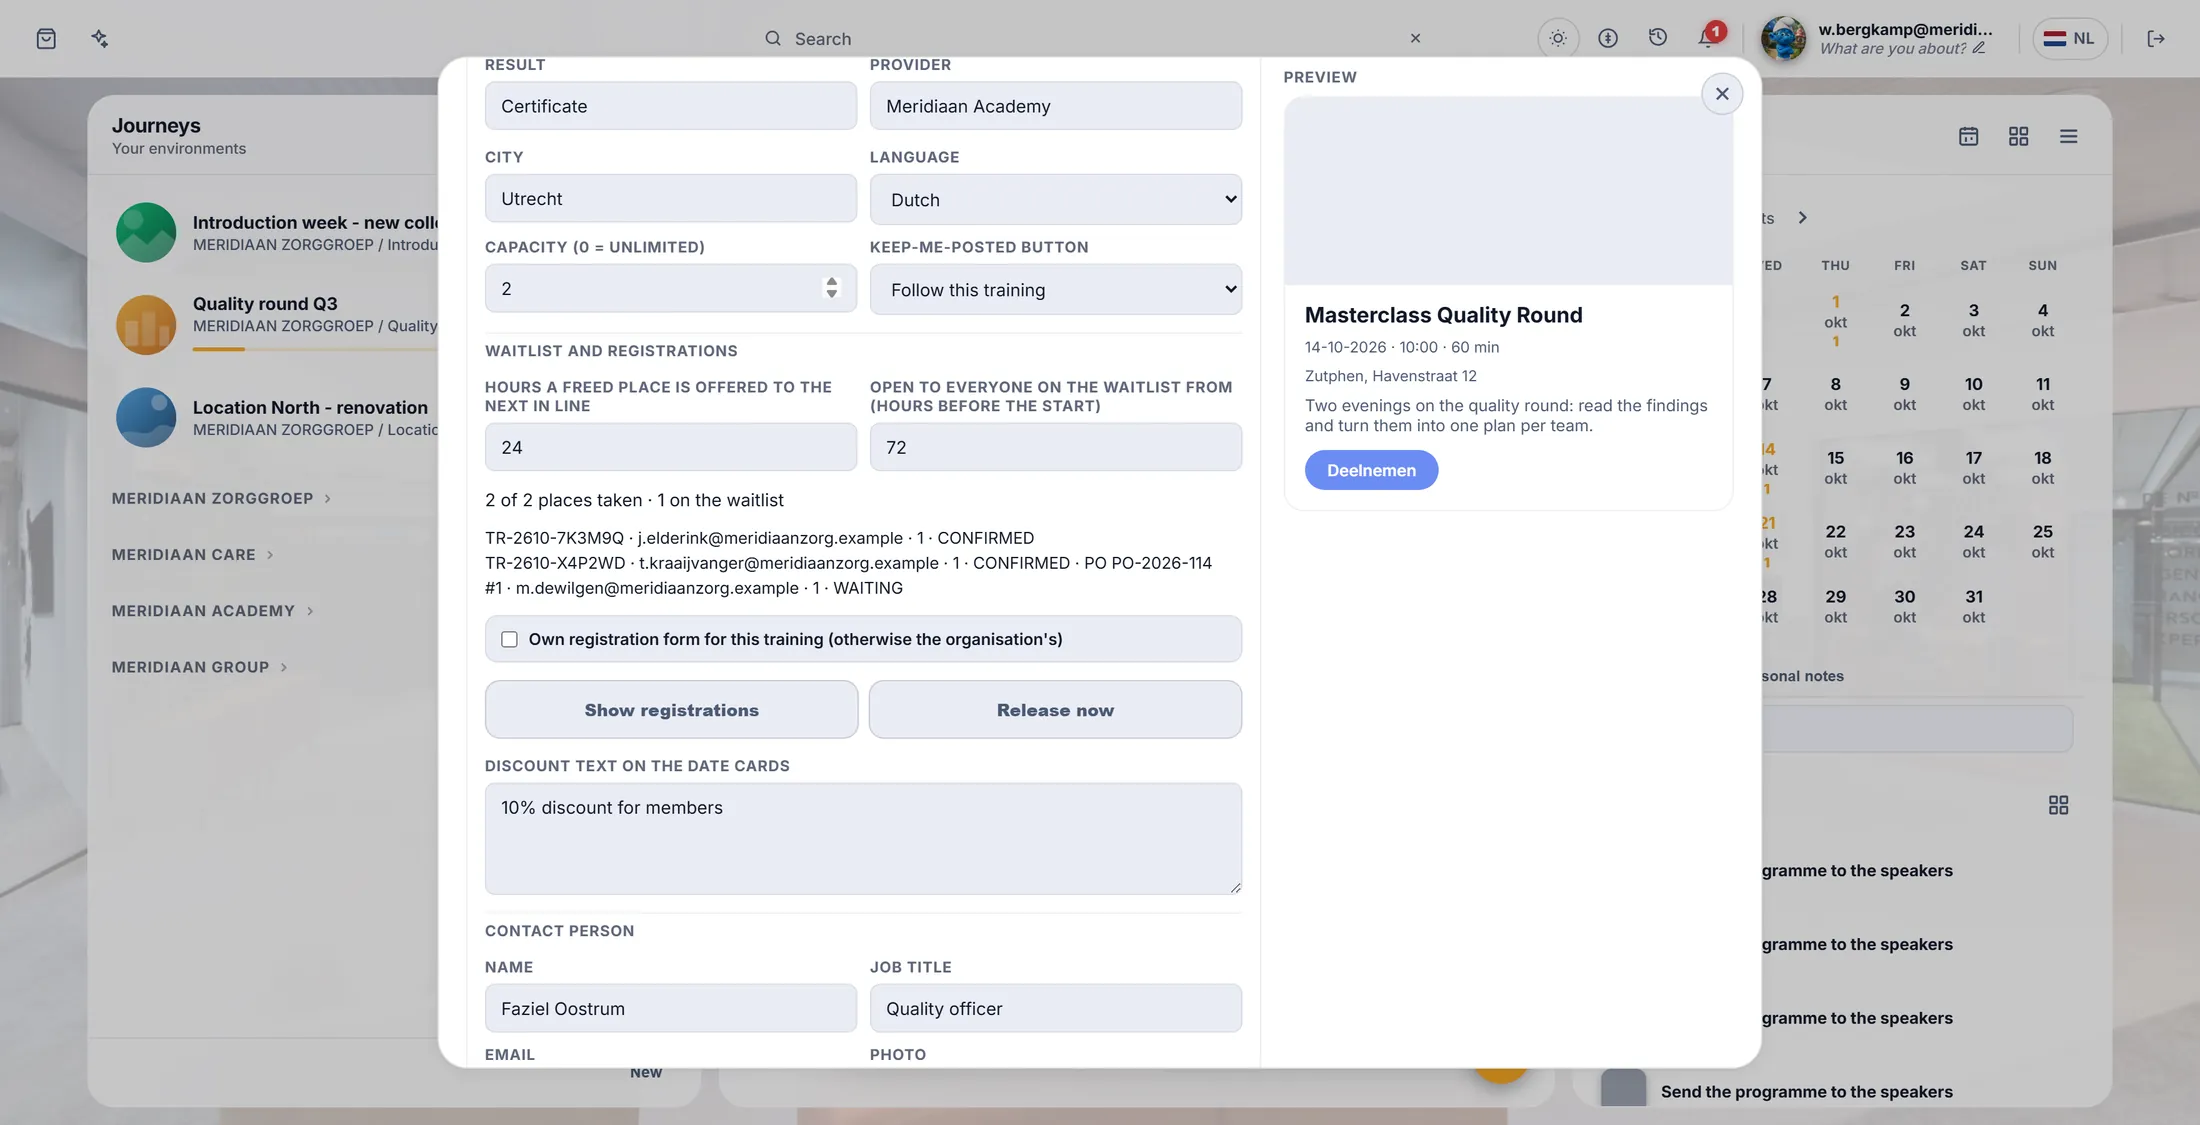
Registrations and waitlist of one date.
If something is not right
There is no heading "Waitlist and registrations".
Registration is not switched on for your organisation yet. Parts 1 to 5 still work; parts 6 and 7 appear once it is on.
The visitor does not see my page.
Check three things: the event is public, it is also ticked Publicly viewable, and the template page is set to Live (not Draft).
There is no Choose this date button.
Switch on the bar "Sign up now" + pick a date in the block Days and times, and choose your journey there (step 3.4).
A few words are still in English.
Select a journey in the wizard, and Date, Time, Duration and Color in the popup, are always English for now.
Can I cancel or refund a registration?
Not yet. Cancelling and refunding are not available at the moment.
Is the VAT exemption applied?
It is shown on the date card only. The checkout still calculates VAT until your accountant advises otherwise.
My change does not show yet.
A change in the editor can take up to 5 seconds to show everywhere. Reload once.
Can I export the registrations?
You can look at them in the event popup. An export is not available yet.
The words on this page
- training
- An event with a price, a factsheet and places to sign up for.
- shop item
- What you sell, with its price.
- detail page template
- The page every training uses.
- waitlist
- The line for a full date.
- PO order
- Order now, pay on an invoice.
- discount code
- A word that lowers the price.
- series
- Dates of one training that belong together.
What to do next
- Sell your trainings More about shop items and payments.
- All explainers The other things you can learn here.