Sell your trainings
Make a shop item for a training, a programme or a journey: name it, price it once or as a subscription, list what is included, add discount codes, and follow the sales and payments afterwards.
Communication - sell what you teach - 7 min. You need: to be an admin of your organisation
Nothing is sold and nobody is charged until you save an item and a buyer pays.
What you will be able to do
- Set up to sell Sign once, fill in who the invoice comes from.
- Make a shop item A name, a picture and a few words.
- Set the price Pay once, or pay every month.
- Follow the sales Numbers and money in one place.
Get this ready first
- Be an admin Only admins see the shop screens. Not an admin? Ask the person who looks after CoVince where you work.
- Know what you sell Write down: the name, the price, and three things the buyer gets.
Do it together, one step at a time
Eight steps. First you get ready to sell. Then you make an item. Then you watch the sales.
Open your shop items
Everything you sell is in one list.
- Open the Editor and choose your organisation.
- In the list on the left, click Organisation Shop Items .
- At the top you see Add, Statistics and Agreement. Below is the list of your items, each with a pencil to edit it.
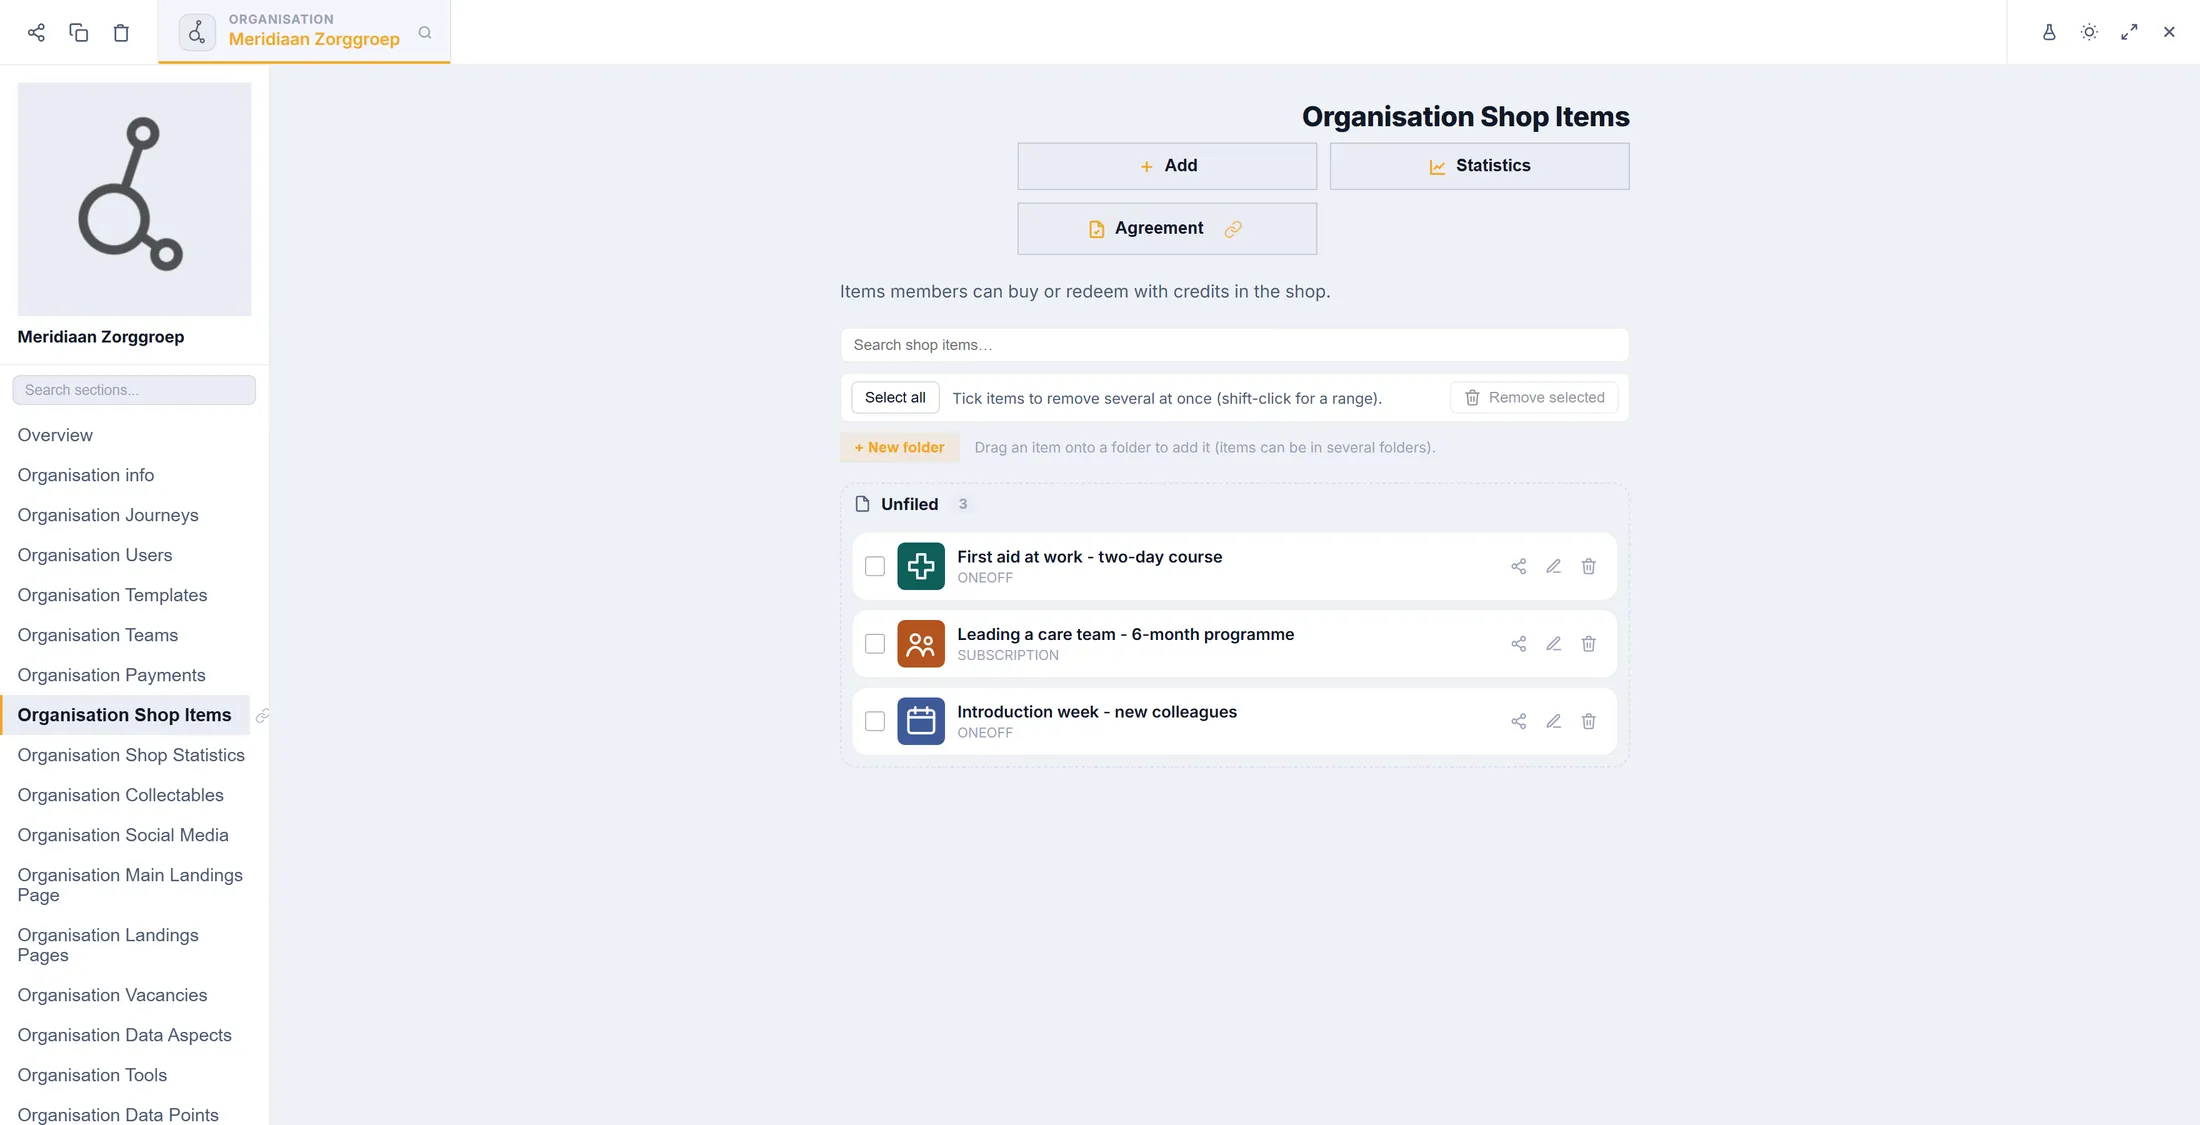
Add is the first button. Get set up to sell
Before your first item, CoVince checks that you can invoice.
- Press Add. The window Get set up to sell opens.
- Sign the selling agreement shows done once one admin has signed it with CoVince.
- Under Who the invoice comes from (marked needed to sell ) fill in the legal name, address, postal code, city and country. Press Save and check.
- VAT number and Where the money goes say can wait . You can sell without them, but you cannot be paid out without an account.
- Press Check again.
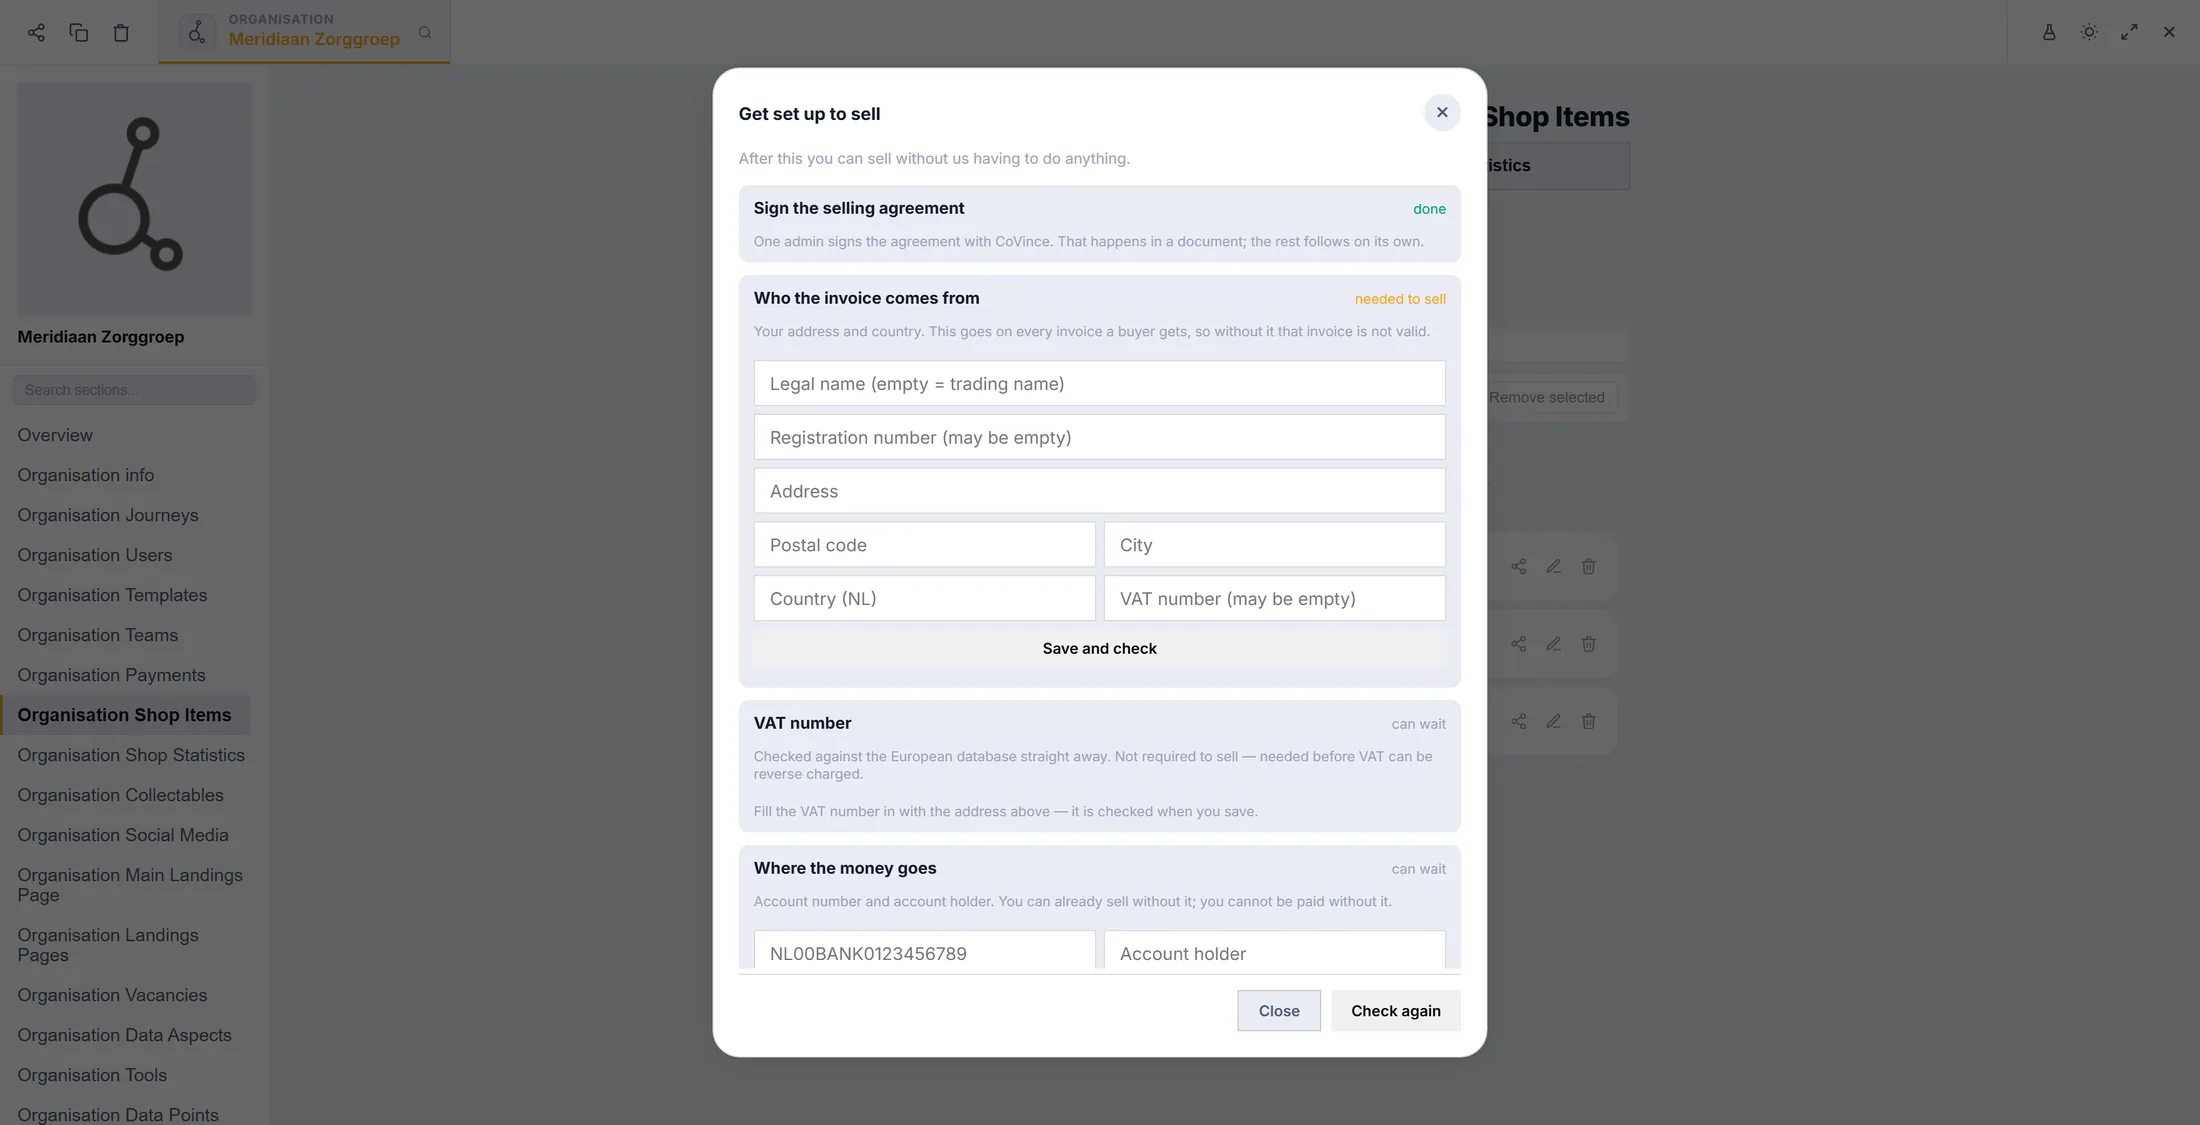
Only one thing is really needed. Make the card
This is what a buyer sees first.
- Press the pencil next to an item (or Add for a new one). The window Edit shop item opens on Card .
- Type the Name , for example Leading a care team - 6-month programme .
- Ribbon on the card is a short label such as Most popular . Leave it empty for no ribbon.
- Write the Description and press Select under Image to choose a picture. The globe next to a field is for other languages.
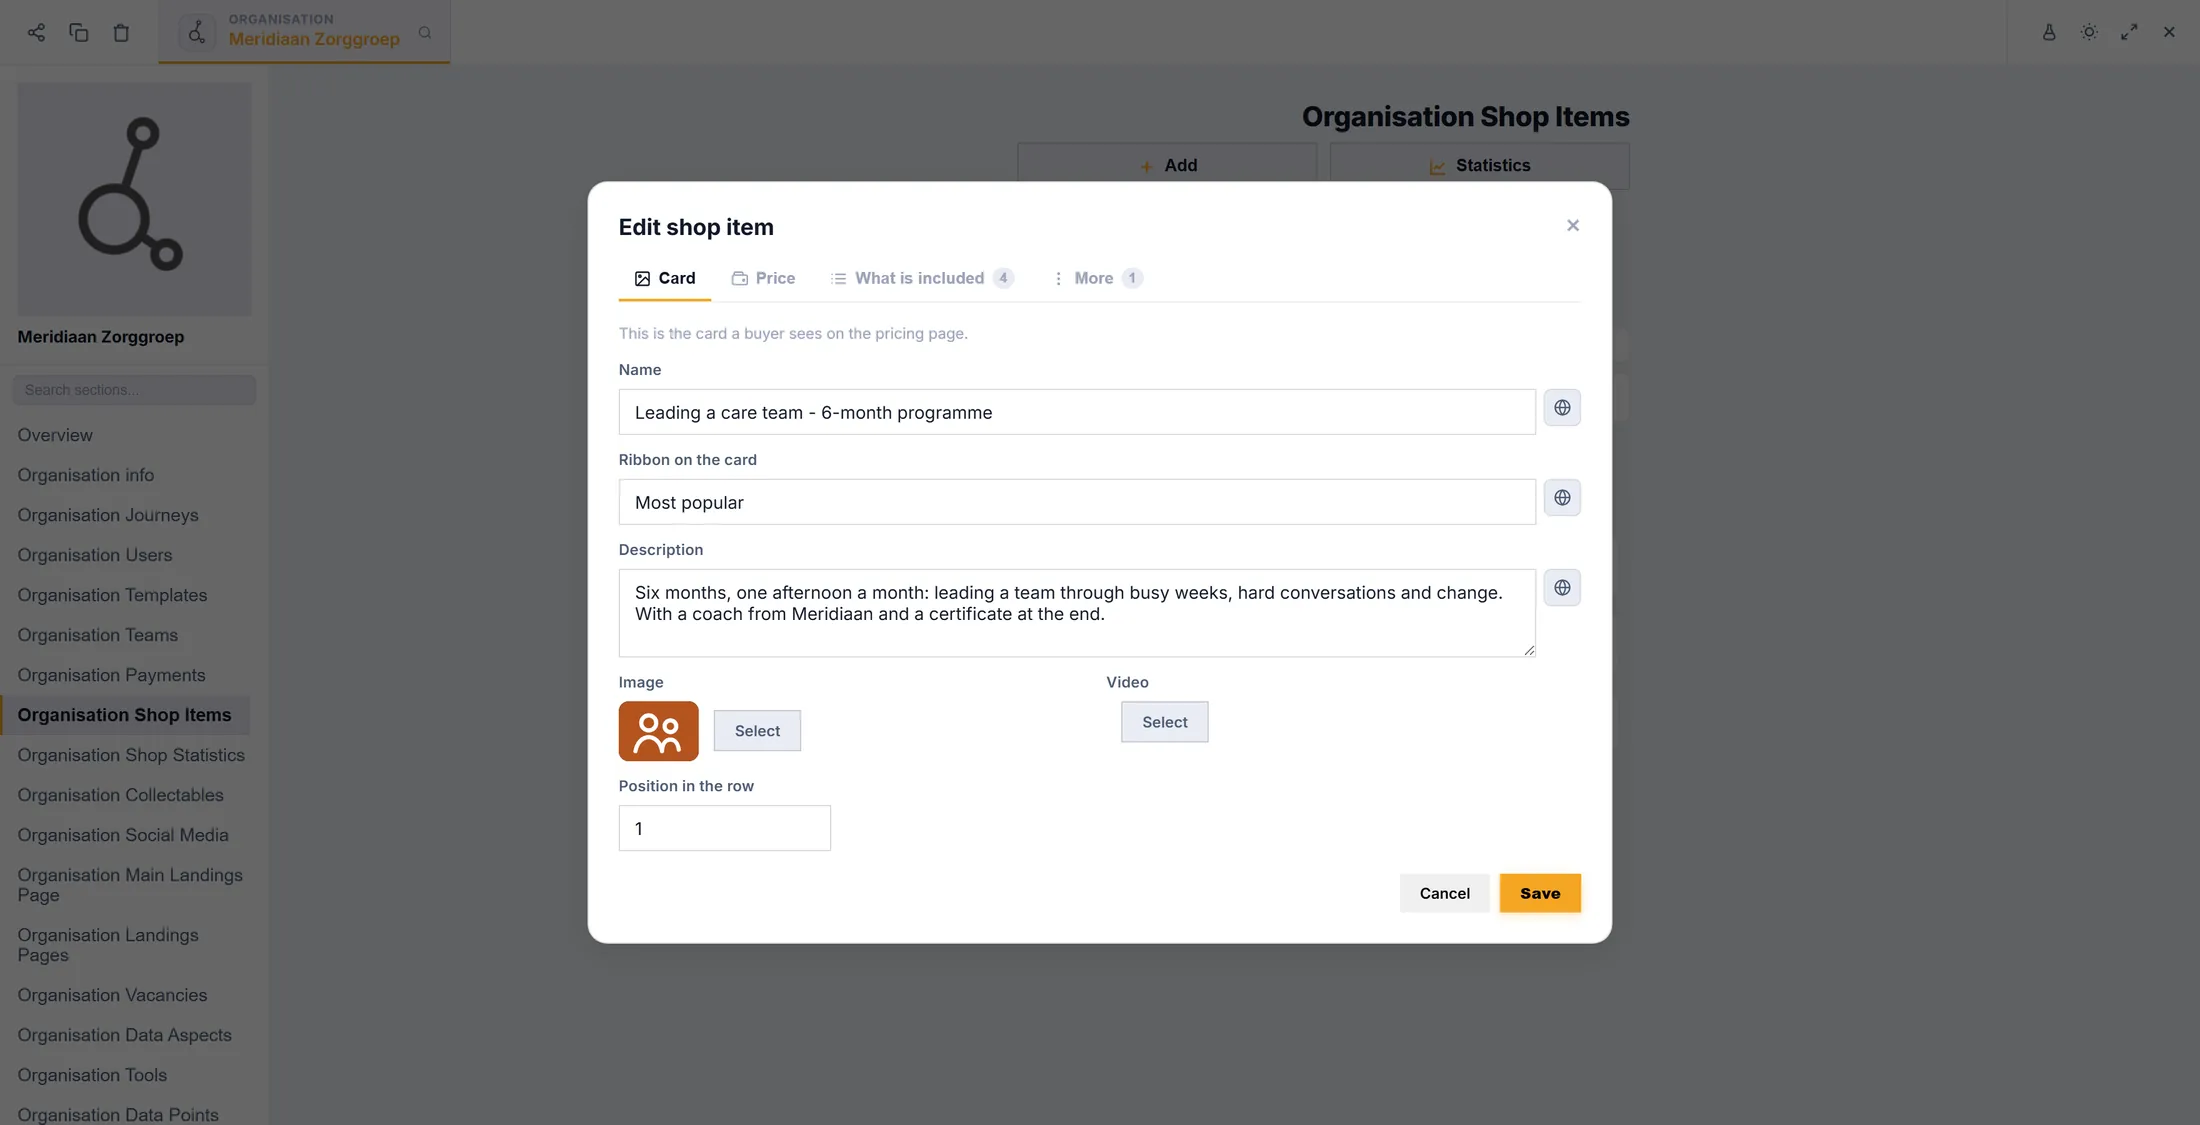
Name, a few words, a picture. Set the price
Say what the buyer gets and what it costs.
- Click the tab Price .
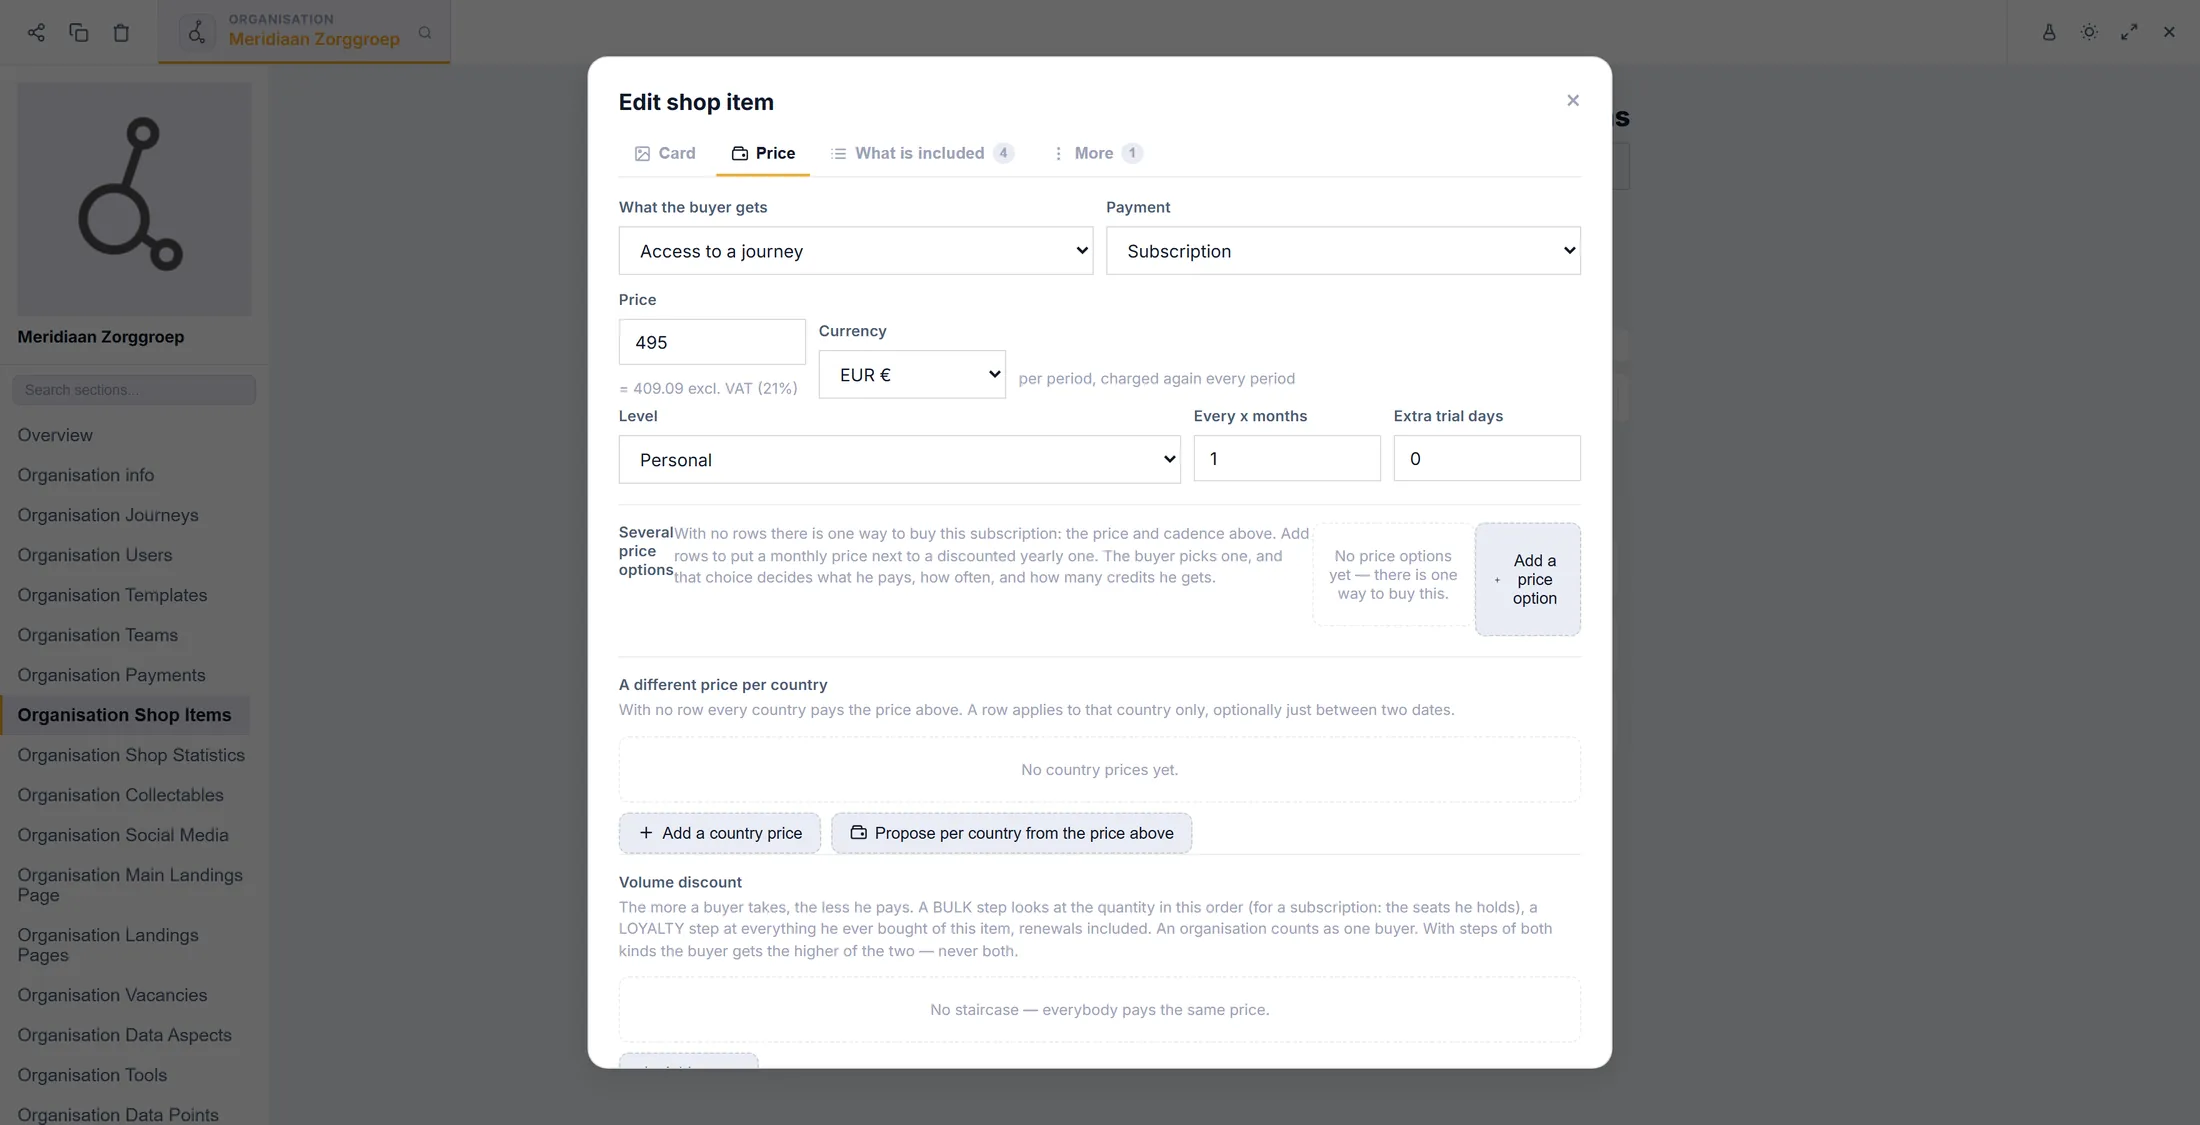
- At What the buyer gets choose the kind of item, for example Access to a journey . The buyer then gets into that journey after paying.
- At Payment choose One-off or Subscription . A subscription is charged again every period; Every x months sets the period.
- Type the Price and pick the Currency . Under the price you see what it is without VAT.
- Need more? Add a price option offers a monthly and a yearly price side by side, and Add a country price sets another price for one country.
Access to a journey, paid every month. List what is included
Each line is a tick or a cross on the card.
- Click the tab What is included . The number next to it counts the lines.
- Press Is included to add a line with a tick. Type what the buyer gets, for example Six workshops with a coach . The second box is an optional explanation.
- Press Is not included for a line with a cross, such as One-to-one coaching . The green Included button on a line switches it to Not included and back.
- Drag the dots at the start of a line to put the lines in order. The small icon picks a pictogram.
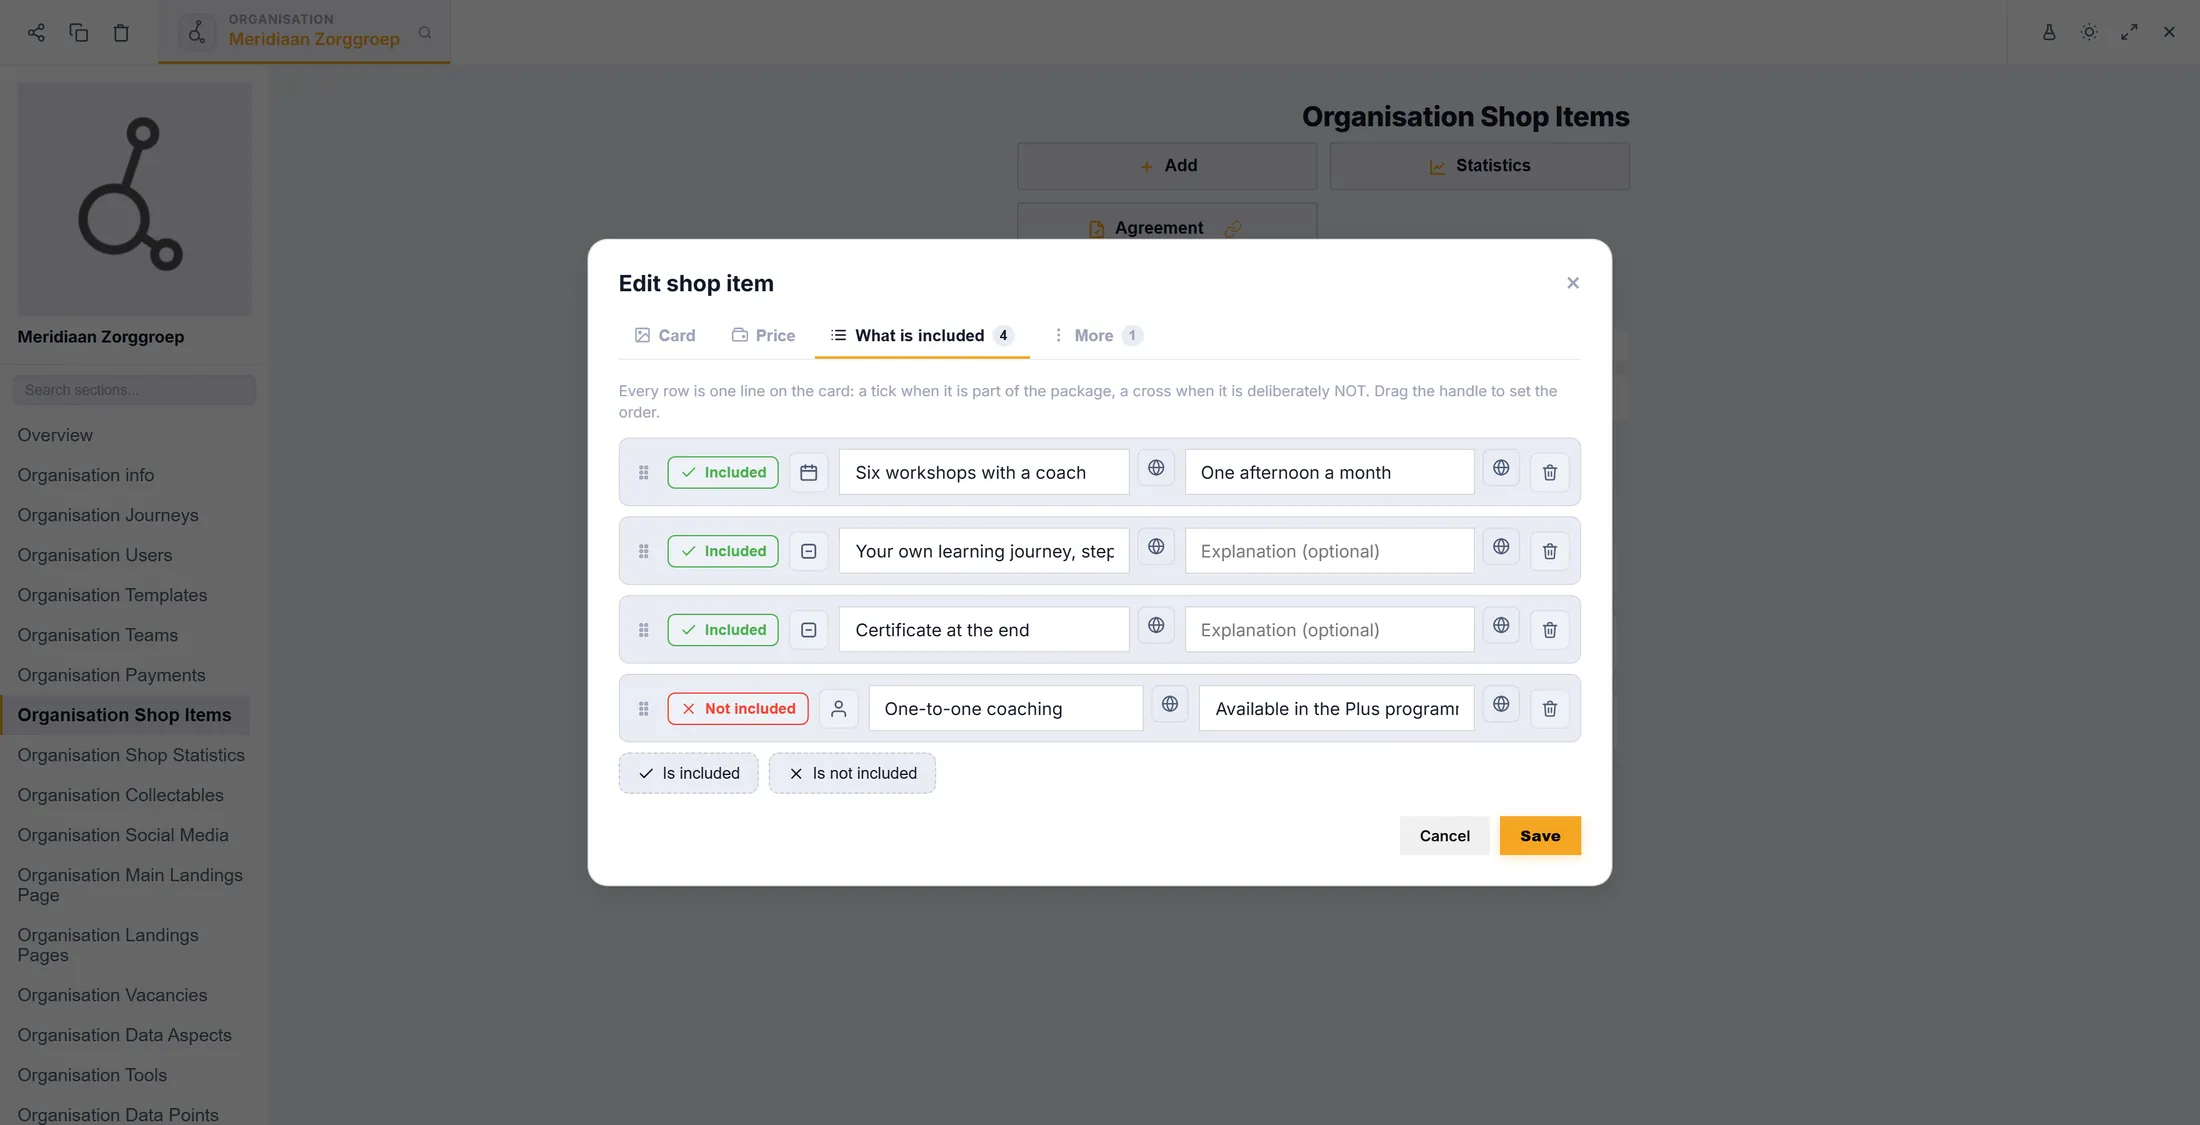
Three ticks and one cross. Add codes and extras
Discount codes, sharing money, more pictures.
- Click the tab More .
- Under Redeem codes press Add a code. Type a Code , for example MERIDIAAN10 , and a Discount % . A buyer types the code at checkout.
- Revenue sharing gives part of every sale to another organisation: Add a share.
- Scroll down for Your own text in the confirmation mail . When everything is right, press Save at the bottom.
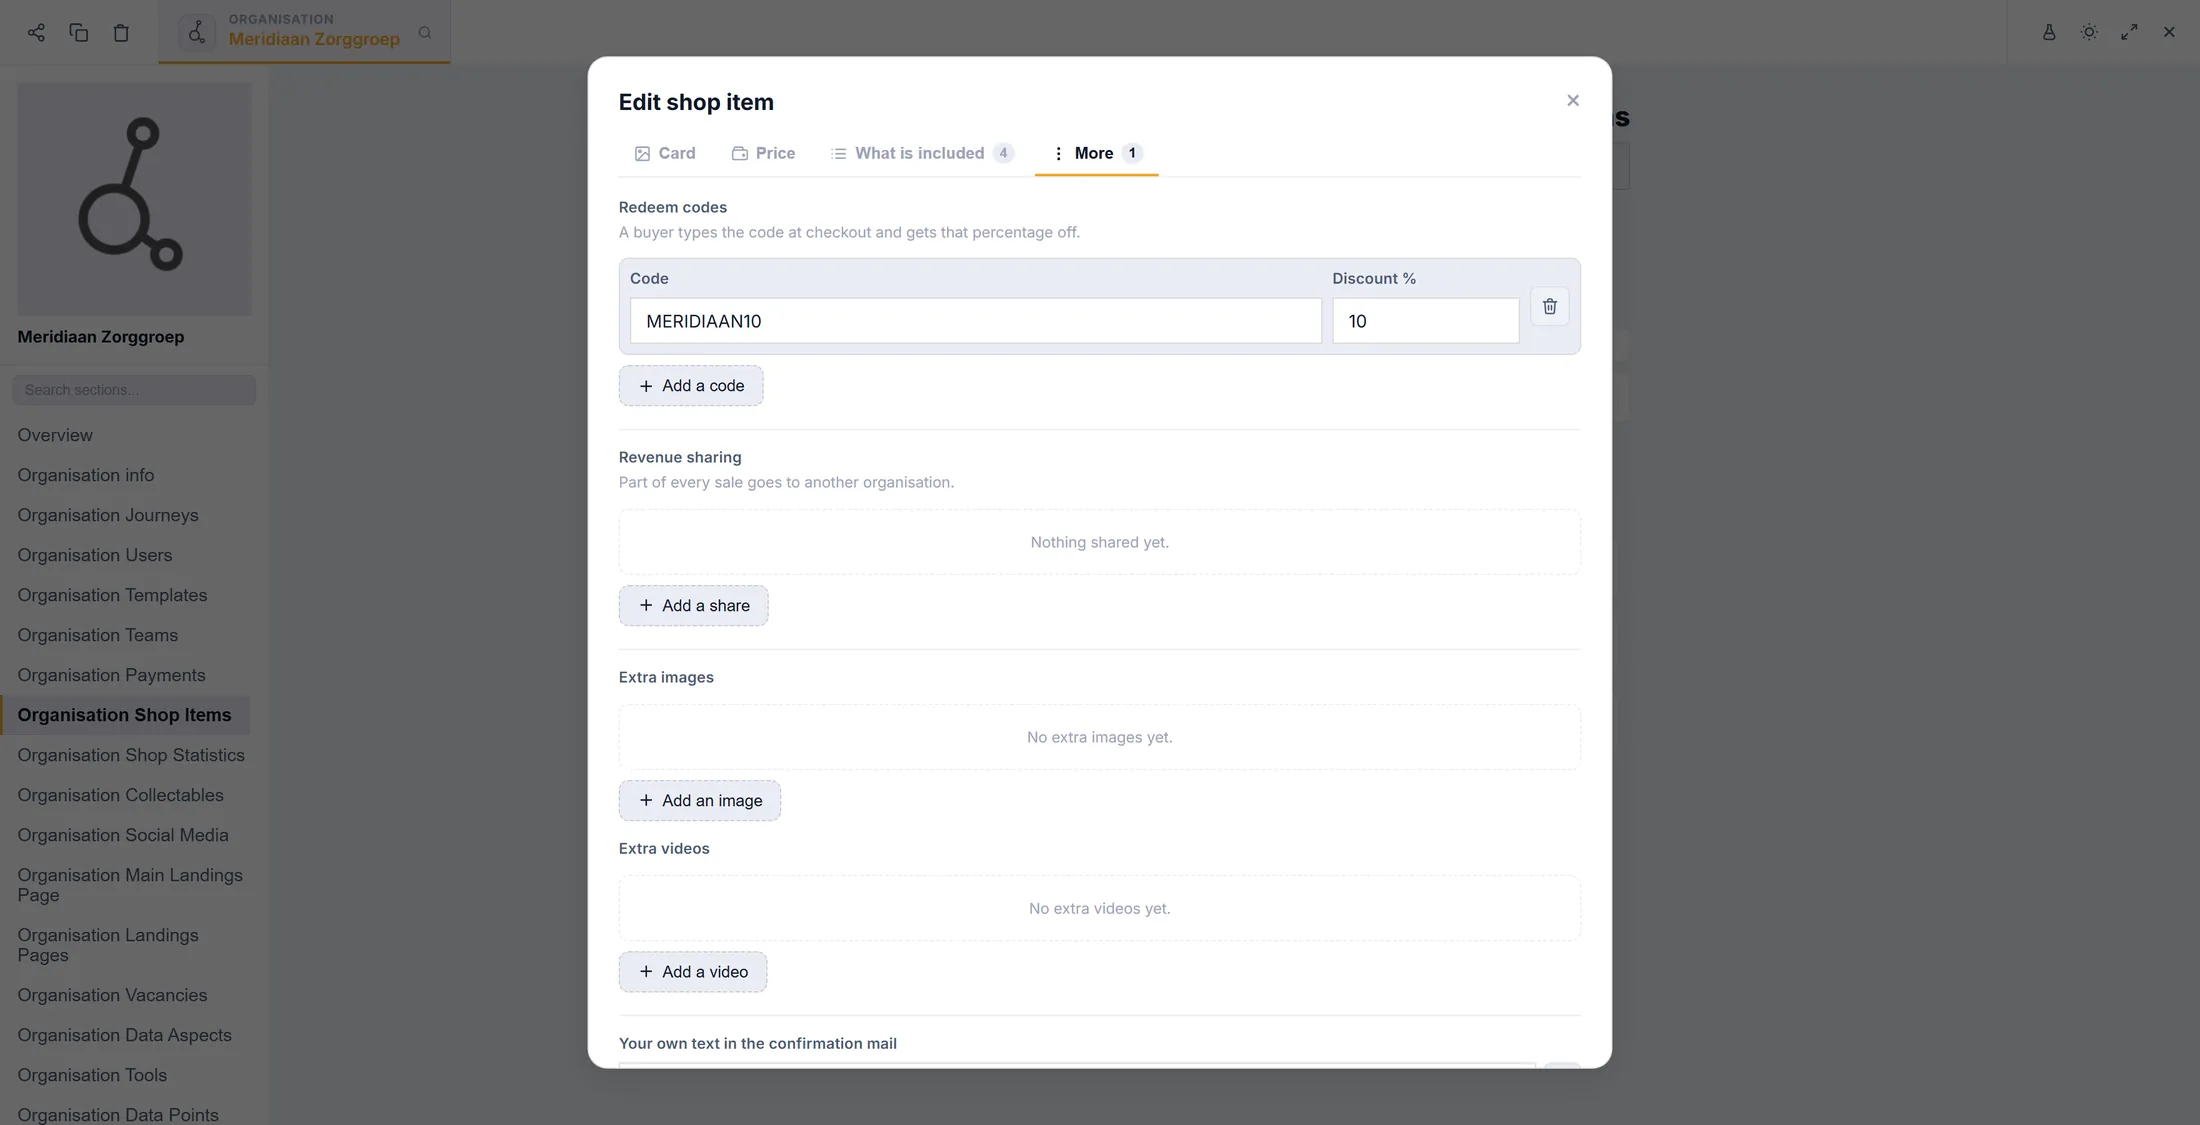
A code that takes 10% off. See what sold
Numbers for each item, each organisation and each journey.
- In the list on the left, click Organisation Shop Statistics (or press Statistics on the shop items page).
- Choose the period: 30 days, 90 days, 12 months or Everything. Compare with the period before adds the change.
- Switch between Per shop item, Per organisation and Per journey. The tiles show Revenue , Sold , Subscriptions running , Cancelled , Payment overdue and Refunded .
- Download CSV saves the table for your bookkeeping.
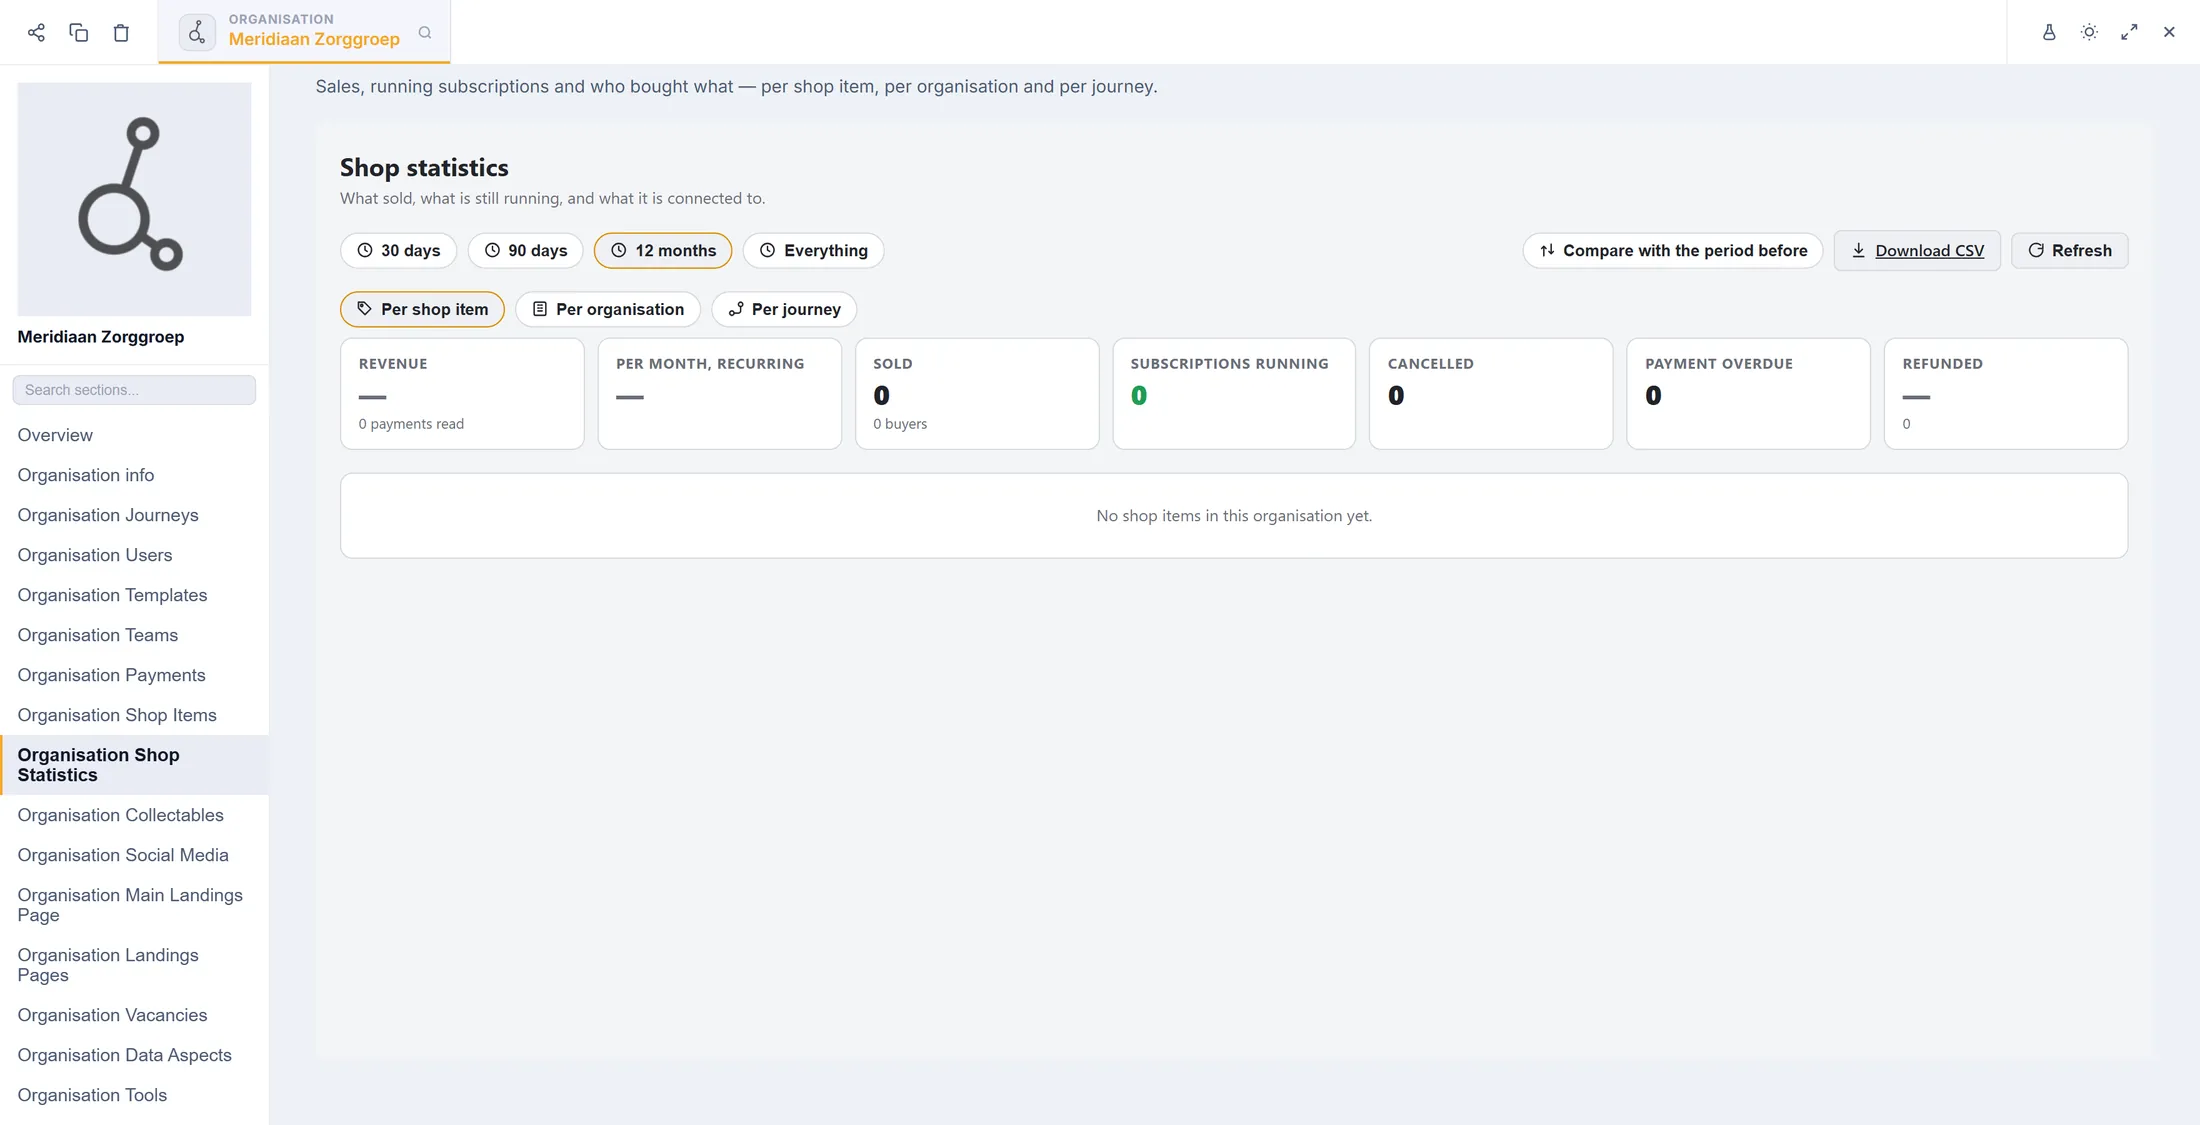
A new shop starts at zero. Follow the money
Every money screen is in one place.
- In the list on the left, click Organisation Payments .
- The first tab, Sales & statistics , shows the same numbers as step 7.
- Shop items is your list again. Subscriptions, invoices & payouts is where the money moves. Organisation credits holds the credits of the organisation.
- Selling agreement at the top right opens the agreement you signed in step 2.
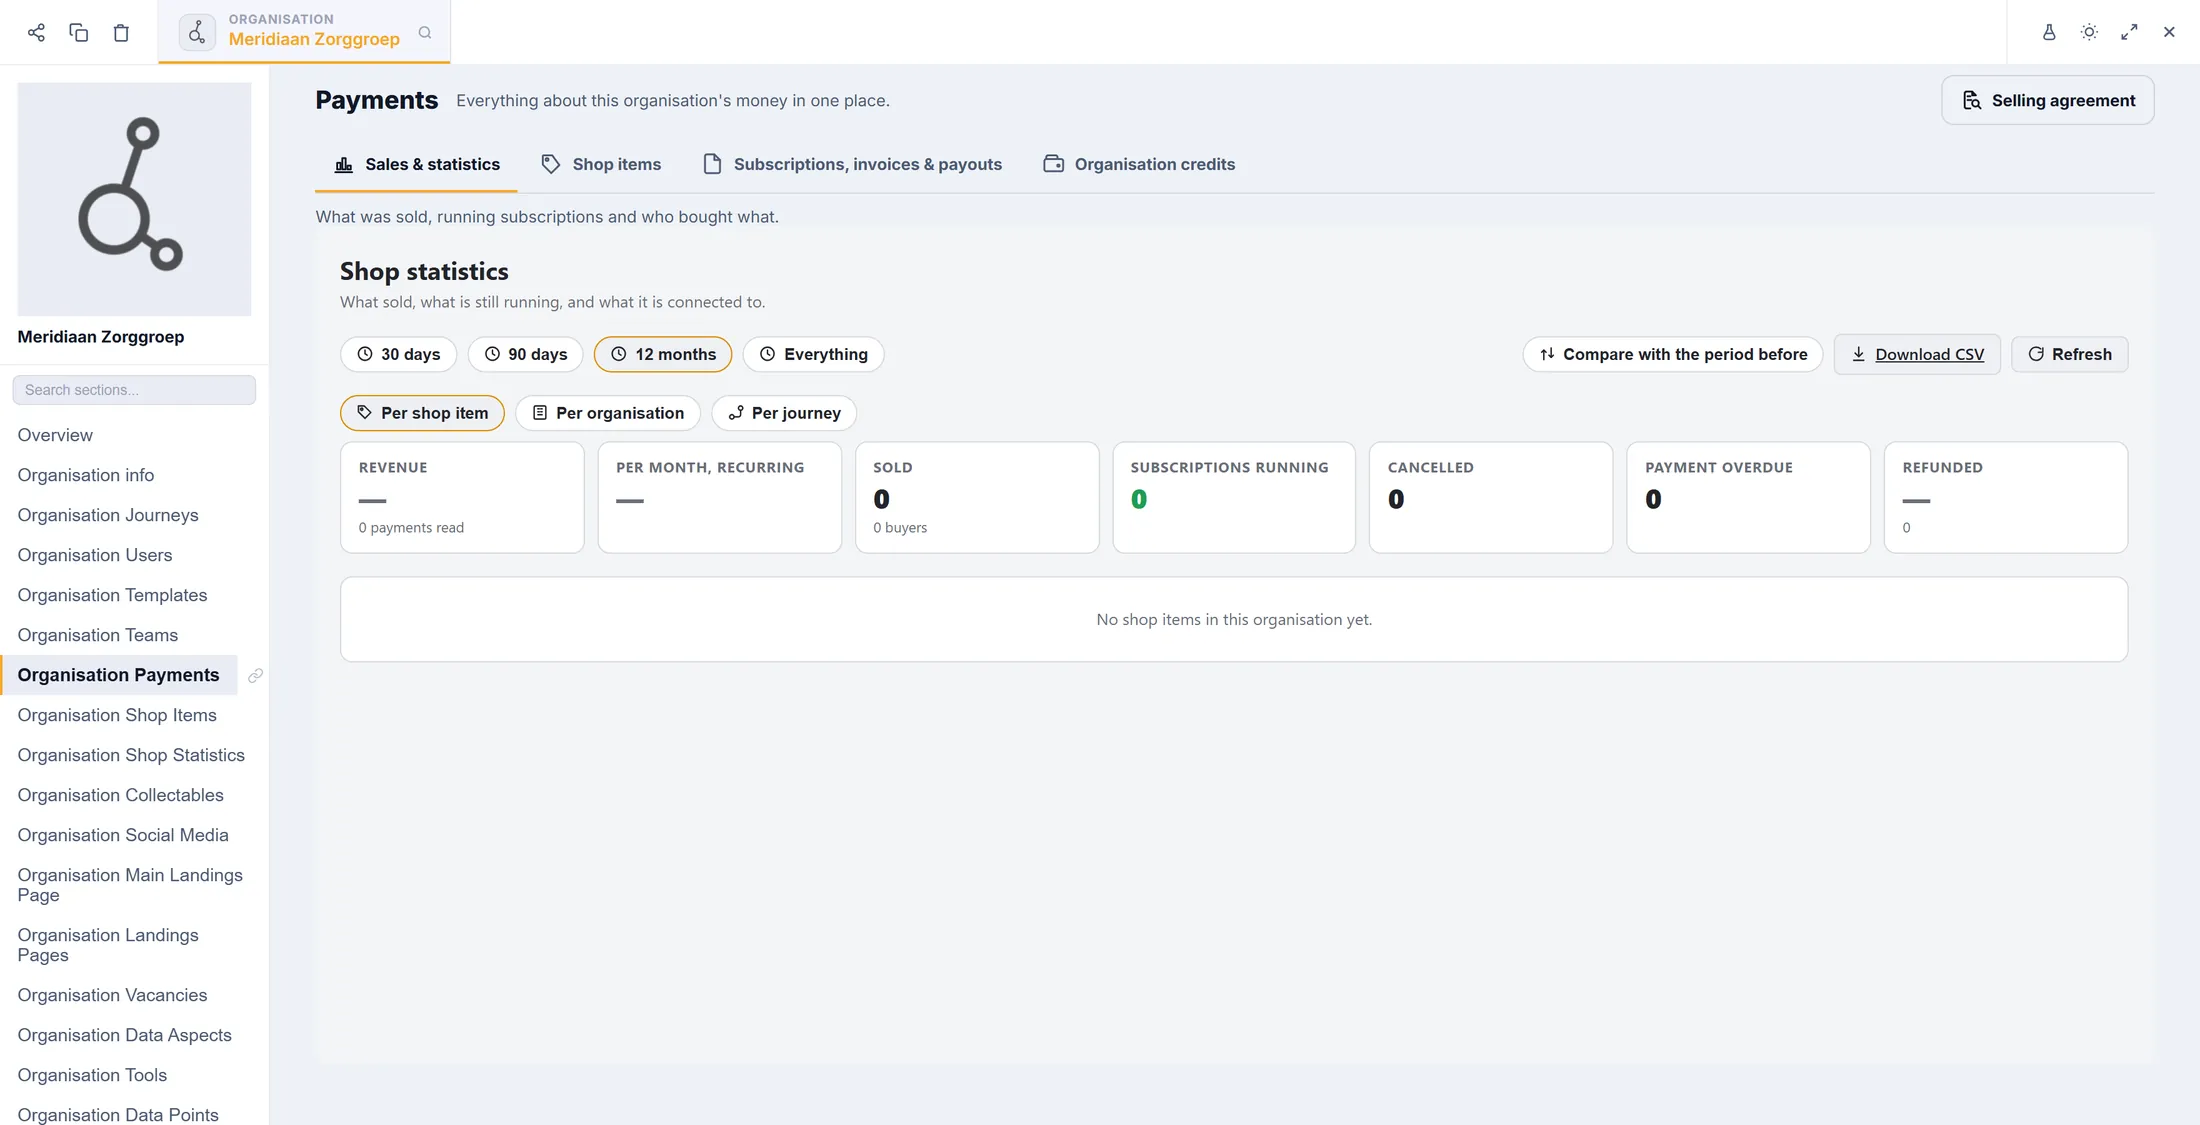
Four tabs. One place for the money.
If something is not right
A window asks me to get set up to sell.
That is the go-live check. Fill in who the invoice comes from and press Save and check.
The price under my number says "excl. VAT".
The price you type includes VAT. The small line shows what is left without VAT.
Shop statistics show only zeros.
Nothing has sold in that period. Try Everything.
I want another price in one country.
On the Price tab press Add a country price.
The words, in plain language
- shop item
- One thing a buyer can pay for, such as a training. It has a card, a price and a list of what is included.
- subscription
- A payment that comes back every period, for example every month, until it is cancelled.
- redeem code
- A word a buyer types at checkout to get a percentage off.
Where to go next
- Make a landing page Tell people about your training on a page of its own.
- Start your organisation Set up the organisation that sells.