Make your presentation beautiful
The design tools of the slide editor, in the order you meet them: a Design for every slide, Smart layout for one slide, Arrange and Tidy up for a messy selection, your CrewMate's "Design this slide better" with its preview, one picture style for the whole presentation, and the slide background.
Content - slides - 7 min. You need: a presentation in Slides
Nothing changes before you say yes. Every change can be undone with Ctrl + Z.
What you will be able to do
- A look for every slide Pick a Design once and every slide follows.
- See it before you keep it Your CrewMate shows what it made. You press Apply, or Cancel.
- Tidy a messy slide Line things up, space them evenly, or choose a new layout.
- Pictures in one style Give every slide that asked for a picture the same look.
Get this ready first
- A presentation with a few slides Any presentation in Slides will do. Practise on a copy if you like: everything here can be undone.
- Know that some steps use credits Design, Smart layout, Arrange and Tidy up are free. "Design this slide better" and making pictures are done by the AI, and use your organisation's AI credits.
Do it together, one step at a time
Ten steps. The first three use no AI credits. From step 4 your CrewMate helps.
Pick a design for all your slides
One click changes the colours and the letters of every slide.
- Open your presentation. Click on the empty grey space next to the slide, so nothing on the slide is selected.
- At the top of the list on the right you see the Design cards: Midnight , Paper , Studio and Boardroom .
- Click one, for example Studio . Every slide changes at once, and so do the small slides on the left.
- Your slide numbers and footer text stay as they were.
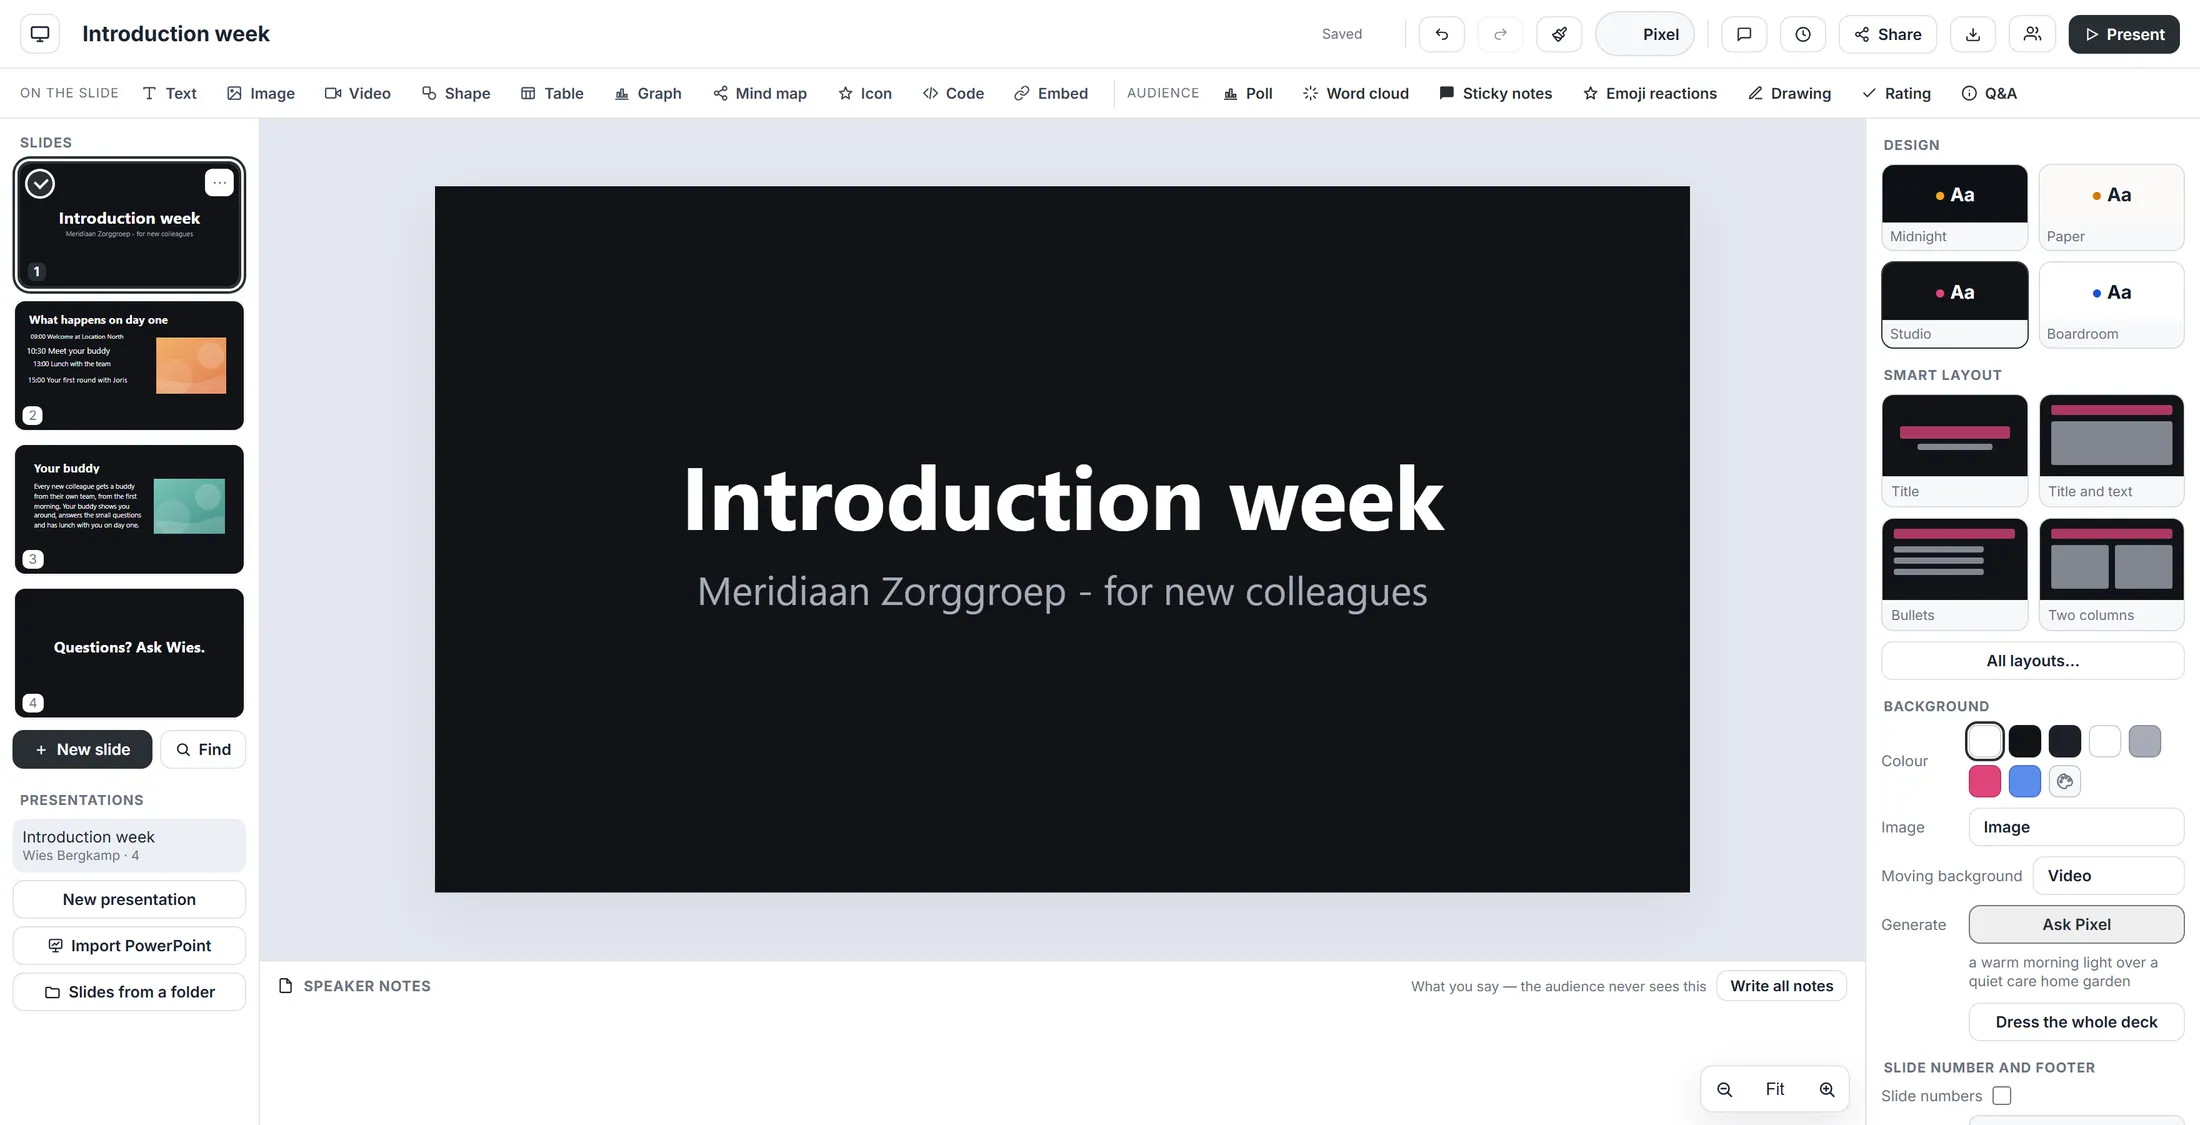
One click, and all four slides have the same look. Give one slide a new layout
Pick a layout and the slide sorts itself out. Your words and pictures stay.
- Click the slide you want to change in the list on the left. Then click the empty space next to it.
- Under Smart layout you see four layouts: Title , Title and text , Bullets and Two columns .
- Want more? Press All layouts…. A window opens: Smart layout - "Rearranges this slide and keeps what is on it."
- Click a layout, for example Two columns . The slide is rearranged.
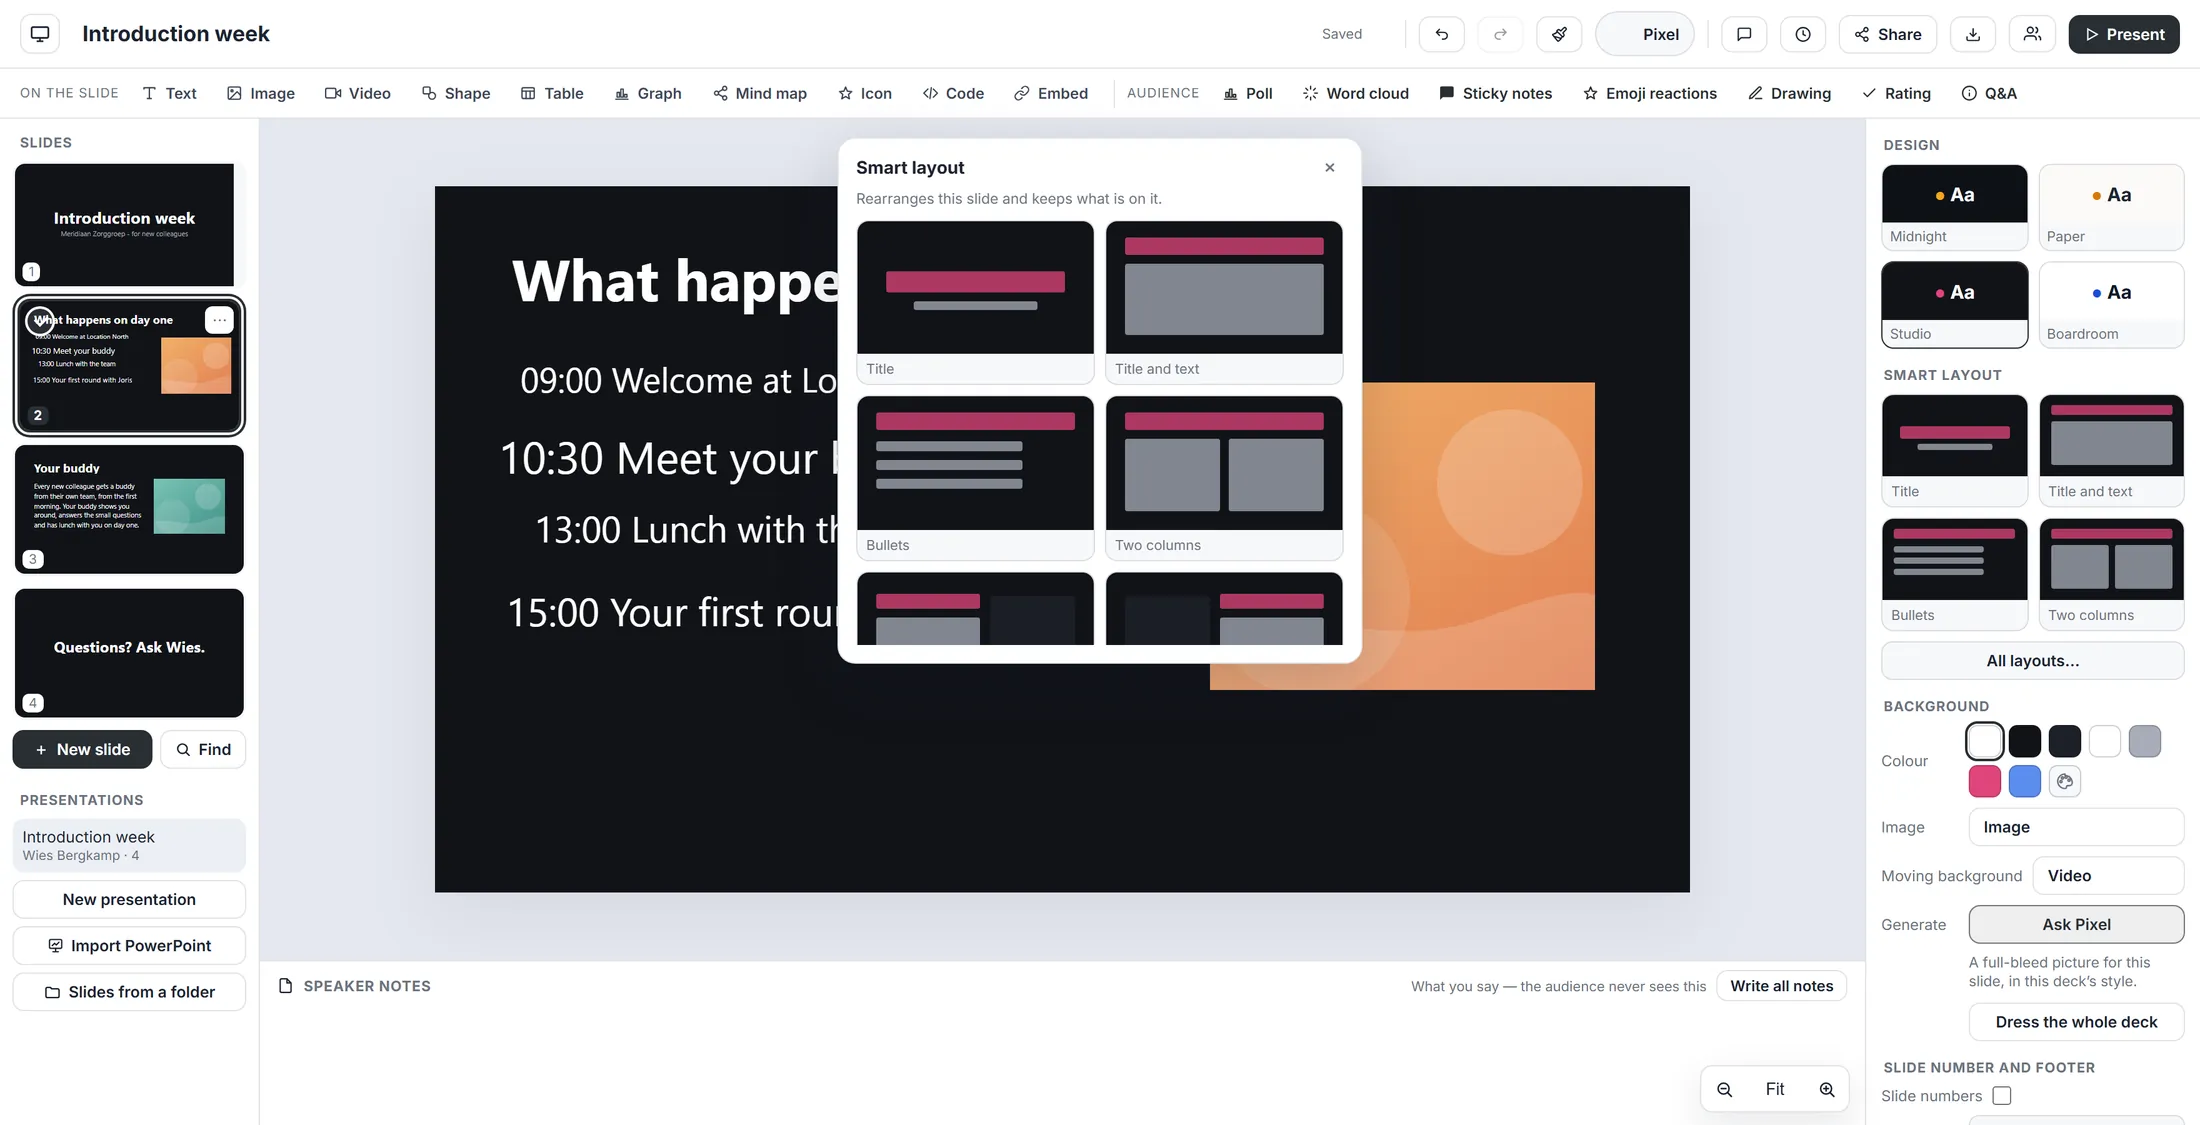
A layout rearranges the slide. Nothing on it is thrown away. Line things up and tidy up
Select everything on a messy slide and put it in order with three buttons.
- Click on an empty spot of the slide, then press Ctrl + A. Every item on the slide gets a frame.
- In the list on the right, scroll to Arrange . The first row has six small buttons: align left, centre, right, top, middle and bottom. With several items selected, they line up with each other.
- Press Space across or Space down to make the gaps between the items equal. This needs at least three items.
- Press Tidy up. Every item moves a tiny bit, to a fine grid, so almost-equal becomes equal.
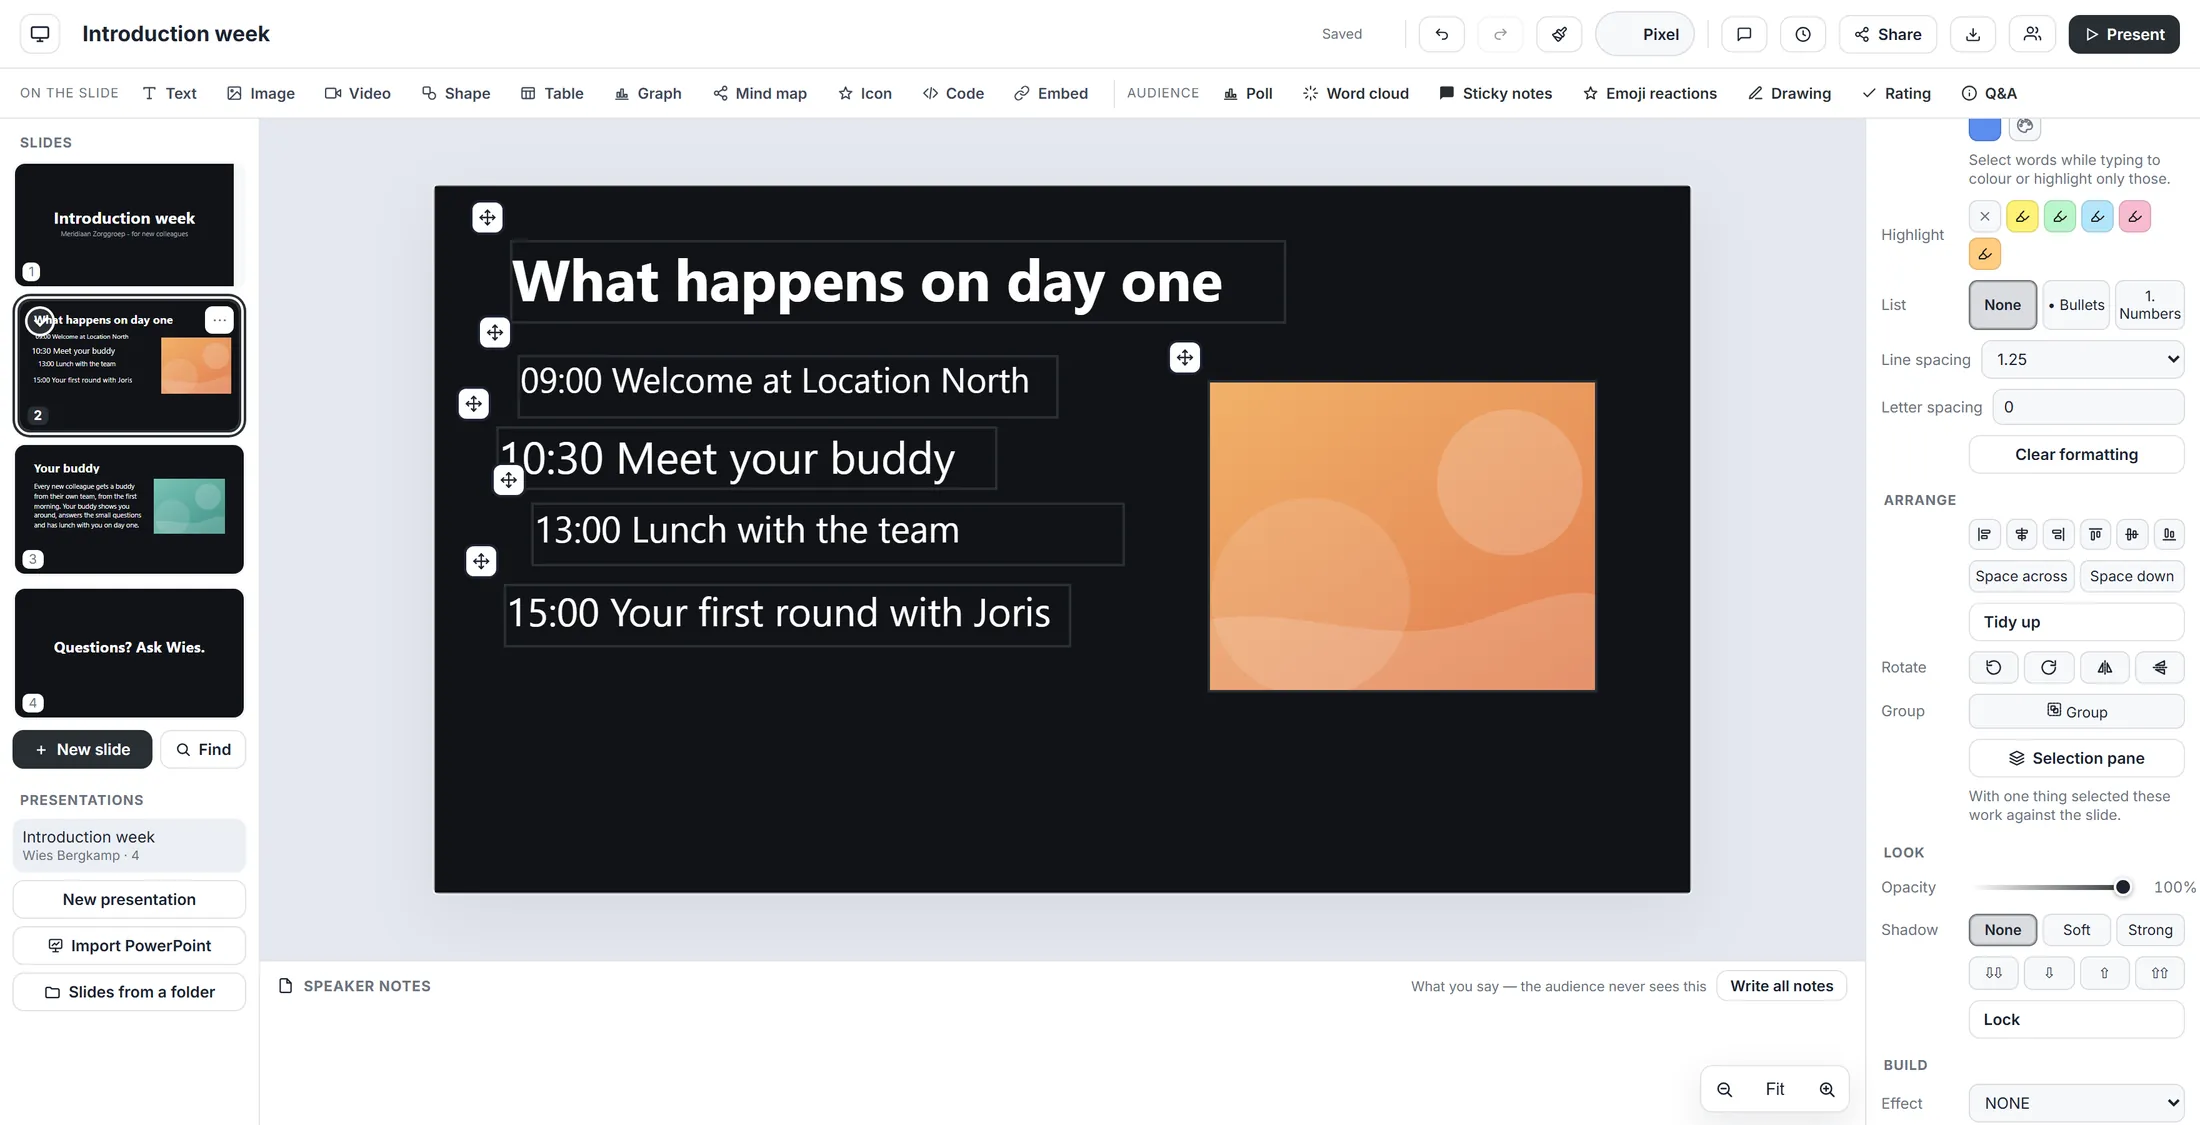
All items selected. The Arrange buttons work on all of them. Open your CrewMate menu
Your CrewMate can design a slide for you. The menu is at the top.
- Click on the empty space of the slide, so nothing is selected.
- In the top bar, press the button with the name of your CrewMate. In the picture it is Pixel .
- A menu opens: Build the deck, Rewrite this slide, Design this slide better, Write speaker notes, Write the notes for all slides, Generate a picture, Illustrate the whole deck and Switch CrewMate….
- For this page we use Design this slide better (next steps) and Illustrate the whole deck (step 9).
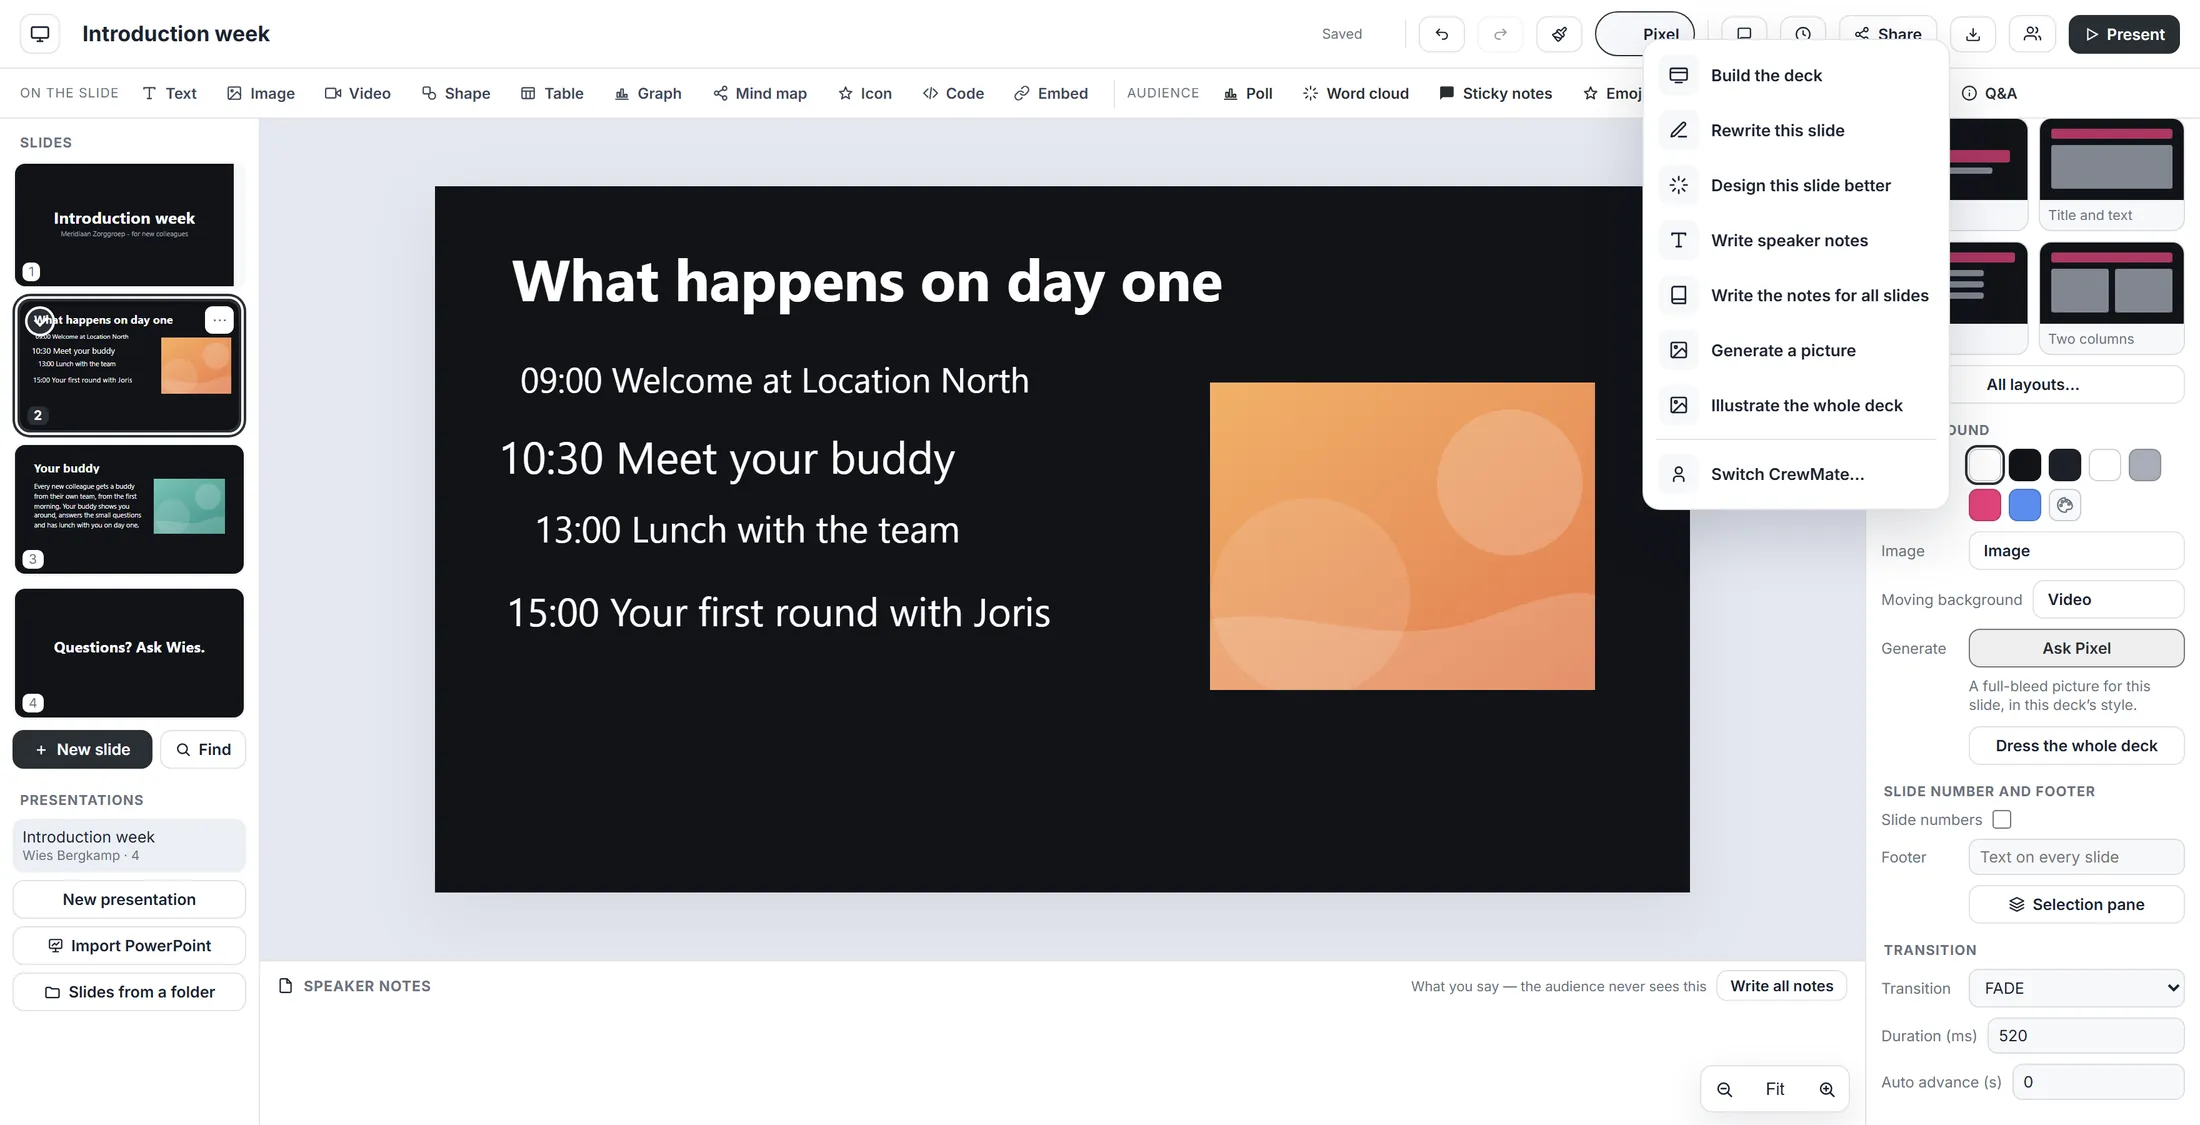
The menu of your CrewMate. Tell it what you want
Type one short sentence, or nothing at all.
- Click Design this slide better . A window opens: Pixel - Design this slide better .
- Type what you want, for example: Calmer, more space, the times in our orange . You can also leave the box empty.
- Press Apply to start. Cancel closes the window and nothing happens.
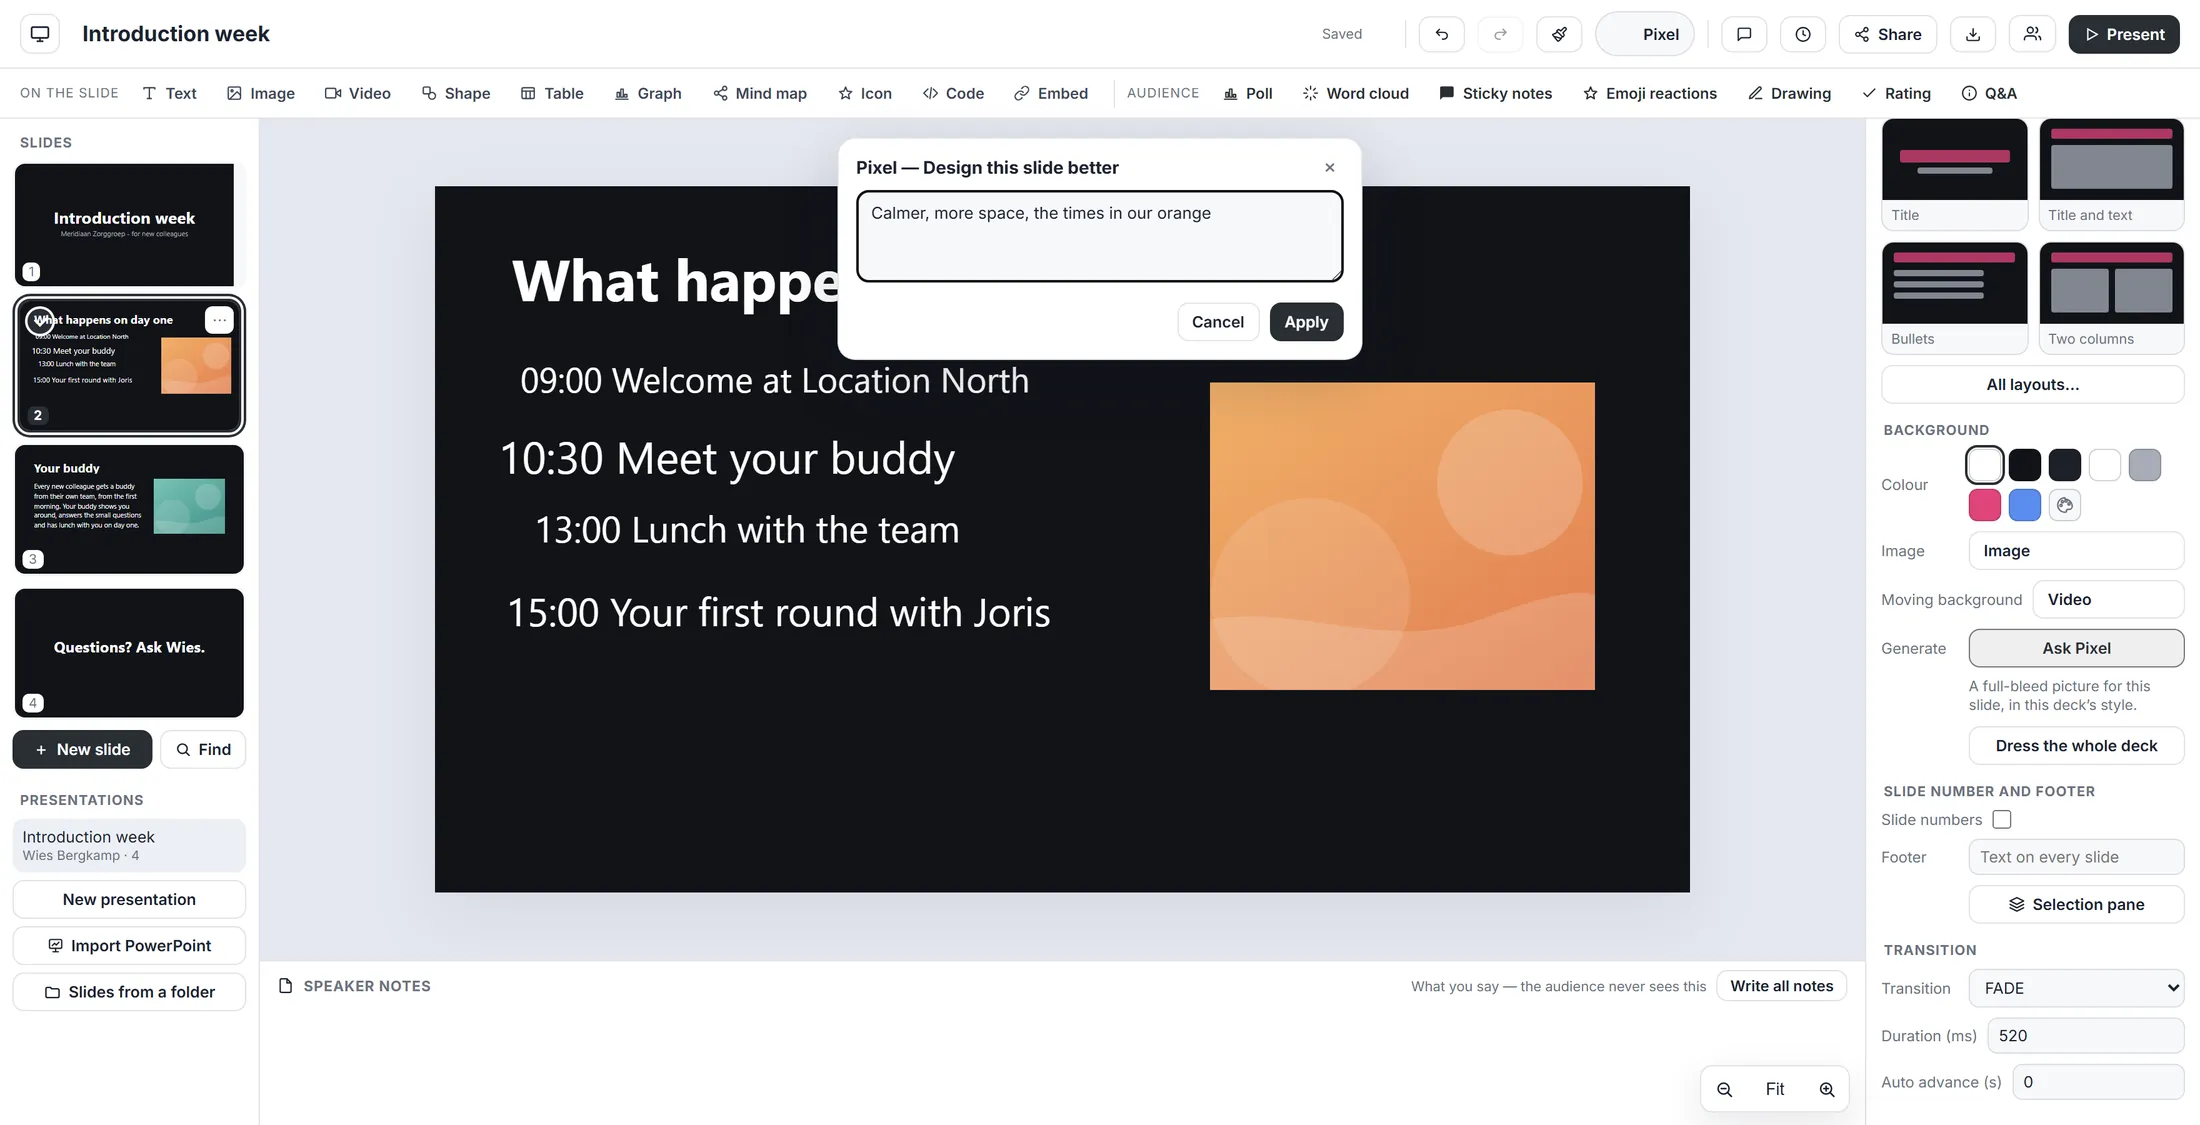
A wish in your own words. Wait a moment
A small window says it is busy. The rest of the screen fades.
- Wait. The card says Pixel - Design this slide better and: "Writing. This takes a moment - the deck opens as soon as it is ready."
- Do not press anything. When it is ready, a preview opens by itself.
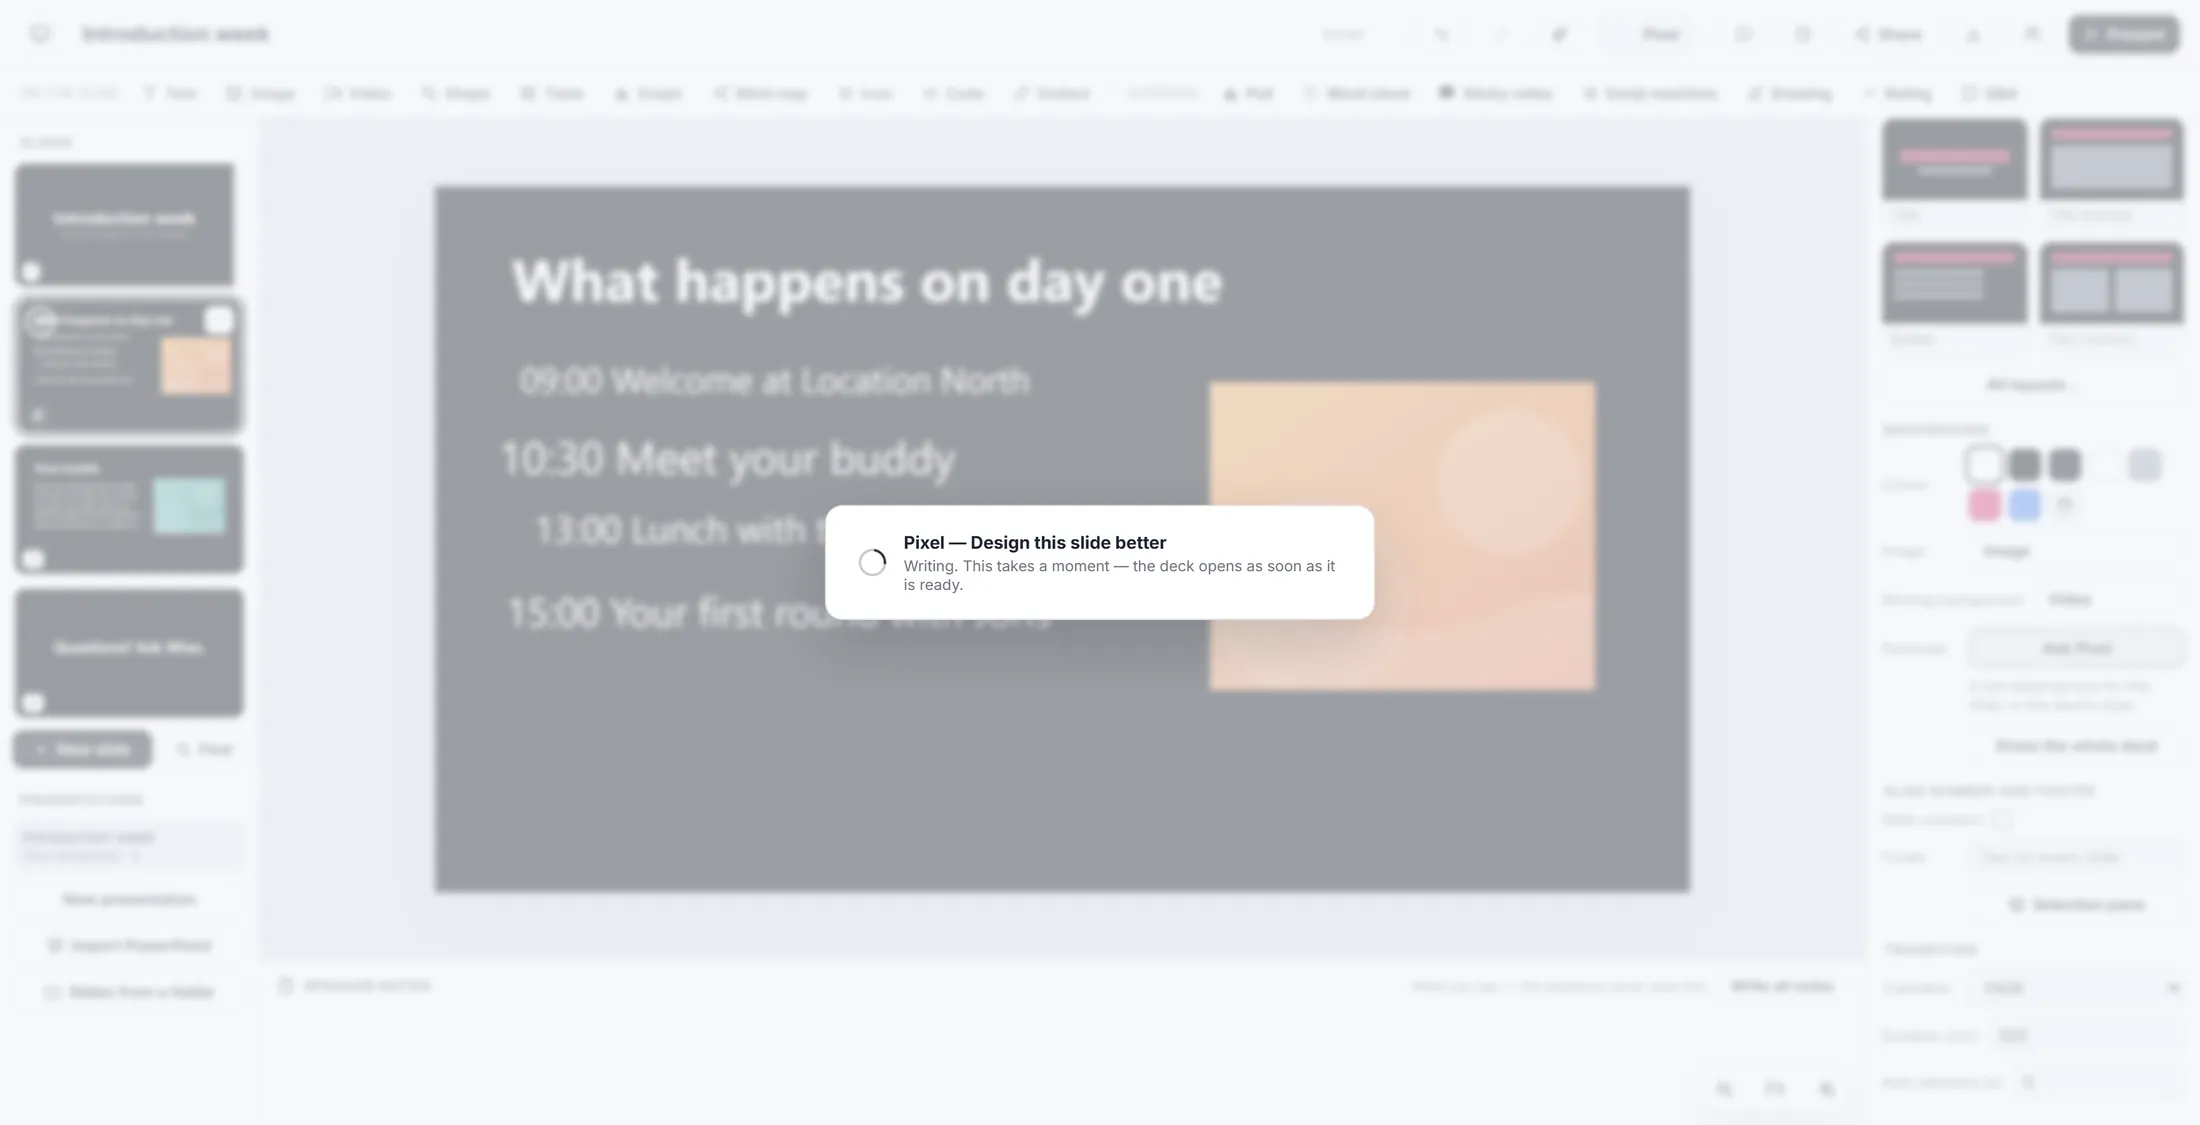
Busy. This takes a moment. Look first, then keep it
Nothing changes before you say yes.
- Read the window Here is what I made - keep it? . Under the title your CrewMate says what it did.
- Look at the small picture. It is drawn by the same editor, so what you see is what you get.
- Happy? Press Apply. Not happy? Press Cancel and nothing changes.
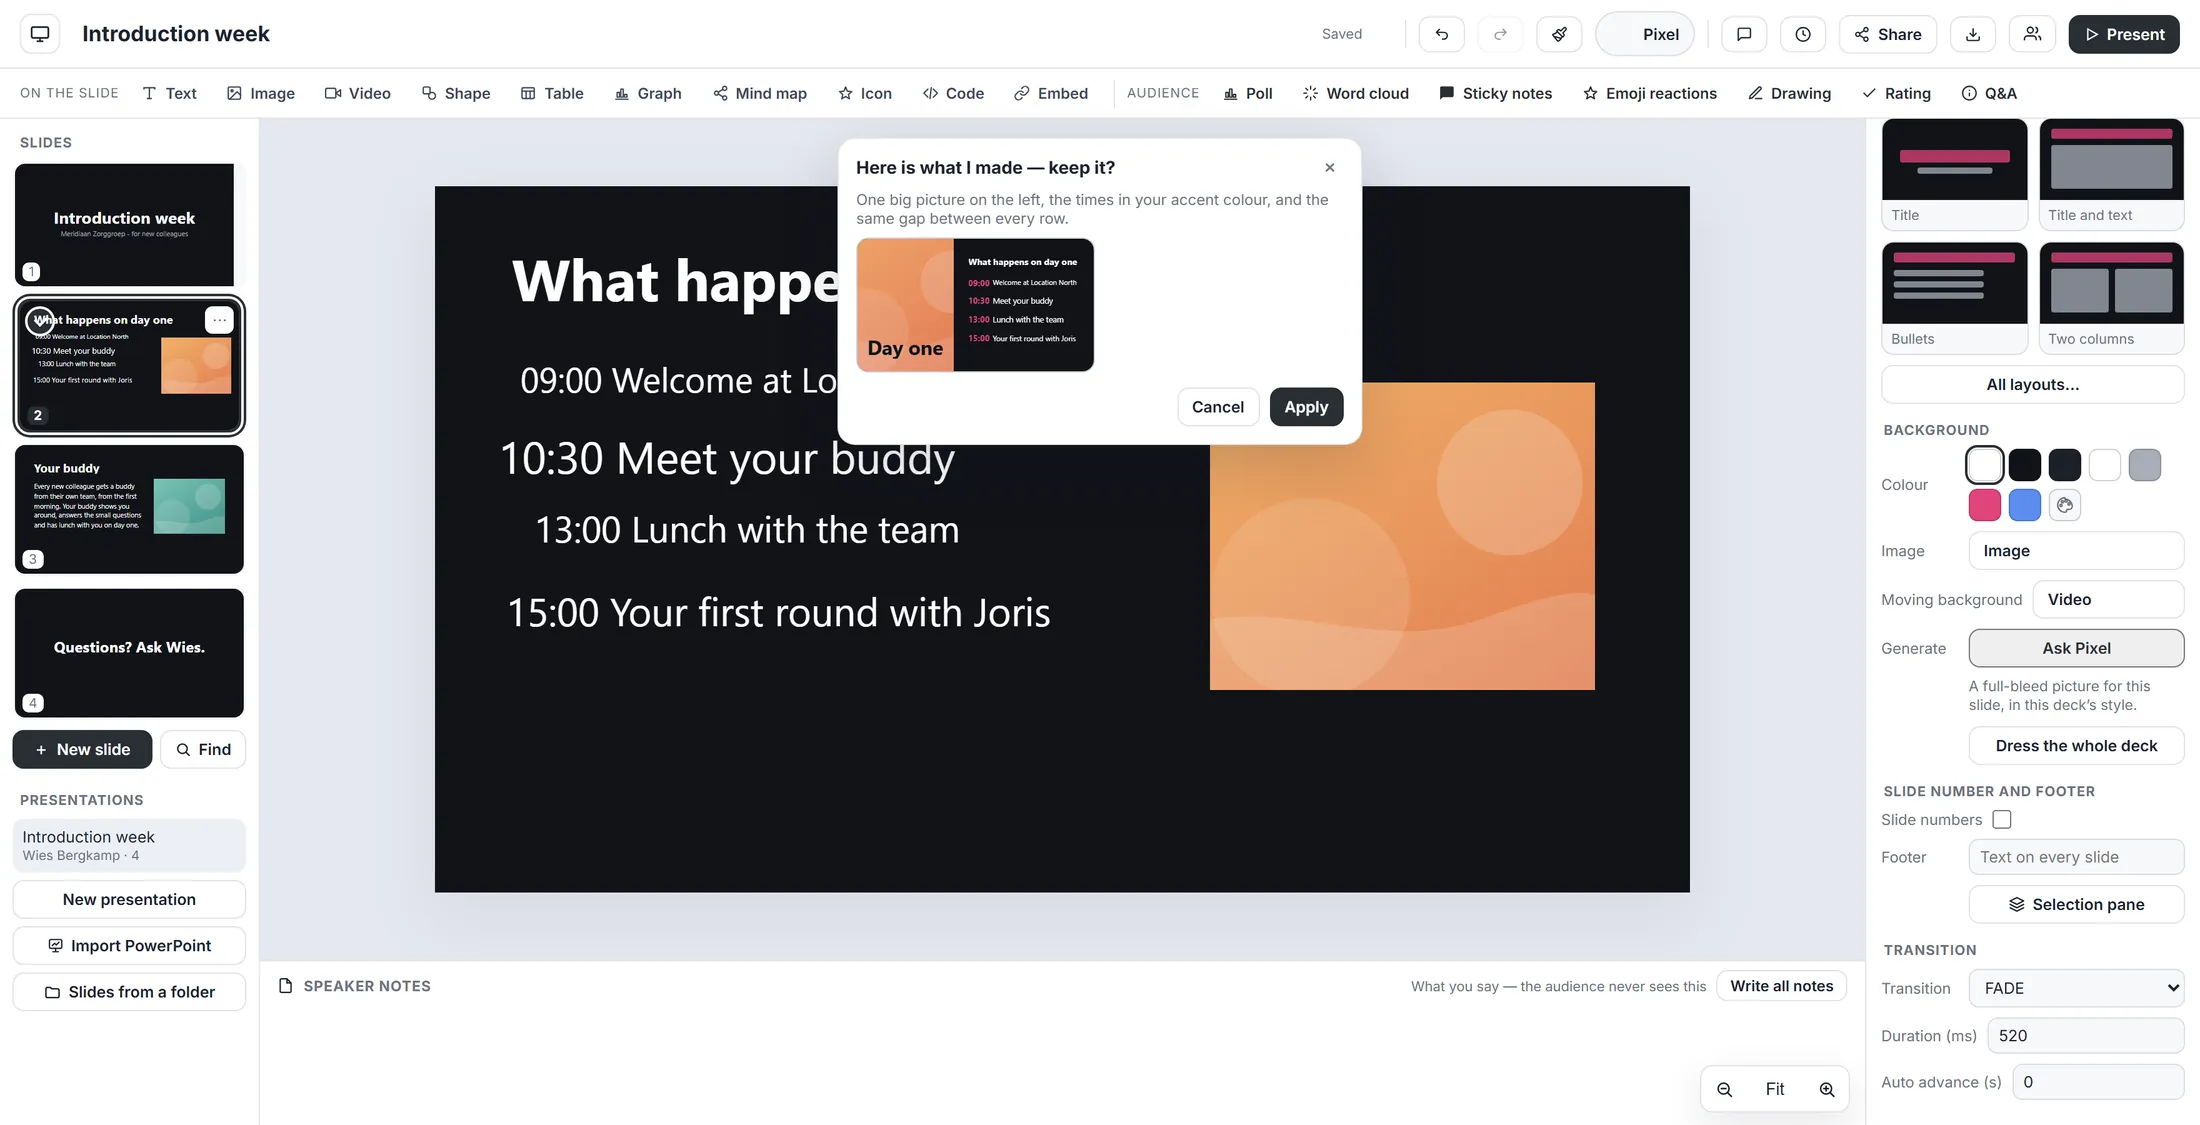
The redesigned slide, in small. Your own slide is behind it, unchanged. See the result
The new slide is in place, in the list on the left too.
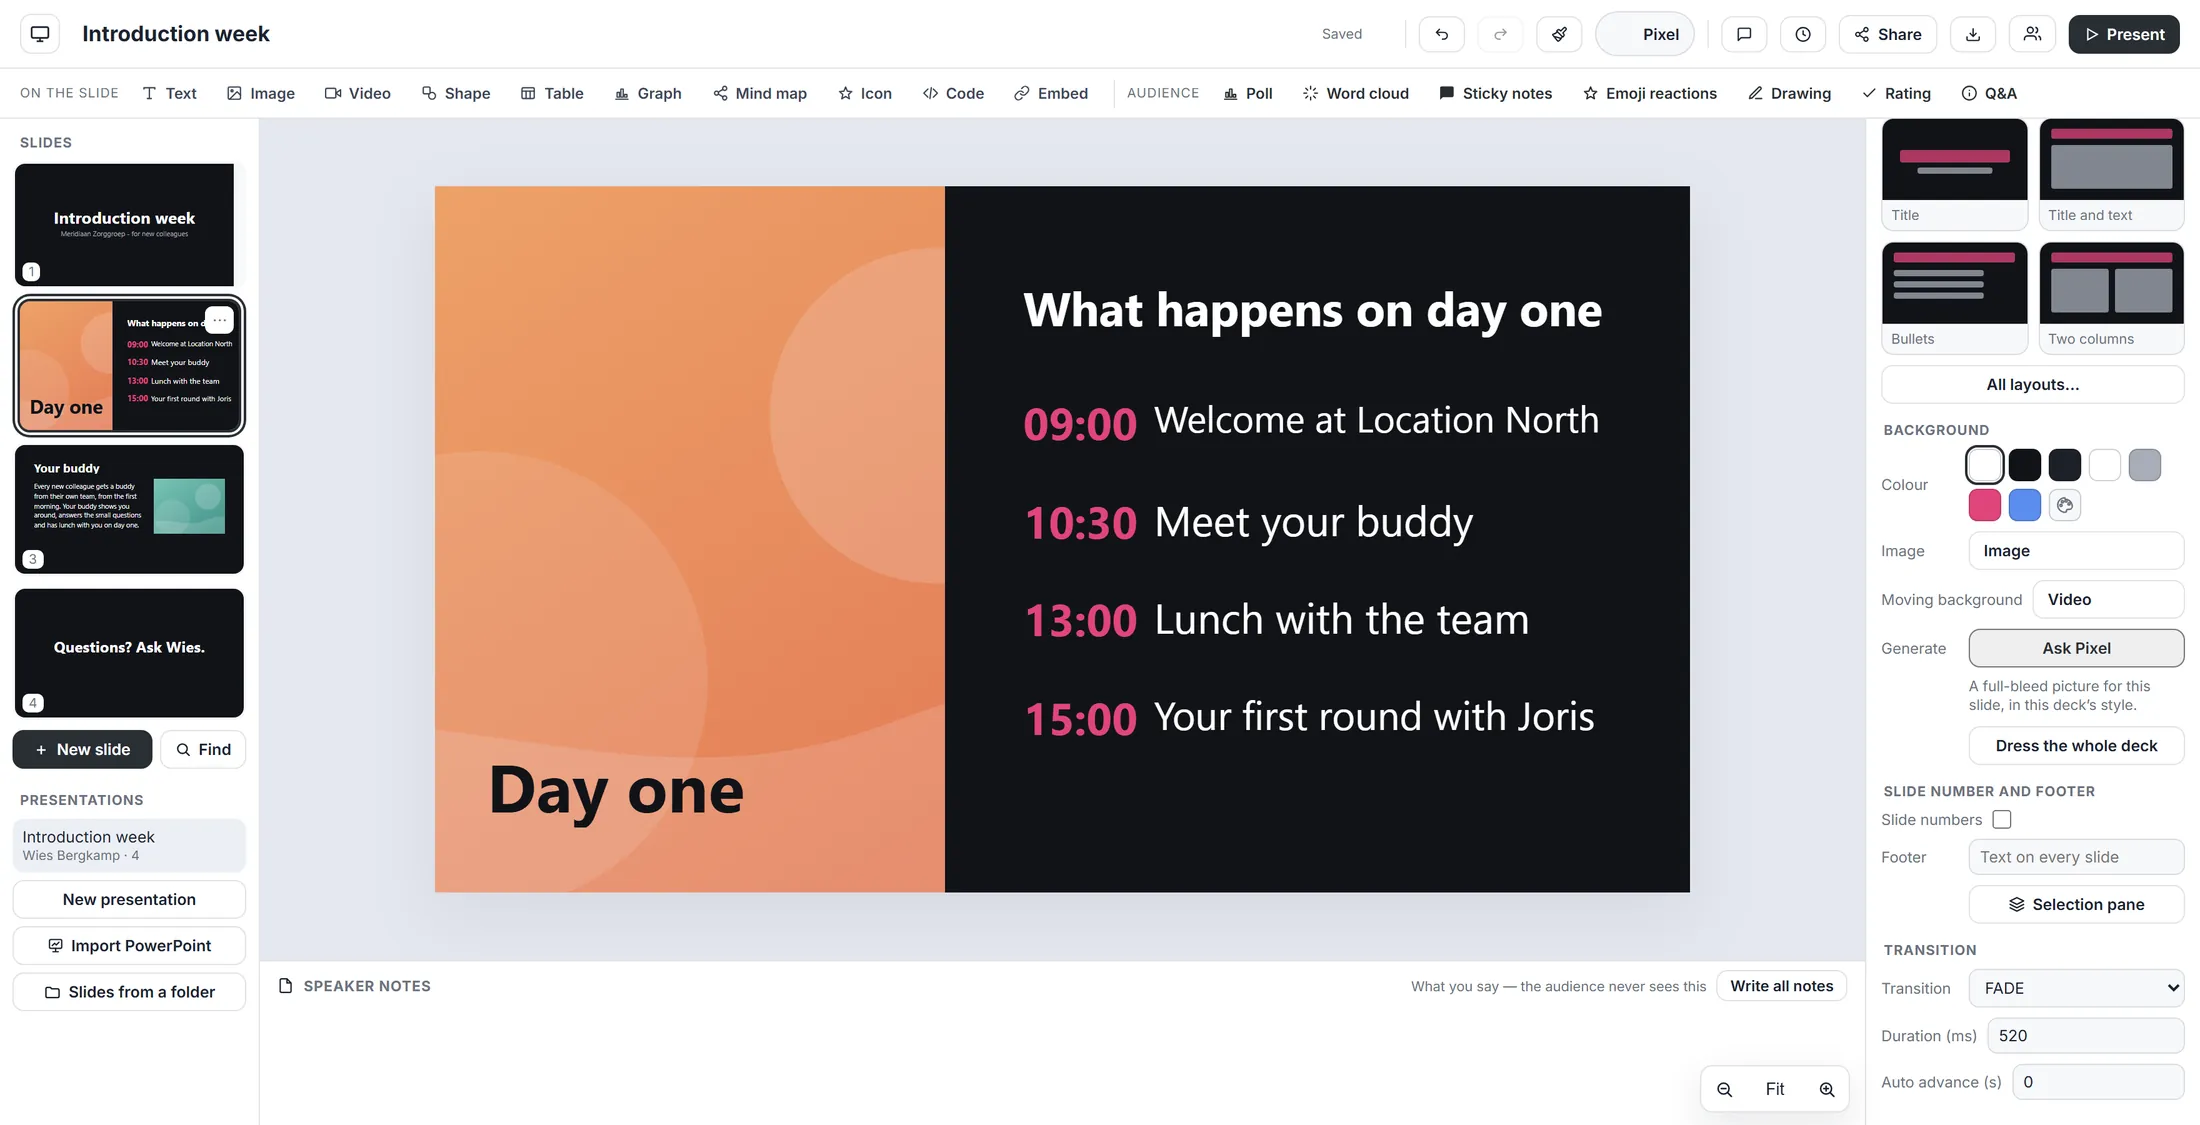
- Look at the slide. In the picture: one big picture on the left, the four times in the accent colour, the same gap between rows.
- The small slide on the left has changed too.
- Do not like it after all? Press Ctrl + Z or the undo arrow at the top. The old slide is back.
The same words, now designed. Give all pictures one style
Some slides ask for a picture. Pick one look, and they all get it.
- Open the CrewMate menu again and click Illustrate the whole deck .
- A window asks In which style should the pictures be? . It says how many slides asked for a picture: "One look for the whole deck. 2 slides asked for a picture."
- Click a style: Photographic , Illustrated , Watercolour , Abstract , 3D render or Black & white . It fills the box below, and you may change the words.
- Or type your own look in the box.
- Press Make the pictures to start, or Not now.
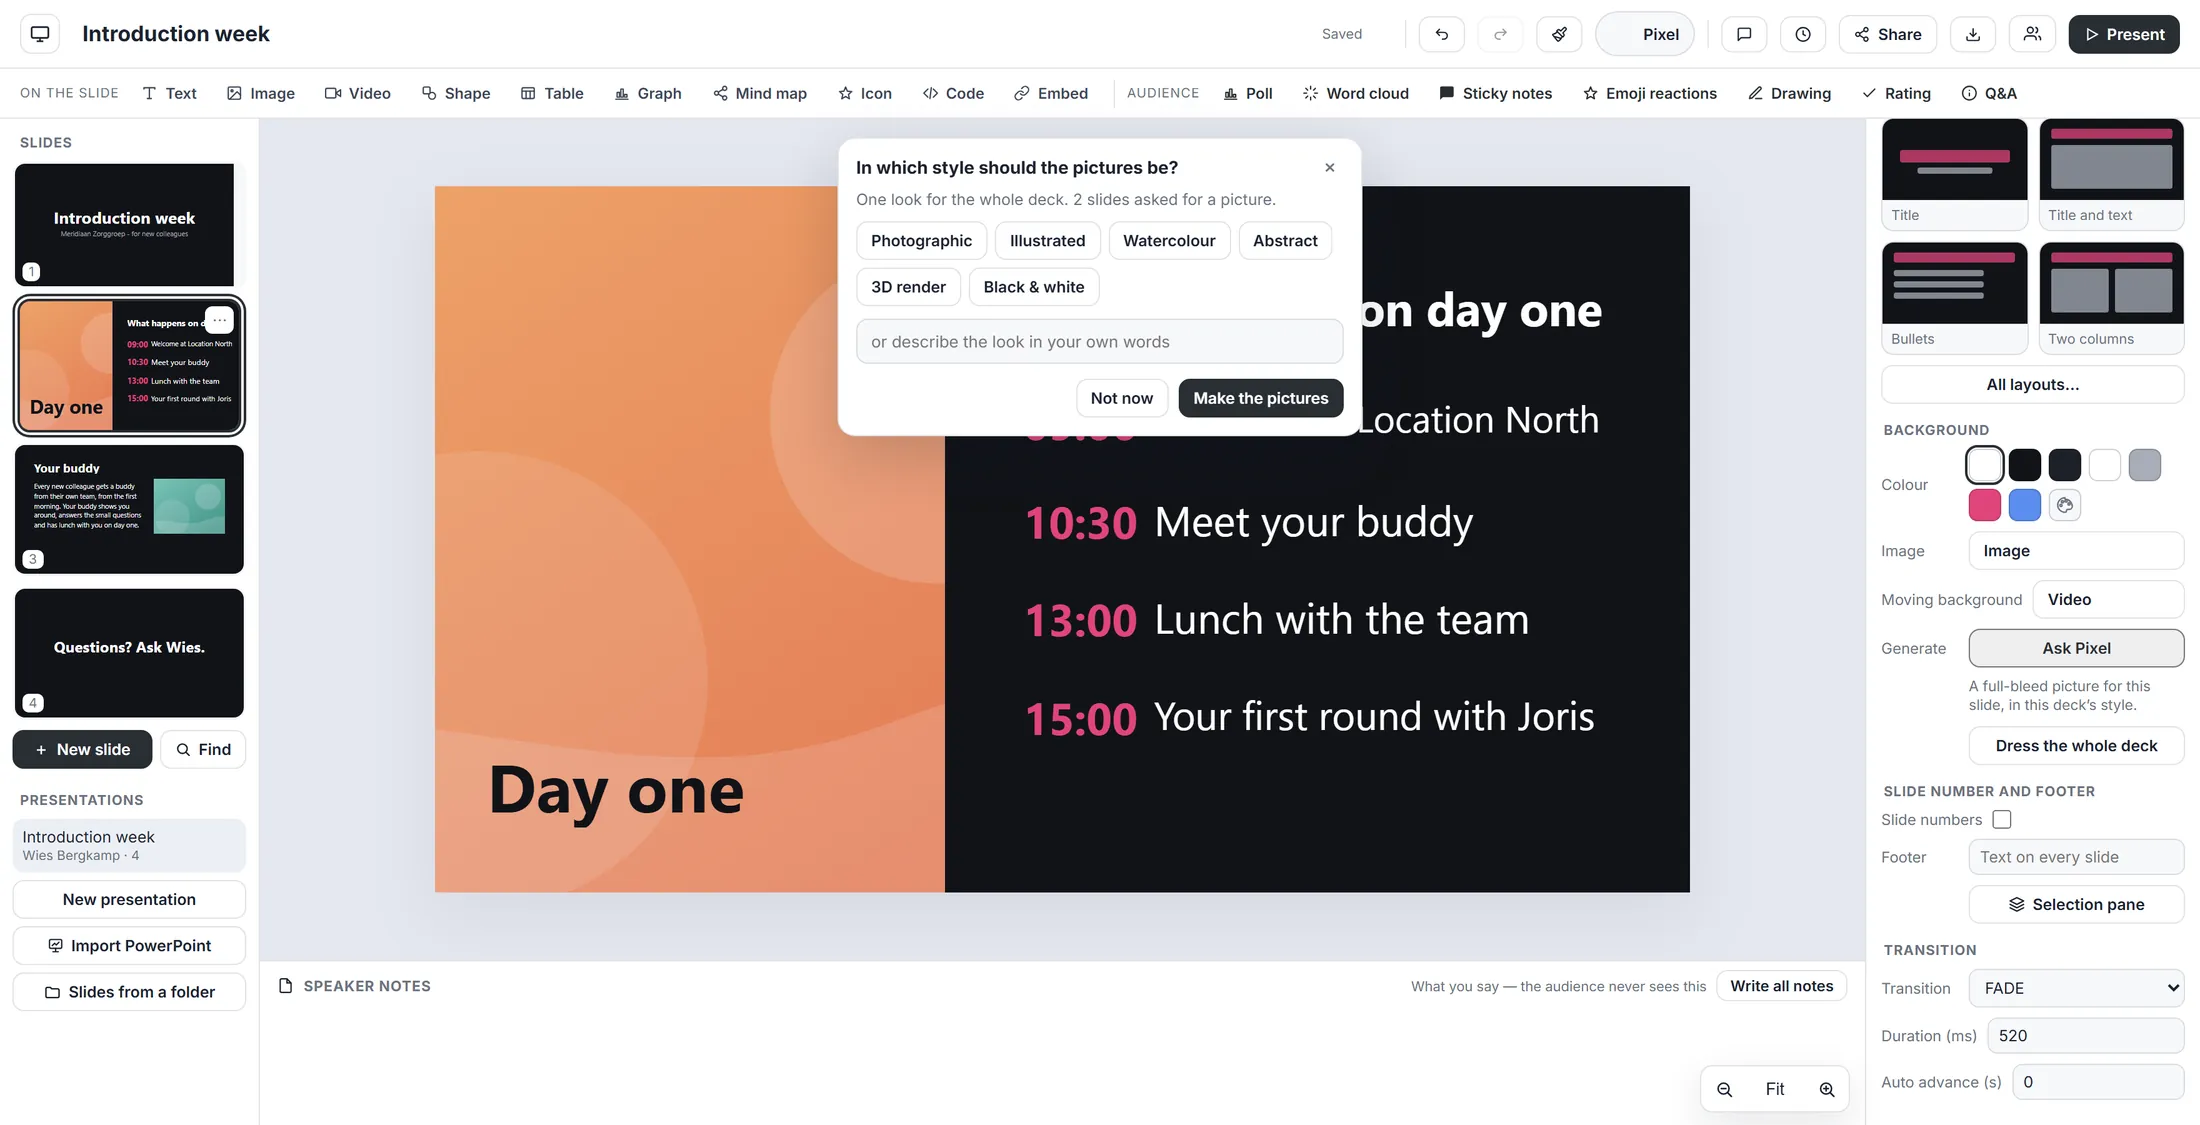
One look for the whole presentation. Change the background of one slide
Every slide has its own background. Pick a colour, or a picture.
- Click the slide, then the empty space next to it. In the list on the right, find Background .
- Click a dot next to Colour to colour the background.
- Press Image to use a picture of your own, or Video for a moving background.
- Press Ask Pixel (the name of your CrewMate) to have a picture made for this slide. Under the button you see what the slide asked for.
- Press Dress the whole deck to make the pictures for every slide that asked for one. This button only shows when at least one slide did.
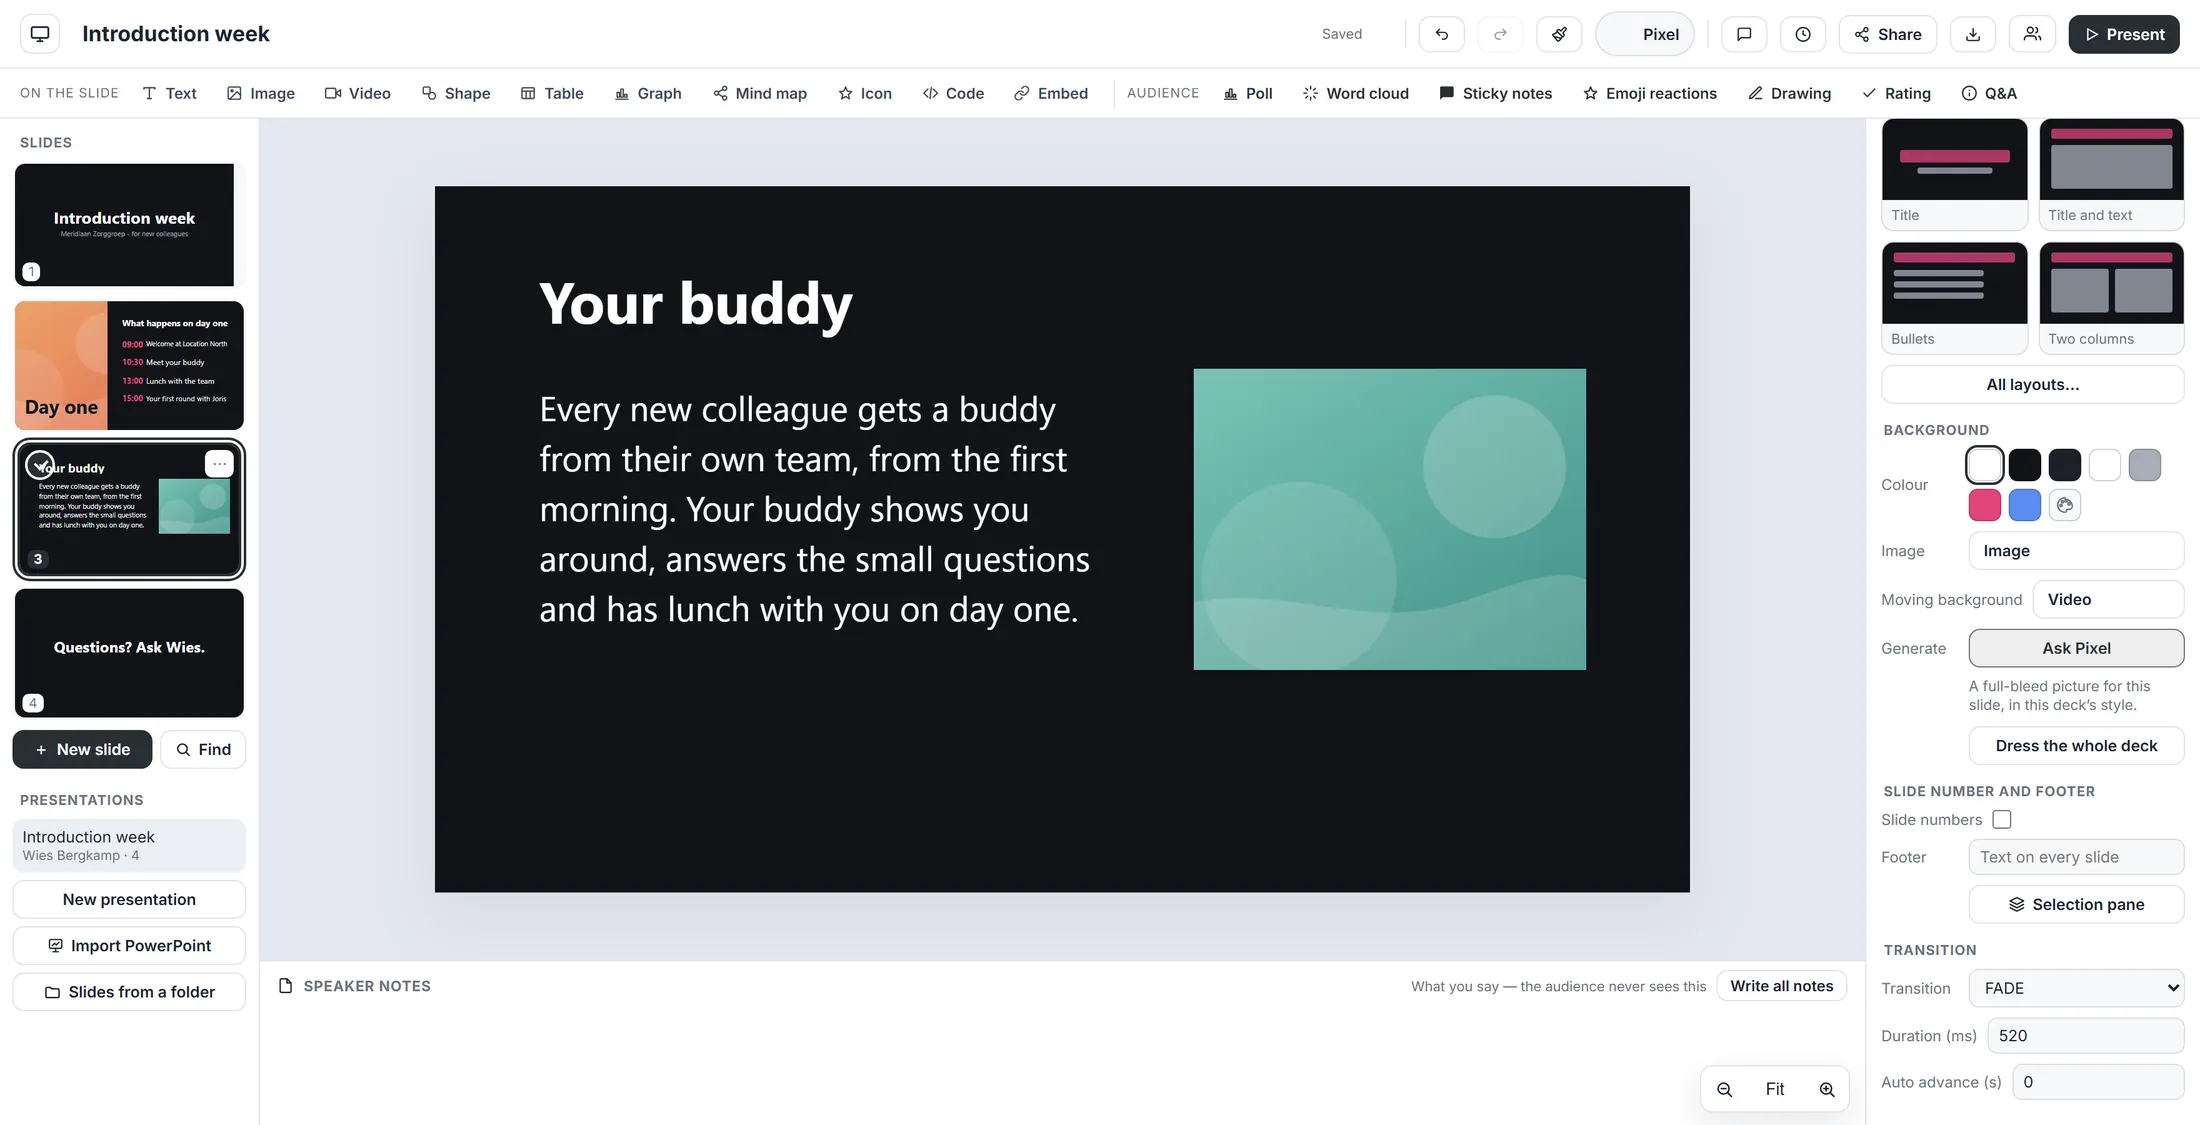
Colour, picture, video, or a picture made for you.
If something is not right
I do not see the Design cards.
Nothing may be selected. Click the empty space next to the slide, and the Design cards appear at the top of the list on the right.
Space across does nothing.
It needs at least three items. Select more items, for example with Ctrl + A.
I do not see "Dress the whole deck".
It shows only when at least one slide asked for a picture. Slides made by a CrewMate do; slides you made yourself do not.
I pressed Apply and do not like it.
Press Ctrl + Z, or the undo arrow at the top. The old slide is back.
The words, in plain language
- Design
- A ready-made look for all your slides: colours and letters.
- Smart layout
- A way to rearrange one slide. Your words and pictures stay.
- Preview
- A small picture of what the CrewMate made, before it goes on your slide.
Where to go next
- Make a learning Turn your slides into something people work through.
- All explainers The other things you can learn here.