Start your organisation
Create the organisation while you make your first journey, then fill it in from the Editor: name and logo, colours, people and teams, your own web address, and where the money is kept.
Set it up once - your organisation - 8 min. You need: a CoVince login
Reading this changes nothing. An organisation is only made when you press Create & continue.
What you will be able to do
- Start it Make an organisation and your first journey.
- Make it yours Your name, your logo, your colours.
- Ask people in Invite people and choose what they may do.
- Give it an address Your own web address for your pages.
Get this ready first
- Be logged in You need to be logged in. That is all.
- Pick a name Think of a name. Find a picture for a logo if you have one.
- Have the emails ready Write down who you want to ask in.
Do it together, one step at a time
Ten steps. Steps 1 to 5 make the organisation. Steps 6 to 10 fill it in.
Press New
An organisation starts with your first journey.
- Log in. On the left you see your journeys.
- At the bottom of that list, press New.
- A window called New journey asks how to start: Simple Space or Journey Store.
- Choose Simple Space : a shared place with files, video calls, events and one timeline.
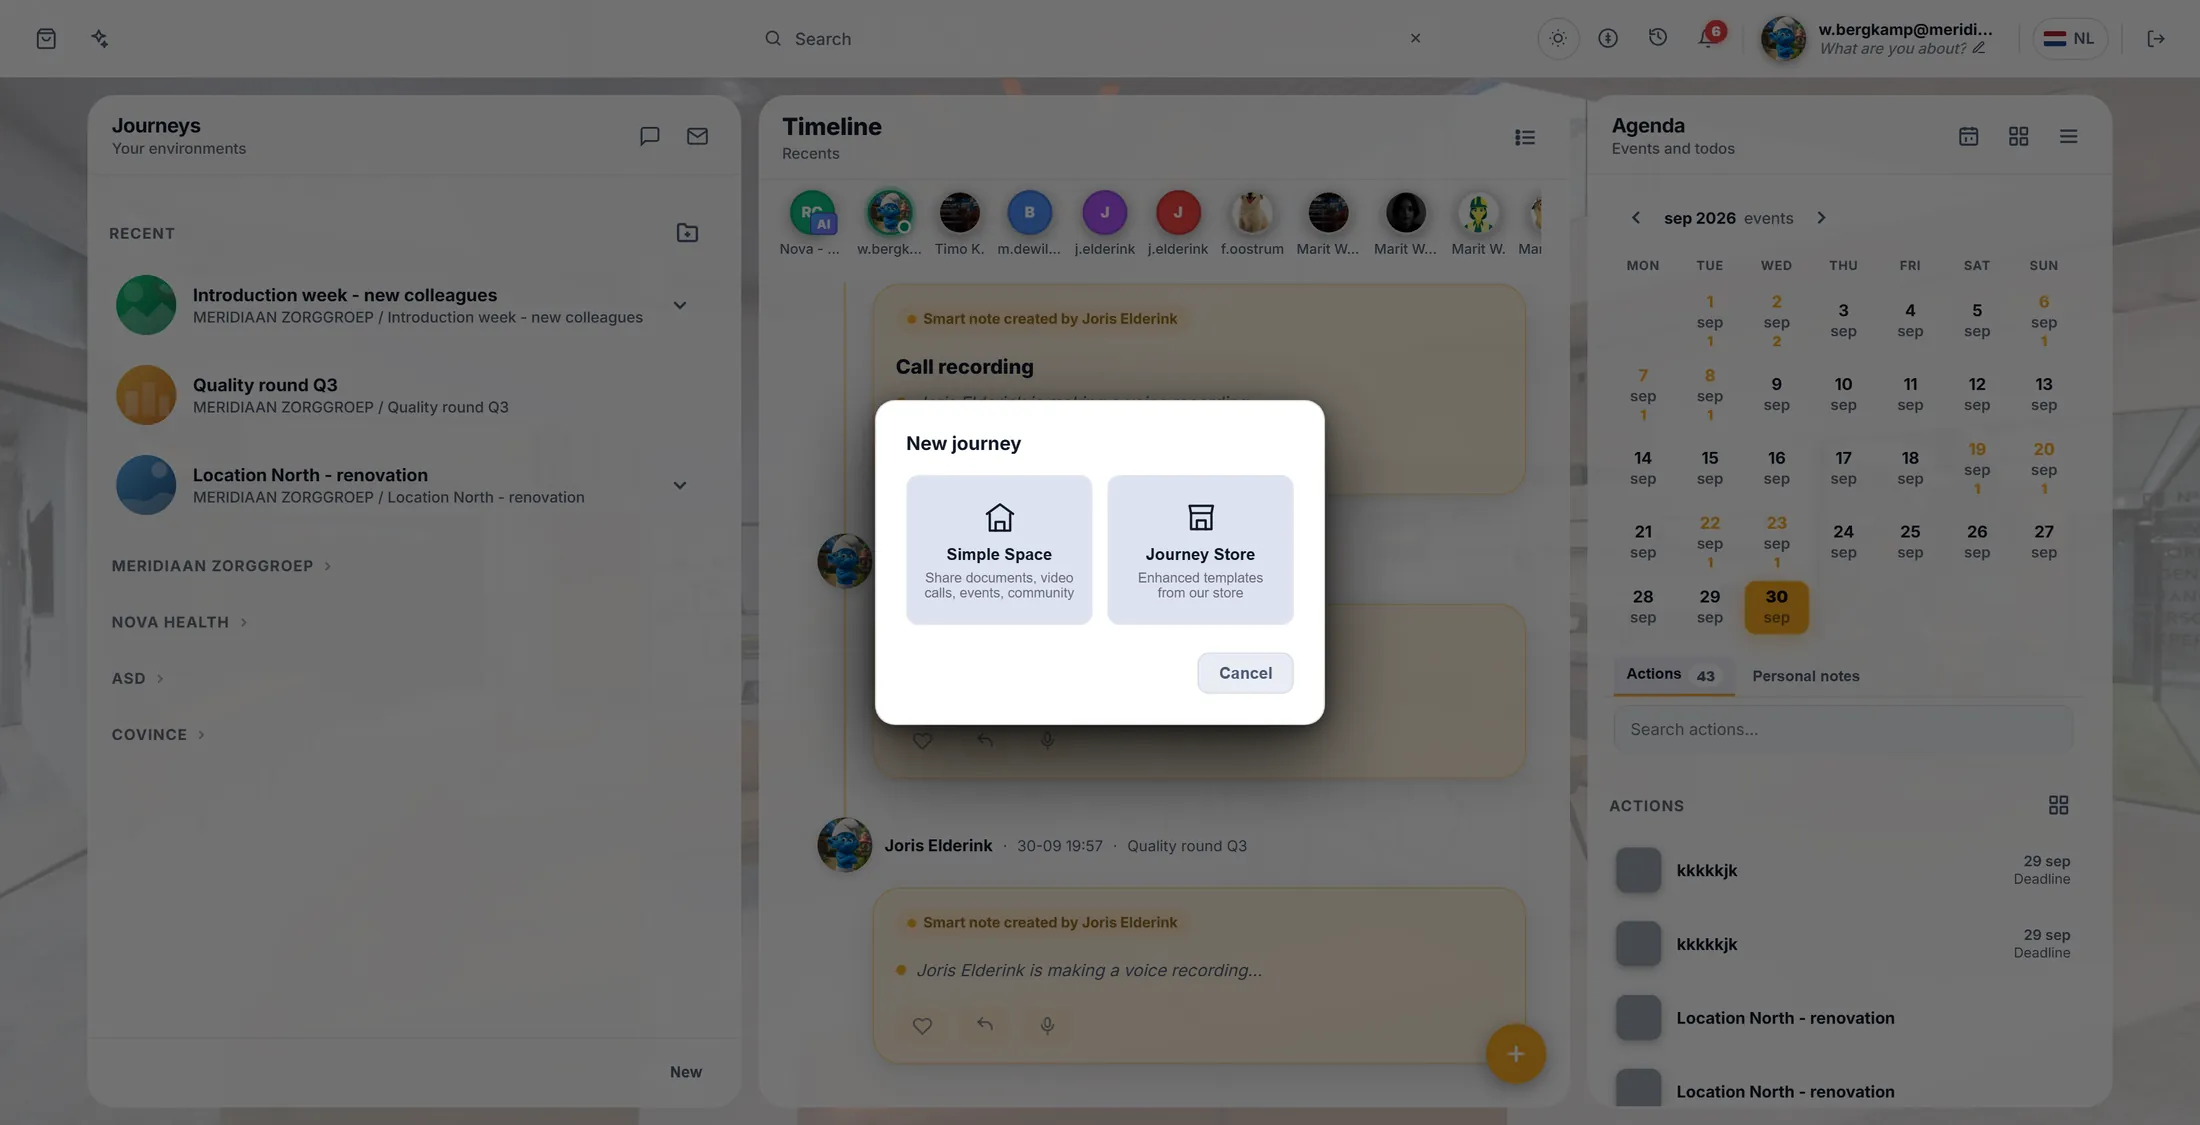
Simple Space is the place to start. Name your first journey
Type a name. You can change it later.
- Read the two lines under Simple Space : they say what you are about to make.
- Type a name in the box under Space name , for example Welcome at Meridiaan .
- Press Next.
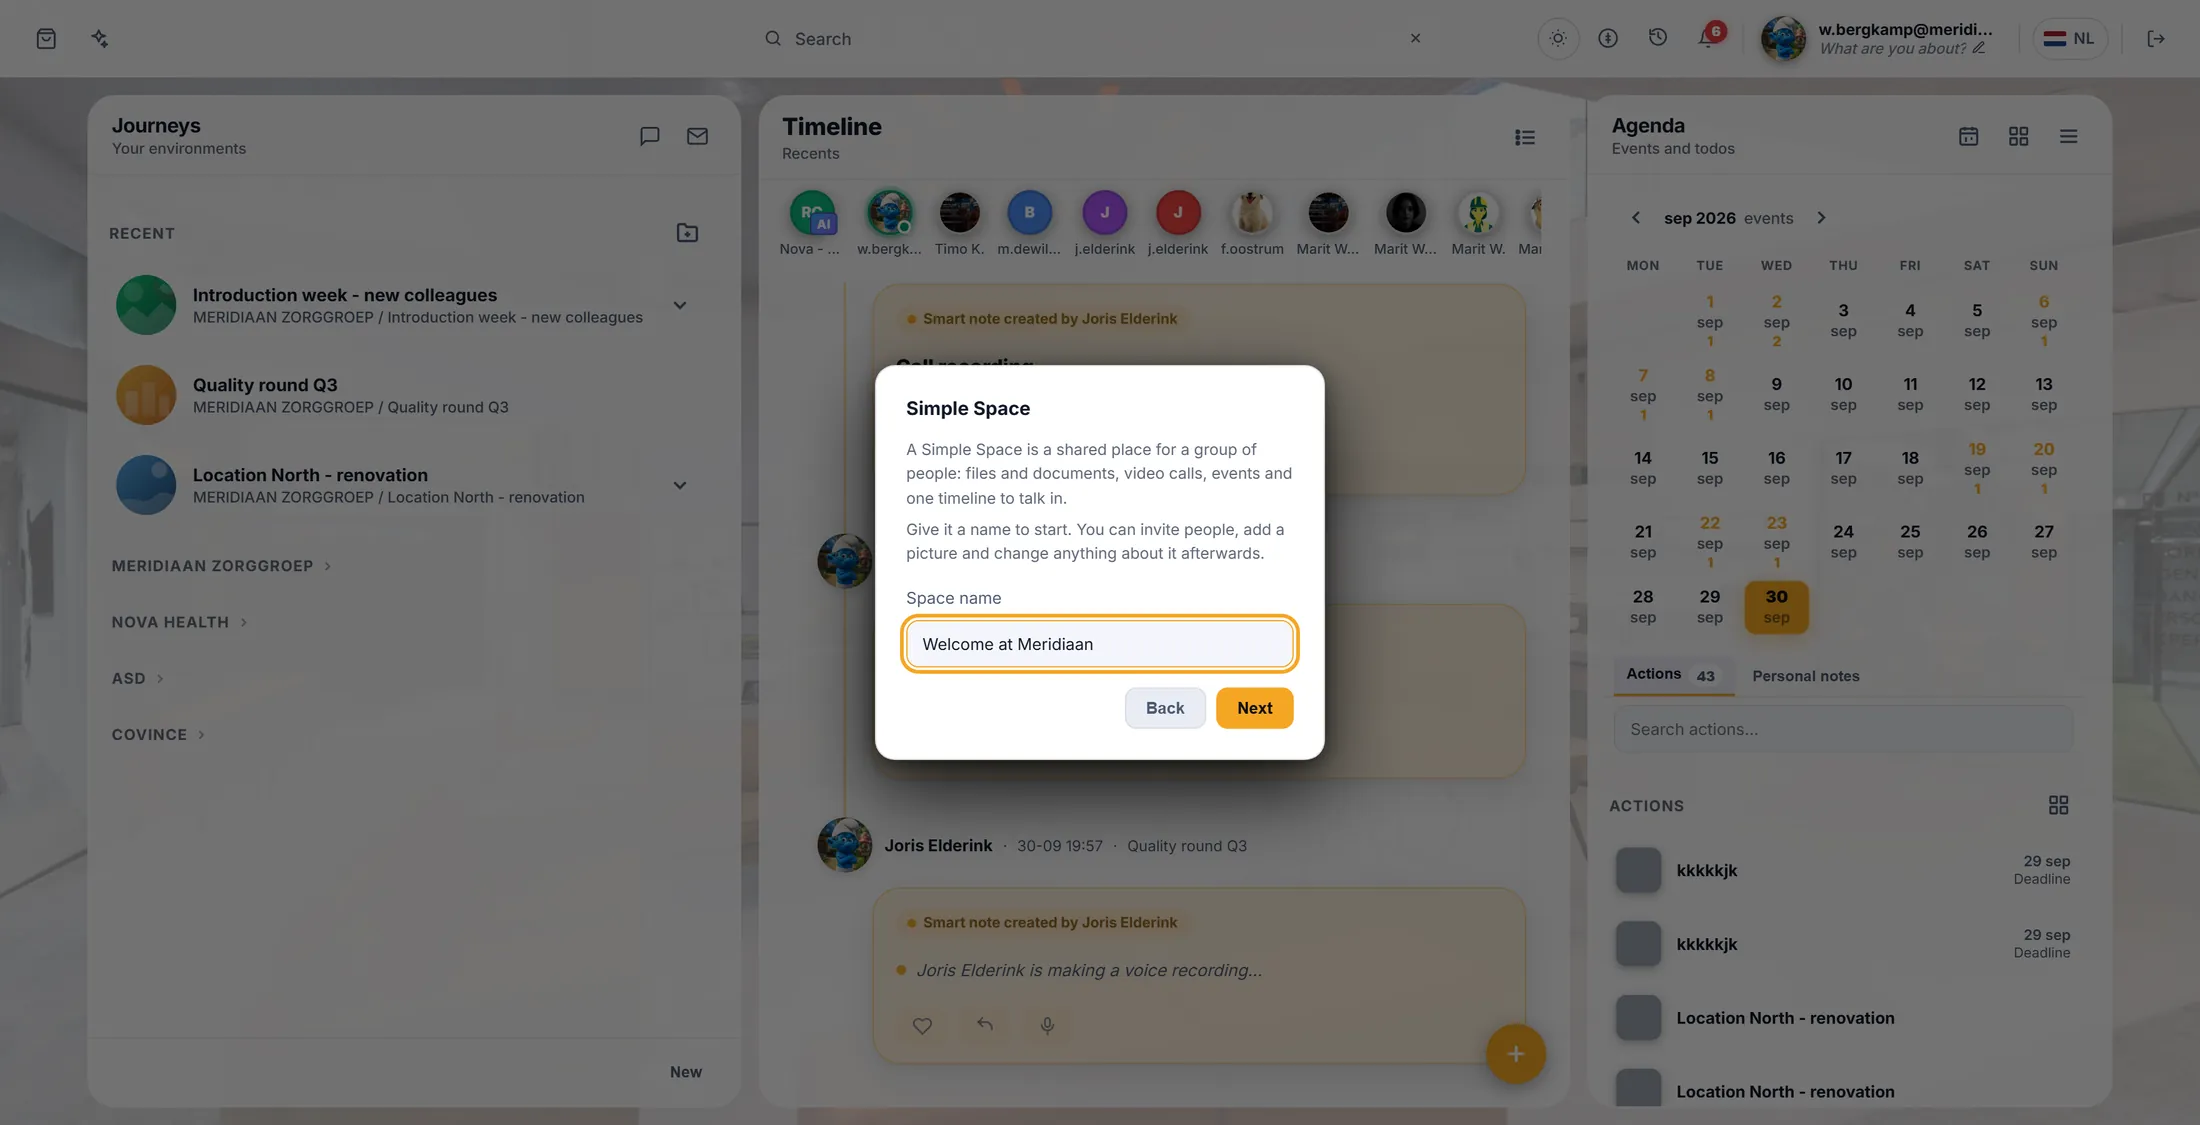
A name, then Next. Choose a picture
The next screen wants a picture before it lets you go on.
- You see three words at the top: Upload, Create with AI and Choose from media library.
- Press Upload and then Choose file to use a picture from your computer (JPG, PNG or GIF, up to 10 MB).
- Or press Create with AI to have one drawn, or Choose from media library to take one that is already in CoVince.
- When a picture is chosen, it shows large at the top and a wide Next button appears at the bottom. Press it.
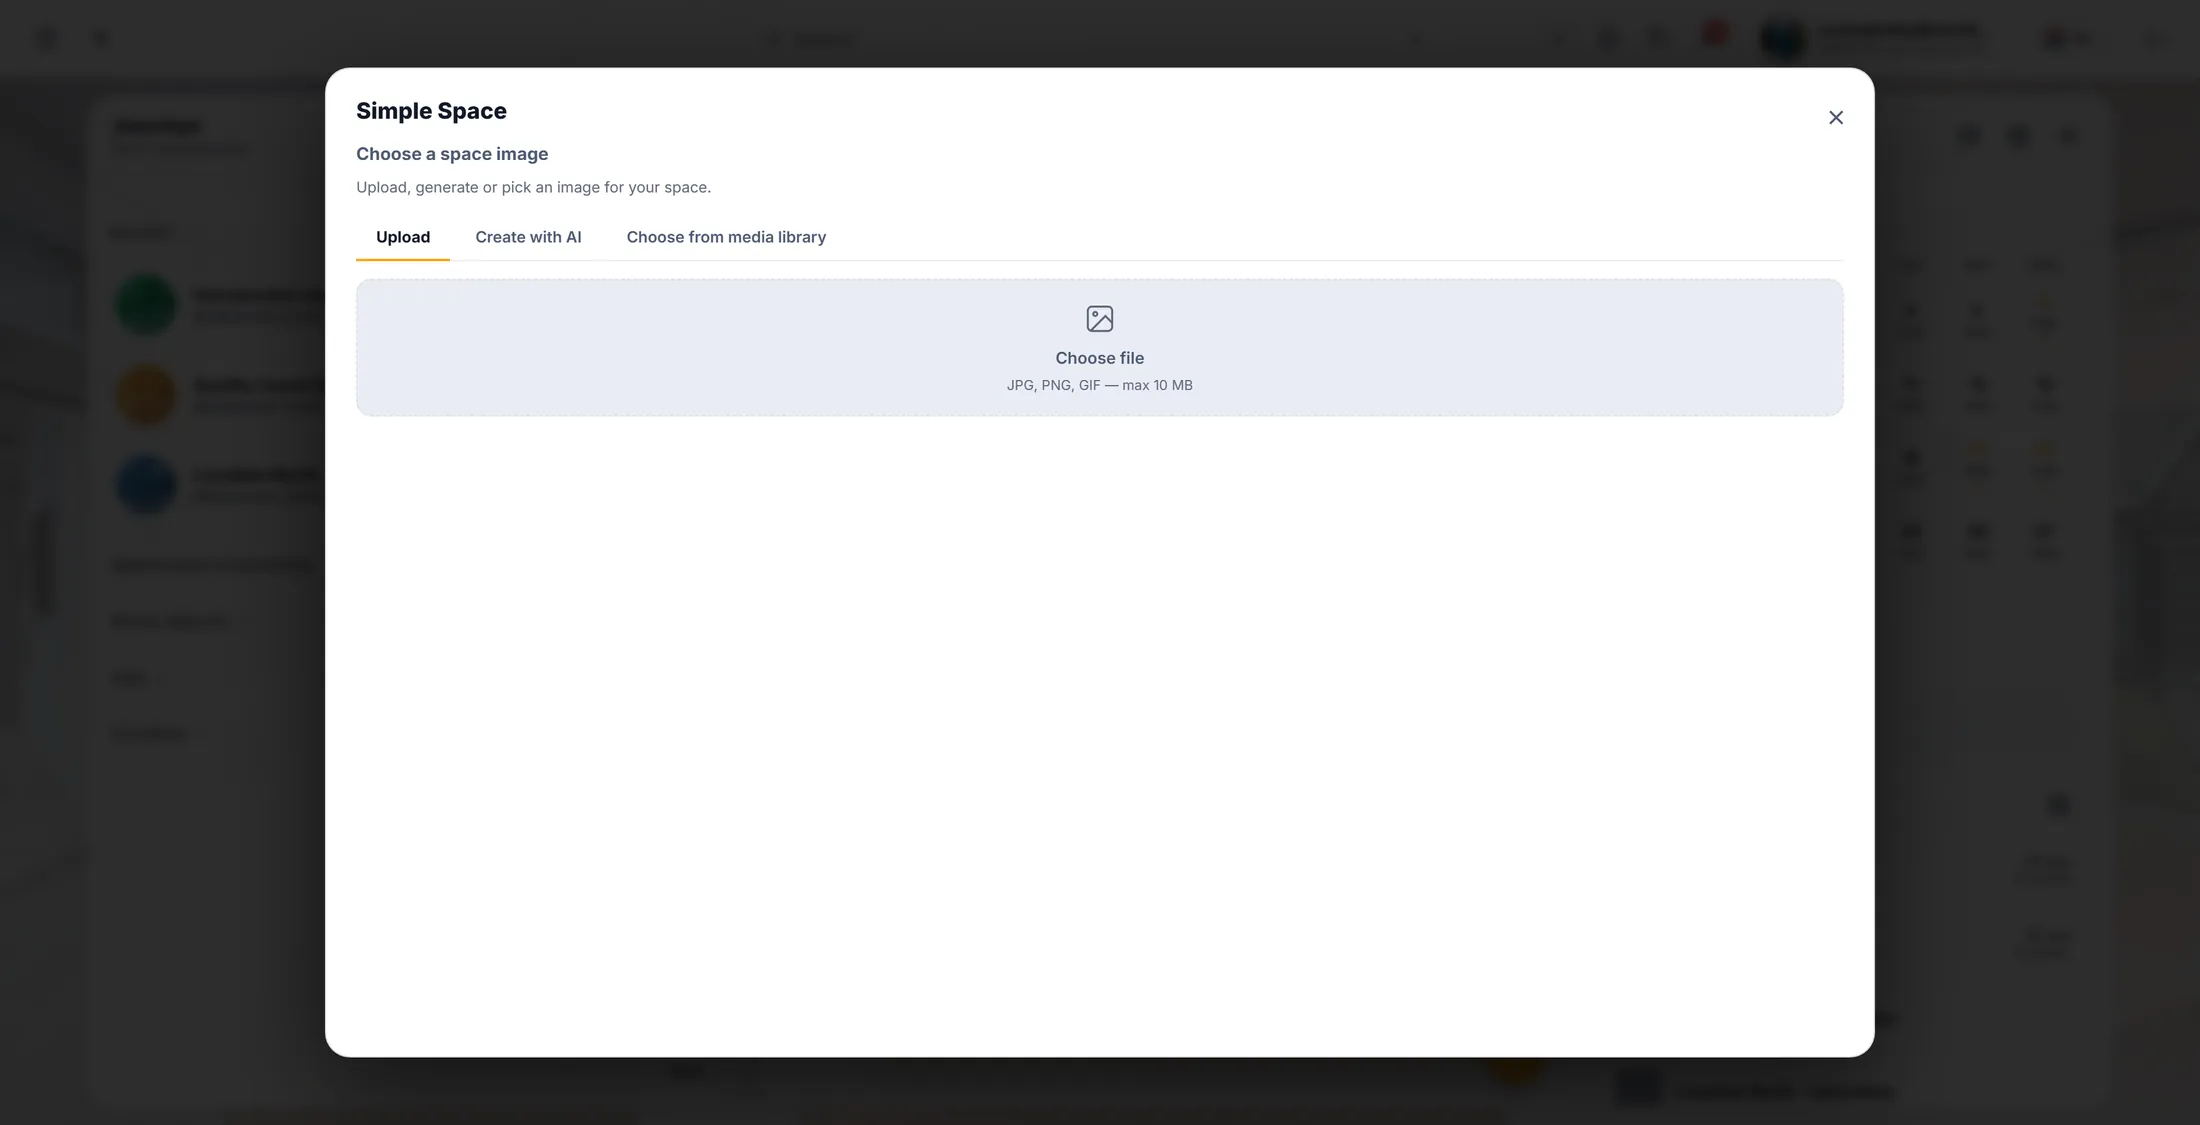
Upload, make one, or pick one. Then Next. Choose or make an organisation
Every journey belongs to an organisation. Make a new one for yours.
- The window now says Select organisation and explains why: every journey belongs to the community around it - your team, your club or your company.
- If you already belong to organisations, they are listed. Press one to make the journey inside it.
- To start your own, press Create a new organisation.
- A first-time user sees no list at all, and goes straight to the next step.
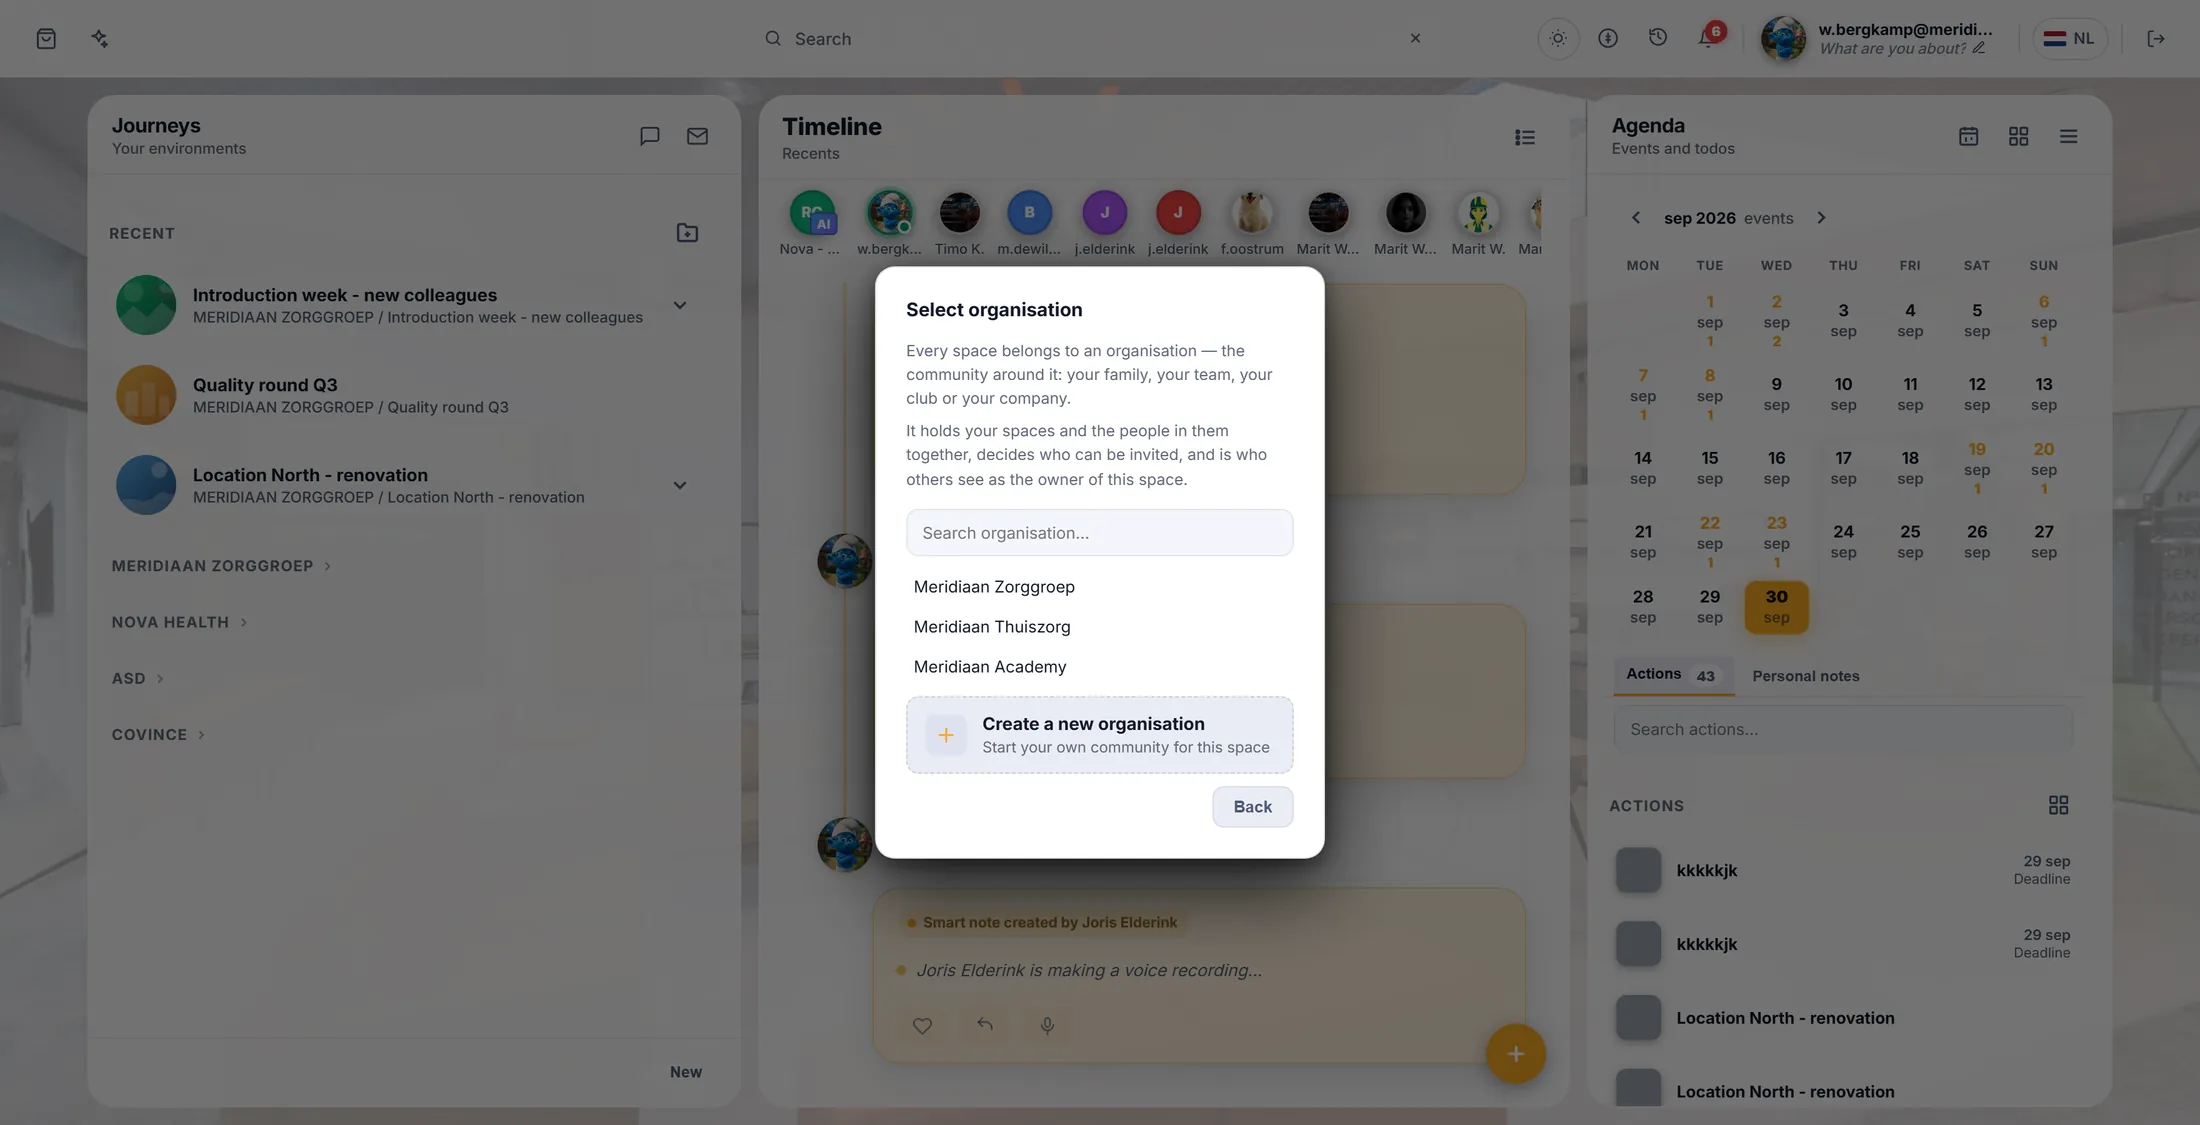
Pick one from the list, or make a new one. Name your organisation
Give it a name and a logo. Then it is made.
- Type the name under Organisation name , for example Meridiaan Zorggroep .
- Under Organisation logo press Choose a picture to add a logo. It works like the picture step before. You can skip it.
- Press Create & continue.
- A progress window counts the steps - the organisation first, then the journey - and opens your new journey.
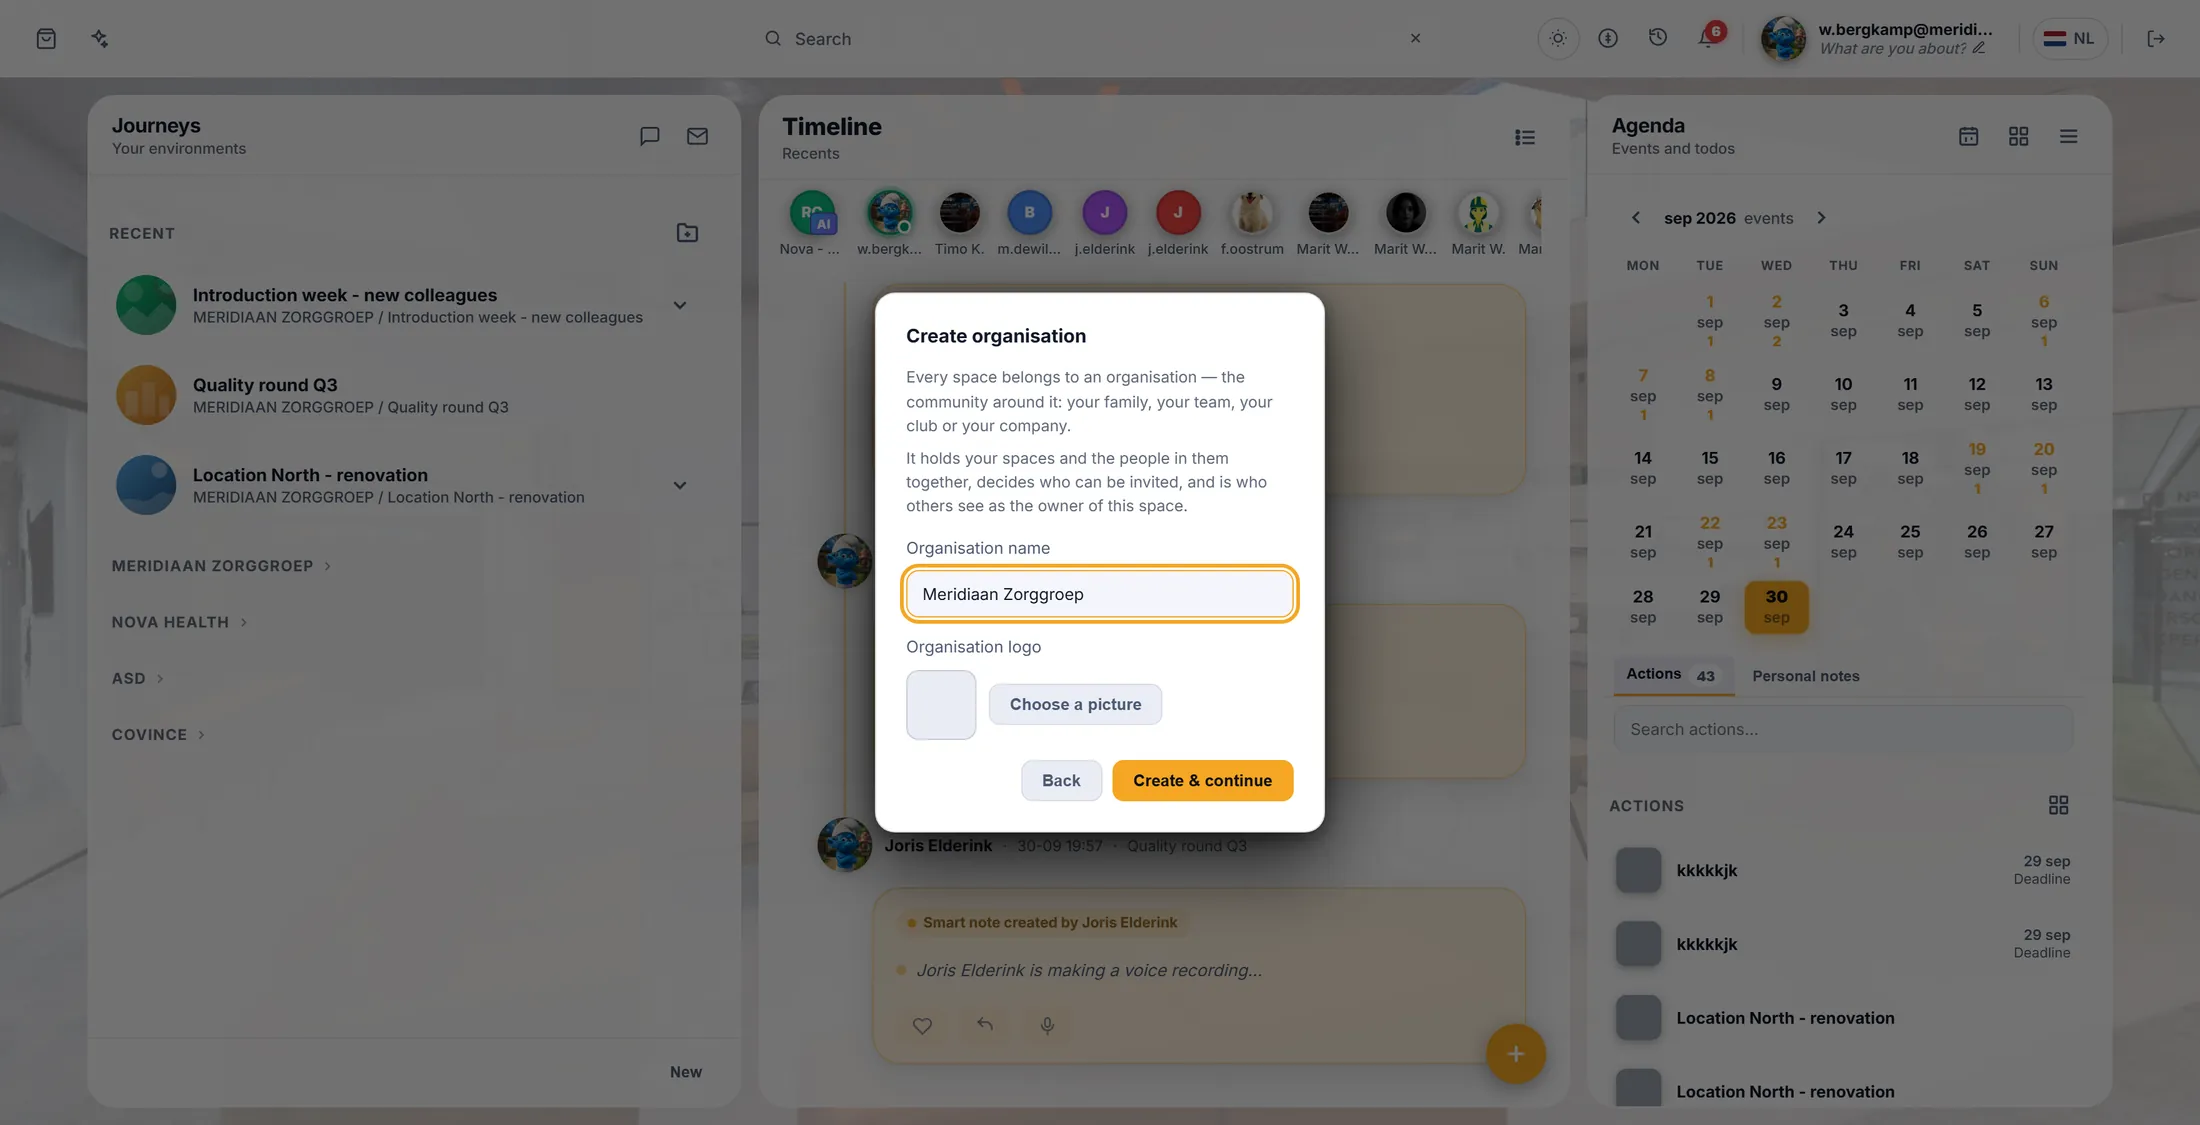
Name, logo, then Create & continue. Fill in Organisation info
This is where your organisation gets its face.
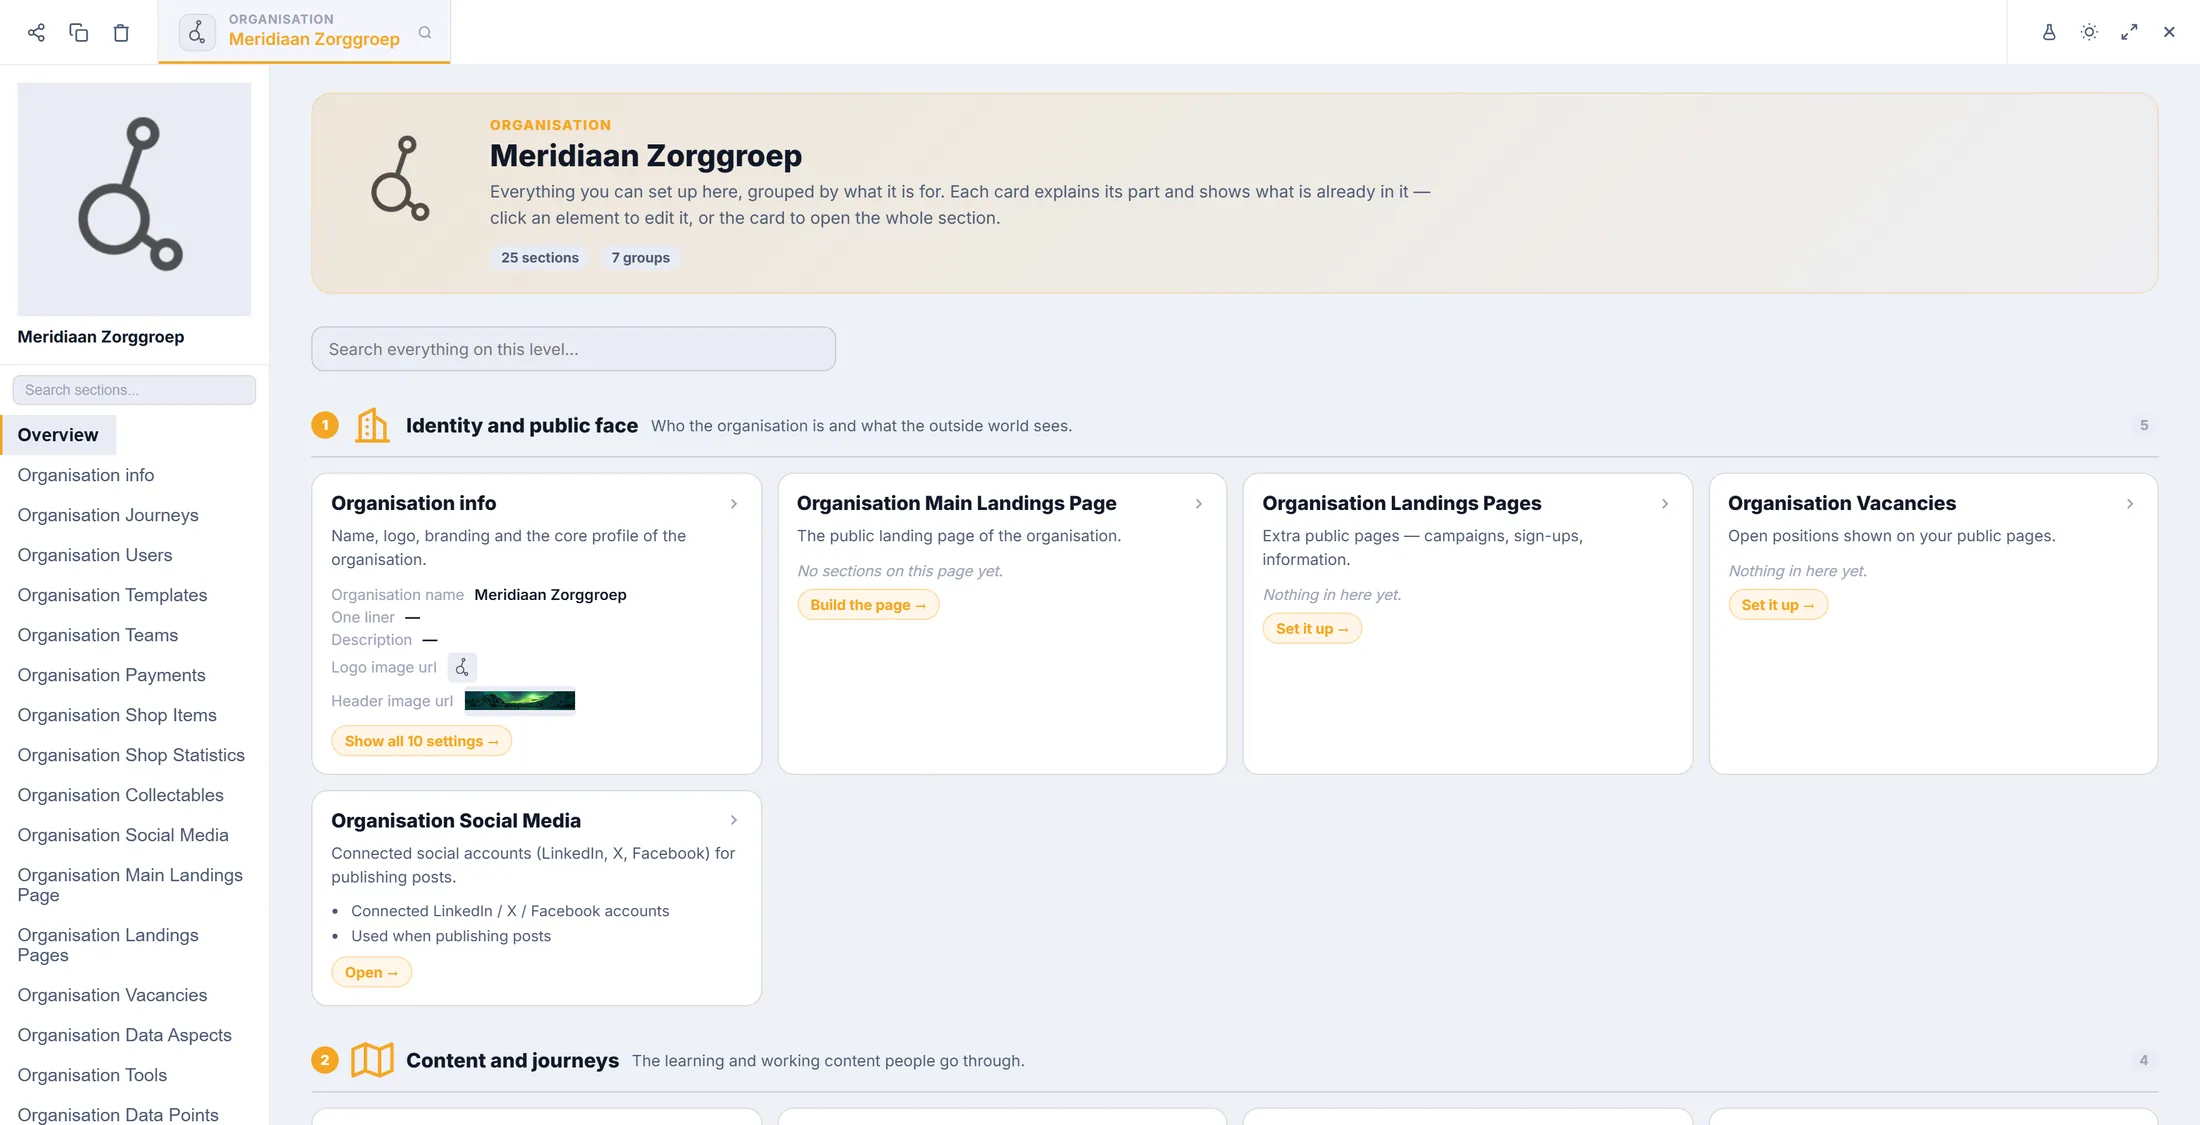
- Open the Editor and choose your organisation. The first screen is an overview with one card per section.
- In the list on the left, click Organisation info .
- Fill in Organisation name , One liner (one short line about you) and Description .
- Change the logo under Logo (250x250) and the wide picture under Header image (2048x350) . Press a picture to replace it.
- Press Save at the top right.
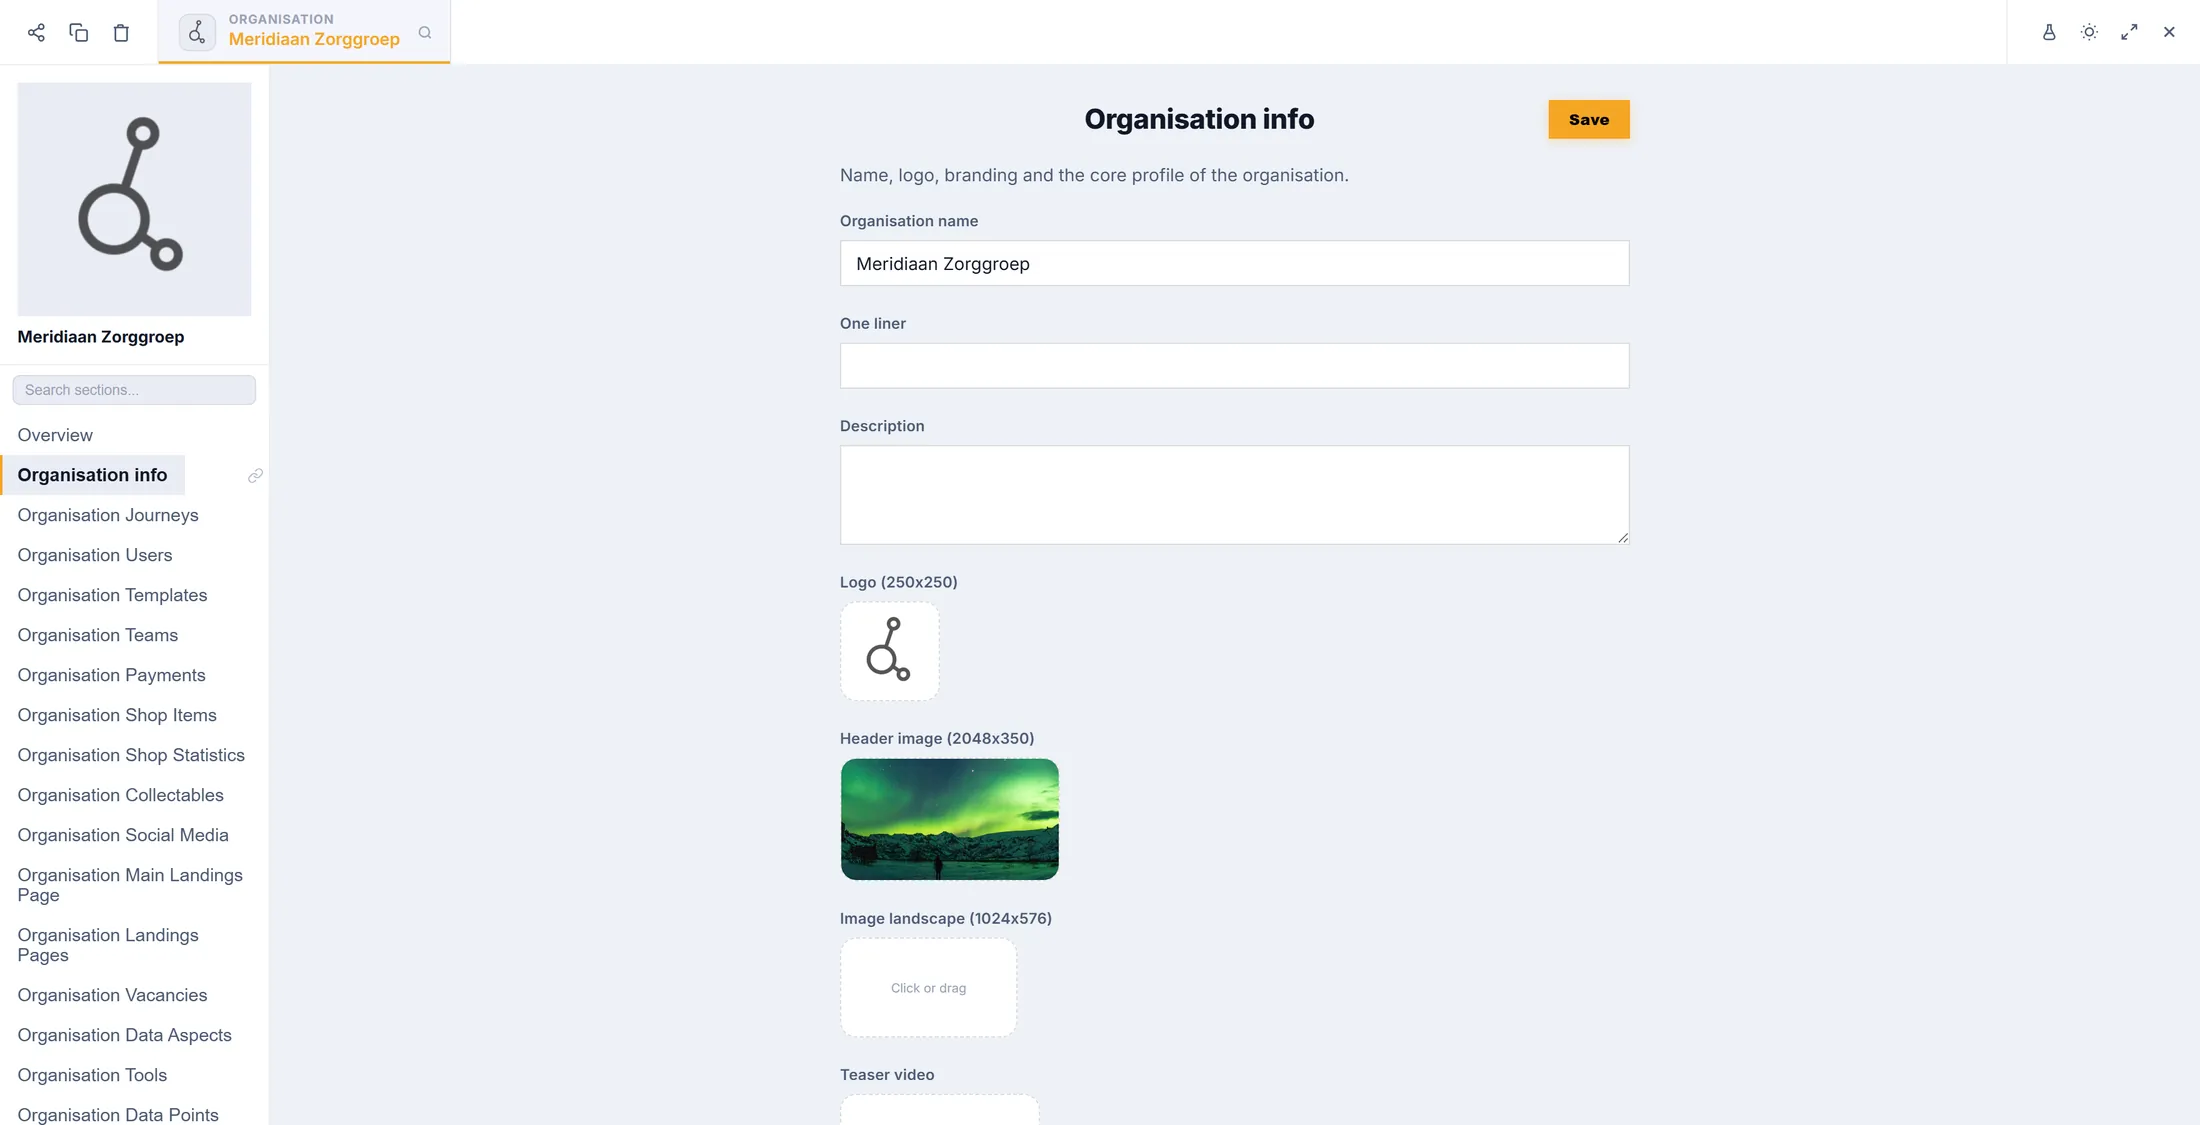
Name, logo, picture. Then Save. Choose your colours
Pick colours for your pages and see them at once.
- In the list on the left, click Organisation Data Aspects .
- Find Styling wizard and press Open styling wizard.
- The wizard has seven small steps, shown as dots. The first one is Achtergrond & tekst (background and text).
- For each colour, press the small square to pick a colour, or type a code such as #f5a623 : Achtergrond (background), Titels (titles), Teksten (text), Gedempte tekst (muted text), Links and Link hover .
- Watch the preview on the right change. Press Next for the next group and go on until the last step.
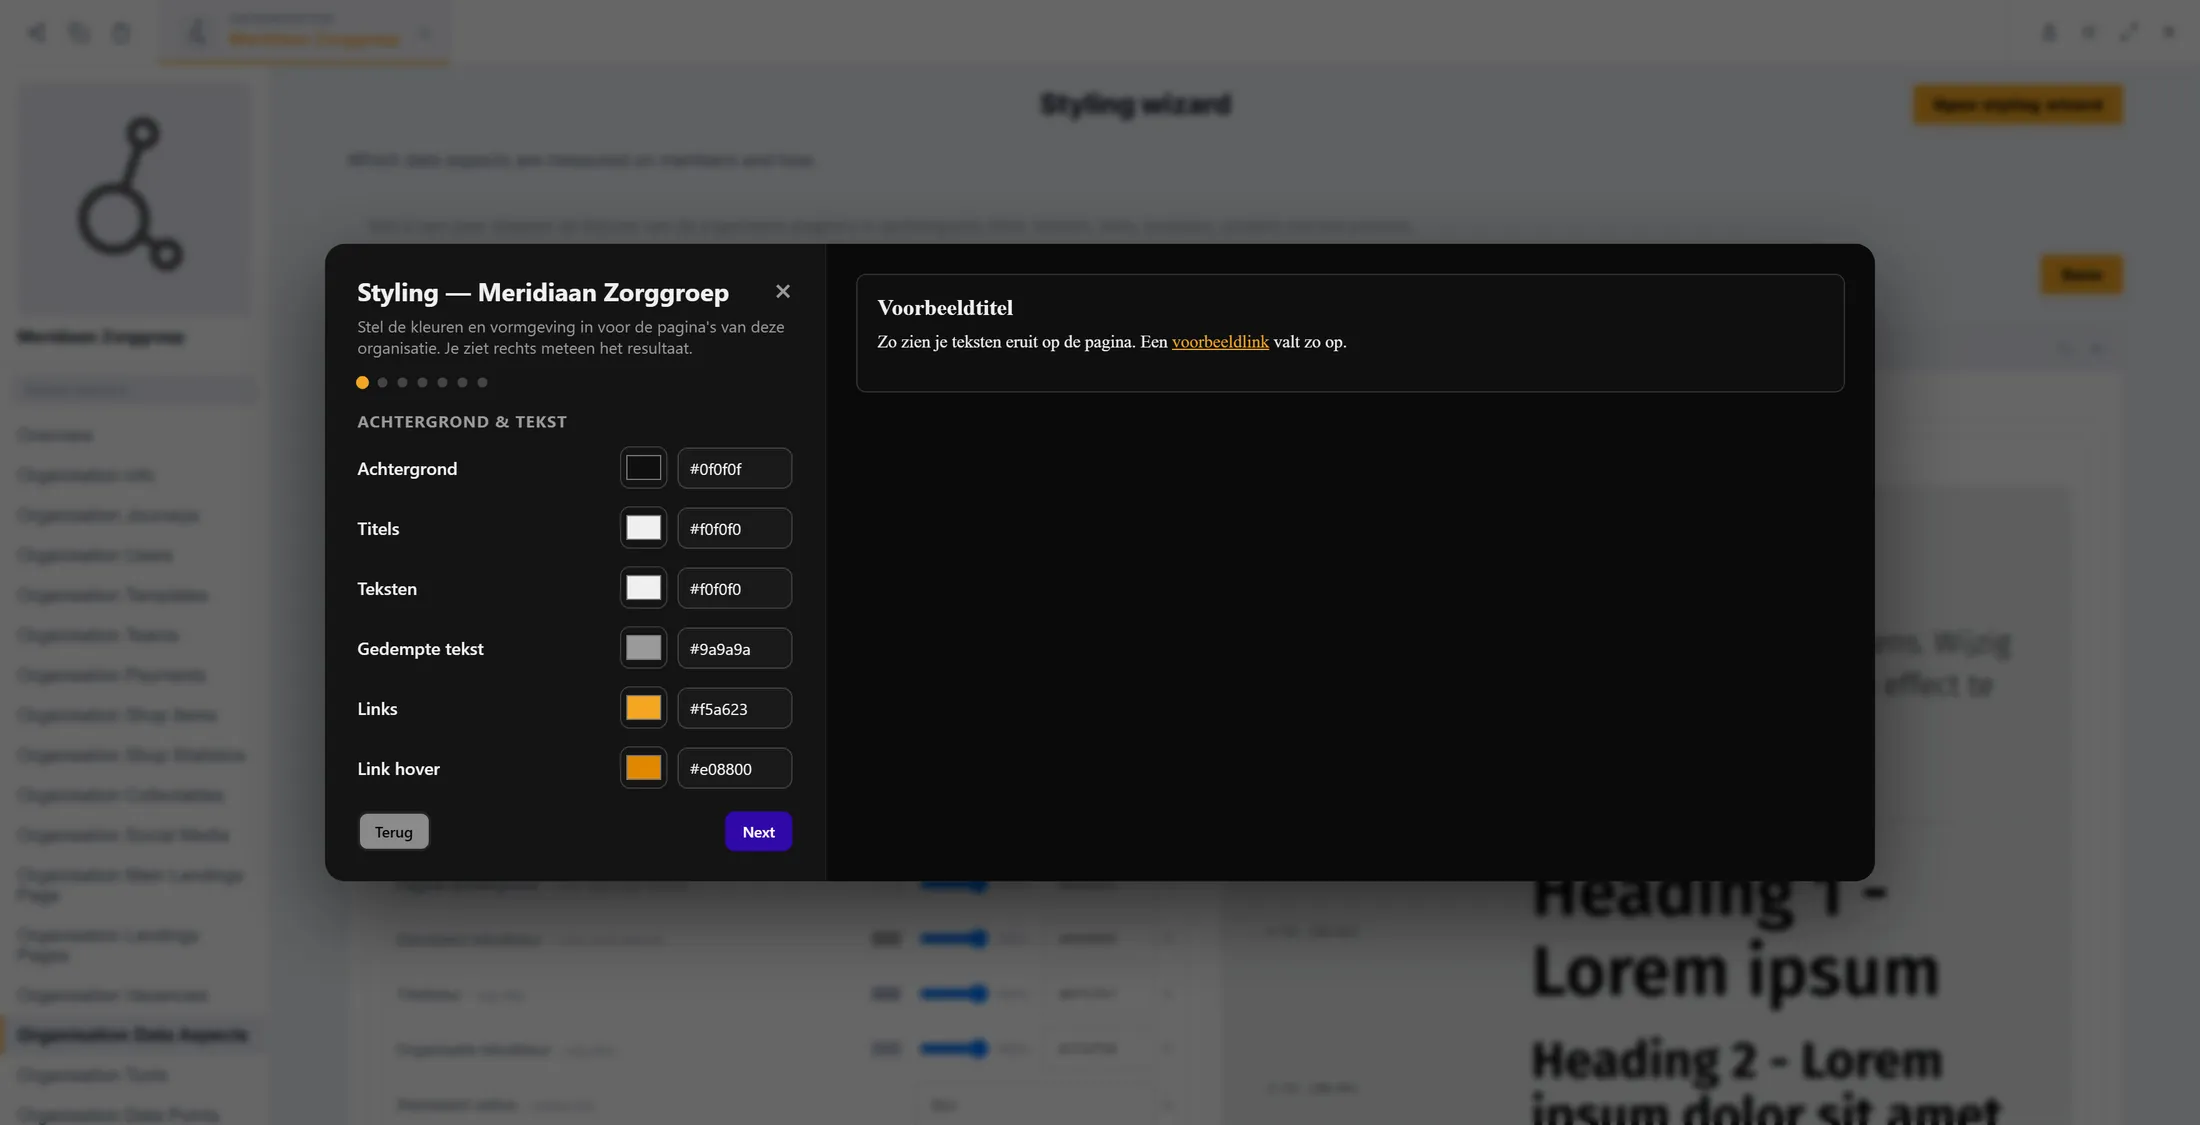
Colours on the left, the result on the right. Ask people in
Invite the people who work with you and choose what each may do.
- In the list on the left, click Organisation Users . You are already in the list, as Organisation admin .
- In the wide box at the top, type one or more email addresses, separated by a semicolon.
- In the box next to it, choose the role: for example User (all organisation-live journeys) . The roles are explained on the left: Organisation admin, Content admin, User manager, Preview user and Restricted user.
- Press Invite. To change someone later, press Edit on their row.
- Want people in groups? Open Organisation Teams , press Add and give the team a name.
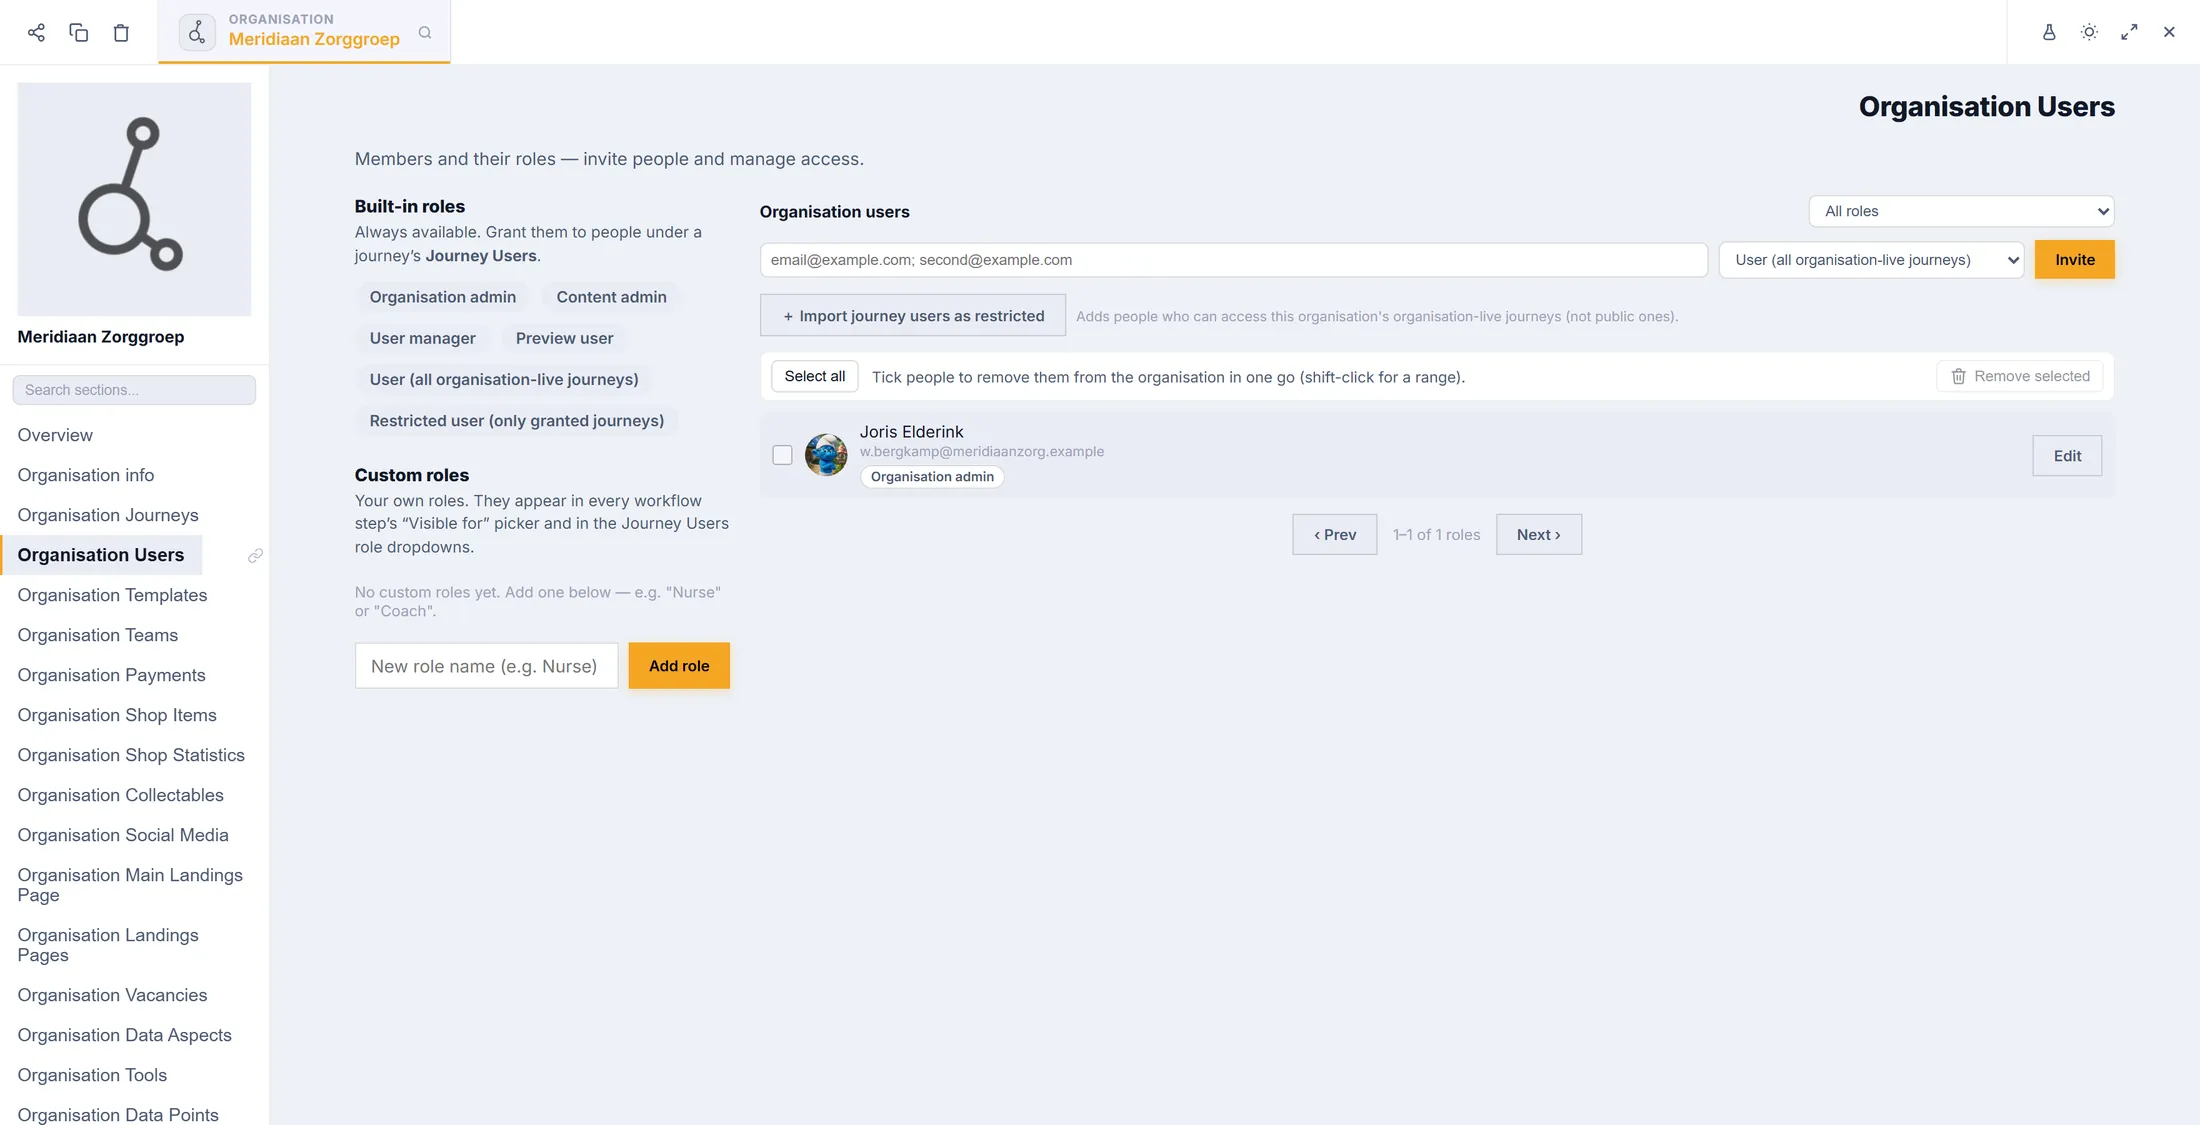
Emails, a role, then Invite. Give it a web address
Your pages already have an address. You can add your own.
- In the list on the left, click Organisation Landings Pages , then press Domains & SEO at the top.
- The first line, Address on this platform , works at once: nothing to arrange, no DNS, no certificate.
- For your own domain, type the hostname in the box Own domains (one per line) , for example acme.com , and press Save. That claims it for your organisation.
- Then follow the list above the box: create the records it shows at your DNS provider, wait for them to spread, and press Check now on the domain.
- When the records are seen, the domain goes Live and gets a free certificate by itself.
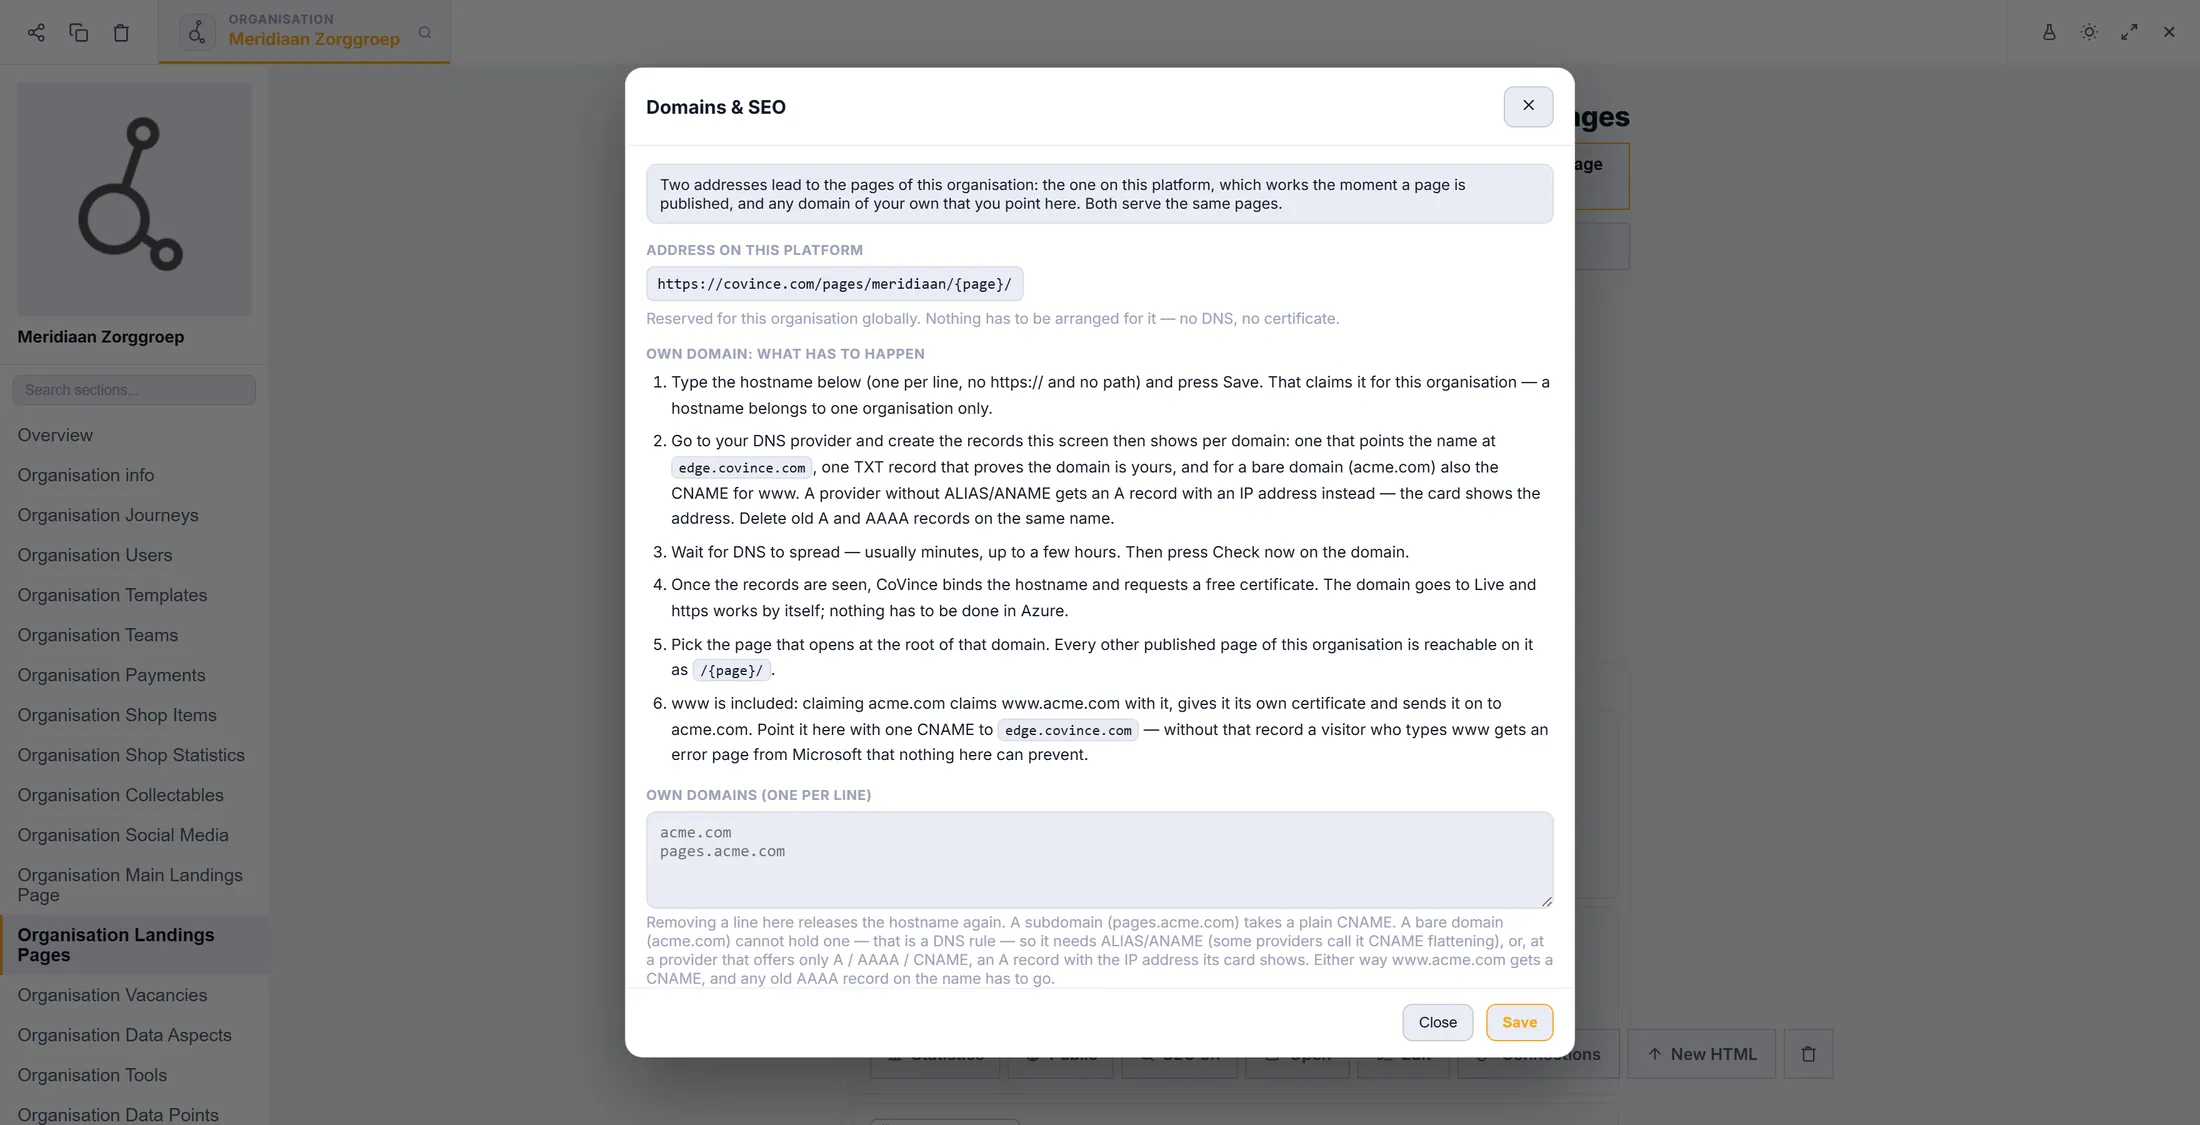
Your CoVince address, and a box for your own. Money, and what to do next
All money things are in one place. Then you are set up.
- In the list on the left, click Organisation Payments .
- Four words at the top lead to four screens: Sales & statistics, Shop items, Subscriptions, invoices & payouts and Organisation credits.
- The subscription of the organisation and its invoices are under Subscriptions, invoices & payouts ; the credits balance is under Organisation credits .
- A new organisation has nothing sold yet, so the numbers show 0. That is right.
- You are set up. Go on with the explainers under Where to go next.
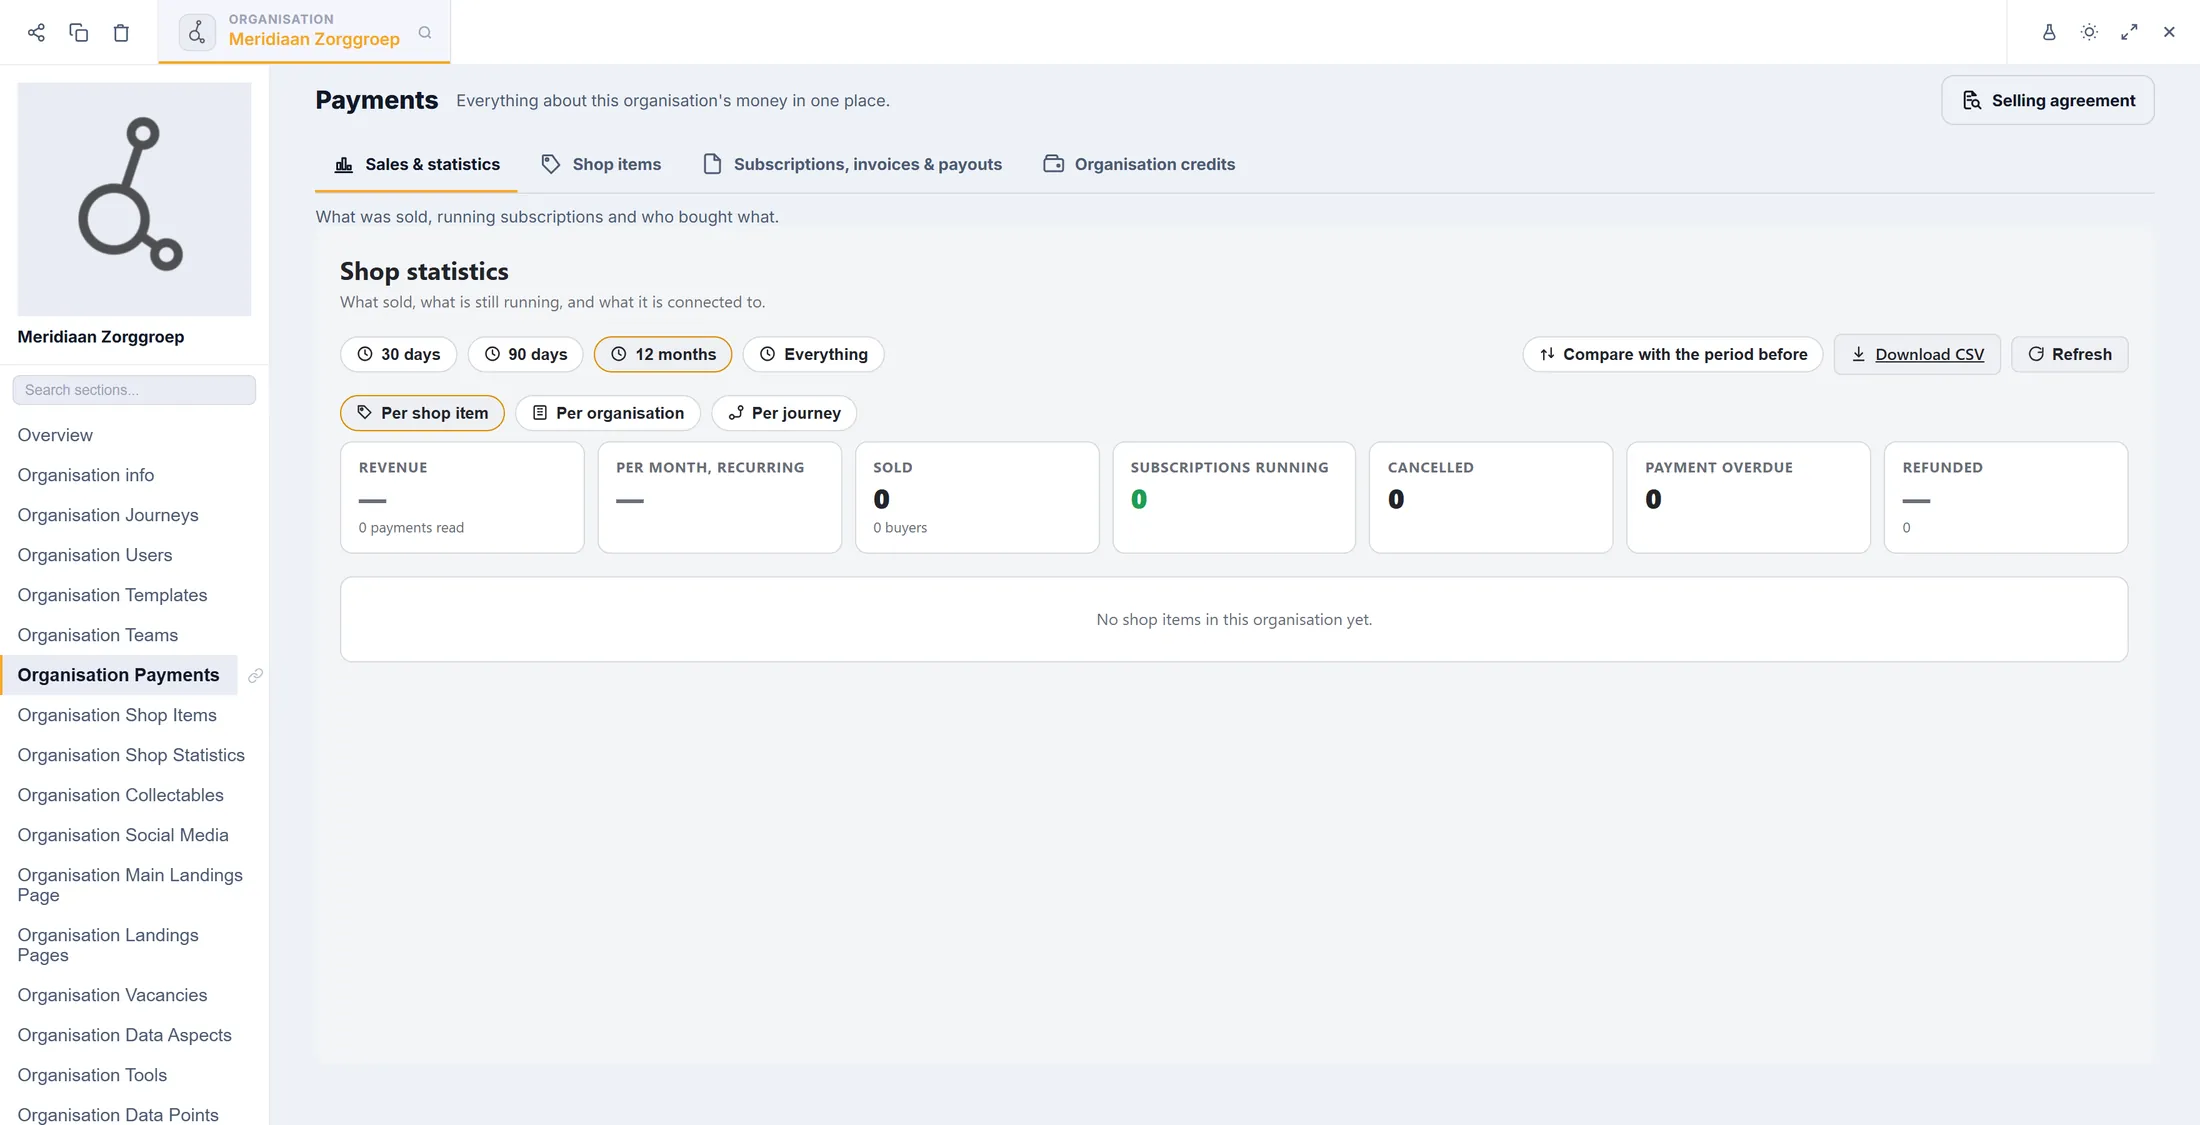
All money things in one place.
If something is not right
I do not see Select organisation.
That is fine. You have no organisation yet, so it goes straight to making one.
There is no Next button.
Choose a picture first. Upload one, or pick one from the media library. Then Next shows.
I do not see the Editor sections.
Only admins see them. Ask the person who looks after CoVince where you work.
My domain does not work yet.
It can take a few hours. Press Check now on the domain later.
The words, in plain language
- organisation
- The community around your journeys: your team, club or company. It holds your journeys and your people.
- journey
- A shared place where a group works together: files, video calls, events and one timeline.
- admin
- A person who may set up the organisation: its info, its people and its address.
- DNS
- The address book of the internet. It says which computer answers for your domain name.
- domain
- A web address of your own, such as acme.com.
Where to go next
- Add a page to your website menu Build the pages of your website and put them in the menu.
- Add people Bring people into a journey.
- Sell trainings Put a training in your shop and get paid.
- All explainers The other things you can learn here.